Boston Cream Poke Cake- Easy Delicious Dessert
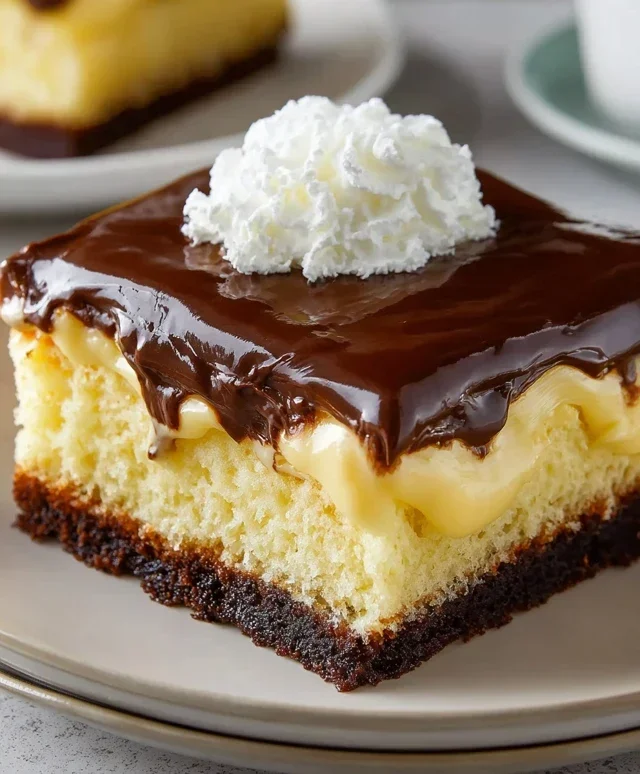
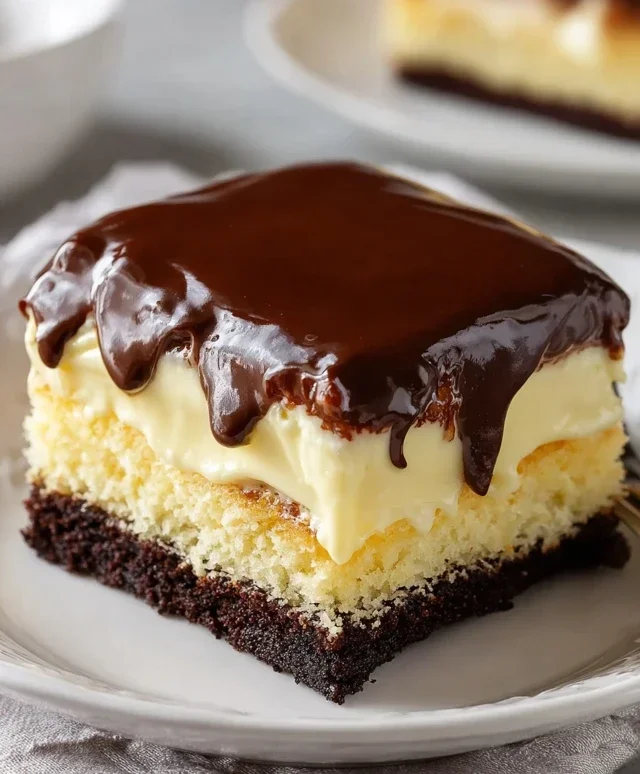
Boston Cream Poke Cake is a dessert that truly lives up to its name, delivering a decadent punch of flavor and an irresistibly moist texture. If you’ve ever swooned over the classic Boston Cream Pie, prepare to be utterly delighted by this cake version. It takes all the beloved elements – the creamy custard filling, the rich chocolate glaze, and the tender vanilla cake – and transforms them into an easy-to-make masterpiece. What makes this Boston Cream Poke Cake so special is its ingenious construction. By poking holes throughout the warm cake and then flooding it with a luscious pudding mixture, we ensure every single bite is infused with that signature creaminess. It’s the ultimate crowd-pleaser, a guaranteed hit at any gathering, and a personal favorite when I crave something truly comforting and satisfying.
Why You’ll Adore This Recipe:
This isn’t just any cake; it’s an experience!
Boston Cream Poke Cake: A Dreamy Dessert Delight
There’s something incredibly satisfying about a dessert that looks fancy but is surprisingly easy to whip up. That’s exactly what this Boston Cream Poke Cake delivers! It’s a moist, tender yellow cake, infused with a creamy vanilla pudding, and crowned with a luscious chocolate glaze. It’s the perfect showstopper for potlucks, birthdays, or just when you’re craving a little something sweet. The beauty of a poke cake is its forgiving nature, making it an ideal recipe for bakers of all skill levels. Let’s get started on creating this delightful treat!
Ingredients:
Preparing the Cake Base
The foundation of our delicious poke cake is a simple yellow cake. You’ll prepare it according to the instructions on your 15.25 ounce box of yellow cake mix. This usually involves combining the cake mix with eggs, oil, and water. I find that using room temperature ingredients helps everything combine more smoothly and results in a more evenly baked cake. Whisk or beat these together until well combined and smooth, being careful not to overmix, which can lead to a tough cake.
Once your batter is ready, pour it into a greased and floured 9×13 inch baking pan. Bake the cake in a preheated oven, following the time and temperature recommendations on your cake mix box. It’s important to bake it until a toothpick inserted into the center comes out clean, indicating that it’s fully cooked through. Allow the cake to cool in the pan for about 10-15 minutes before inverting it onto a wire rack to cool completely. Don’t rush this cooling step, as a warm cake can be more fragile and harder to work with.
Creating the Pudding Infusion
While the cake is cooling, let’s get our creamy pudding mixture ready. In a medium-sized bowl, whisk together the two 3.4 ounce boxes of instant vanilla or French vanilla pudding with 4 cups of milk. It’s crucial to use instant pudding here, as it sets up quickly without any cooking required. Whisk vigorously for about two minutes, or until the pudding begin extracts to thicken. Some people prefer using cold milk for a faster set, while others find slightly chilled milk works just as well. Once the pudding is thickened, cover it with plastic wrap, pressing the wrap directly onto the surface of the pudding to prevent a skin from forming. Let it sit at room temperature for about 5-10 minutes to allow it to fully set up.
The Poke Process
Now for the fun part – the “poking”! Once your cake is completely cool, it’s time to create the channels for our creamy pudding. Using the handle of a wooden spoon or a skewer, poke holes all over the surface of the cake. You want to make these holes relatively close together, ensuring that the pudding can seep down into the cake. Don’t be afraid to be generous with your poking! The more holes you make, the more pudding will saturate the cake, leading to an incredibly moist and flavorful dessert. Aim for holes that go about halfway to two-thirds of the way down the cake.
Filling with Creamy Goodness
After you’ve poked your cake to your heart’s content, it’s time to pour that luscious pudding mixture over the top. Gently spread the thickened pudding evenly over the entire surface of the poked cake. Use an offset spatula or the back of a spoon to coax the pudding into all those little holes you created. This step is where the magic really starts to happen, as the pudding will slowly seep into the cake, creating a wonderfully creamy texture.
The Chocolatey Crown
The final touch to our Boston Cream Poke Cake is the rich chocolate frosting. You can gently warm the 16 ounce tub of chocolate frosting in the microwave for about 15-30 seconds, just until it’s pourable and spreadable. This makes it much easier to get a smooth, even coating. Pour the warmed frosting over the pudding-covered cake and spread it out to the edges. You can use an offset spatula for a professional finish, or simply let it drip down the sides for a more rustic, homemade look.
Chill and Serve
For the best results, cover the cake loosely with plastic wrap and refrigerate it for at least 2-3 hours, or ideally, overnight. This chilling time allows the pudding to fully set and the flavors to meld together. The longer it chills, the more infused the cake will become. When you’re ready to serve, cut into squares and enjoy this incredibly delicious and surprisingly simple dessert. The combination of tender cake, smooth pudding, and rich chocolate is simply irresistible!
Conclusion:
I hope you’re as excited about making this Boston Cream Poke Cake as I am about sharing it! This recipe is truly a winner because it takes all the beloved flavors of a classic Boston Cream Pie – that rich, creamy custard and decadent chocolate ganache – and makes it incredibly accessible and fun to create. The poke cake method ensures every bite is infused with flavor, making it moist and utterly delightful. It’s the perfect dessert for potlucks, birthdays, or just because you deserve something special.
For serving, this cake shines on its own, but a dollop of fresh whipped cream or a dusting of cocoa powder can elevate it further. Imagin extracte serving slices of this delightful treat at your next gathering; I guarantee it will be a crowd-pleaser!
Don’t be afraid to get creative with variations! You could experiment with different cake flavors like chocolate or even yellow cake for a slightly different base. For the filling, consider adding a hint of coffee liqueur extract to the custard for an adult twist, or use a different type of chocolate for the ganache. The possibilities are endless! I truly encourage you to give this Boston Cream Poke Cake recipe a try. It’s surprisingly easy and the results are so rewarding. Happy baking!
Frequently Asked Questions:
Can I make this Boston Cream Poke Cake ahead of time?
Absolutely! This cake is actually best made a few hours or even a day in advance. This allows the flavors to meld beautifully and ensures the cake is perfectly moist. Just store it, covered, in the refrigerator until you’re ready to serve.
What’s the best way to store leftover cake?
Leftover Boston Cream Poke Cake should be stored in an airtight container in the refrigerator. Due to the custard filling, it needs to be kept chilled to maintain its freshness and prevent spoilage. It should stay delicious for 3-4 days.
Boston Cream Poke Cake
A delicious and easy poke cake made with yellow cake mix, instant pudding, and chocolate frosting, inspired by the classic Boston Cream Pie.
Ingredients
-
1 (15.25 ounce) box yellow cake mix
-
3 large eggs (for cake)
-
1/2 cup vegetable oil (for cake)
-
1 cup water (for cake)
-
2 (3.4 ounce) boxes instant vanilla pudding
-
4 cups milk
-
1 (16 ounce) tub chocolate frosting
Instructions
-
Step 1
Preheat oven to 350°F (175°C). Grease and flour a 9×13 inch baking pan. -
Step 2
Prepare the yellow cake mix according to package directions, using the eggs, oil, and water. -
Step 3
Bake the cake for 30-35 minutes, or until a toothpick inserted into the center comes out clean. -
Step 4
While the cake is baking, whisk together the instant vanilla pudding and milk in a medium bowl until smooth and thickened. Refrigerate until ready to use. -
Step 5
Once the cake is baked, let it cool in the pan for about 10 minutes. While still warm, poke holes all over the top of the cake using the handle of a wooden spoon or a fork. -
Step 6
Pour the prepared vanilla pudding evenly over the warm cake, allowing it to seep into the holes. -
Step 7
Refrigerate the cake for at least 2-3 hours, or until completely chilled and set. -
Step 8
Warm the chocolate frosting slightly in the microwave (about 10-15 second intervals, stirring in between) until it is spreadable. Spread the warm frosting evenly over the chilled cake. -
Step 9
Slice and serve chilled.
Important Information
Nutrition Facts (Per Serving)
It is important to consider this information as approximate and not to use it as definitive health advice.
Allergy Information
Please check ingredients for potential allergens and consult a health professional if in doubt.