Easy Easter Rice Krispie Treats – Fun & Festive!
Easter Rice Krispie Treats are more than just a simple dessert; they’re a nostalgic hug in edible form, a shimmering portal back to childhood Easters filled with pastel colors and gleeful egg hunts. There’s an undeniable magic to these treats that makes them a perennial favorite. Why do we all love them so much? It’s their perfect balance of chewy, crunchy goodness, that satisfying crackle with every bite, and the sheer simplicity of creating something so utterly delightful. What truly elevates Easter Rice Krispie Treats from the everyday is their incredible versatility. We can transform these humble ingredients into festive masterpieces, adorned with colorful sprinkles, dipped in pastel chocolate, or even shaped into adorable bunnies and eggs. They are the ultimate canvas for springtime creativity, bringin extractg smiles to faces young and old during our Easter celebrations.
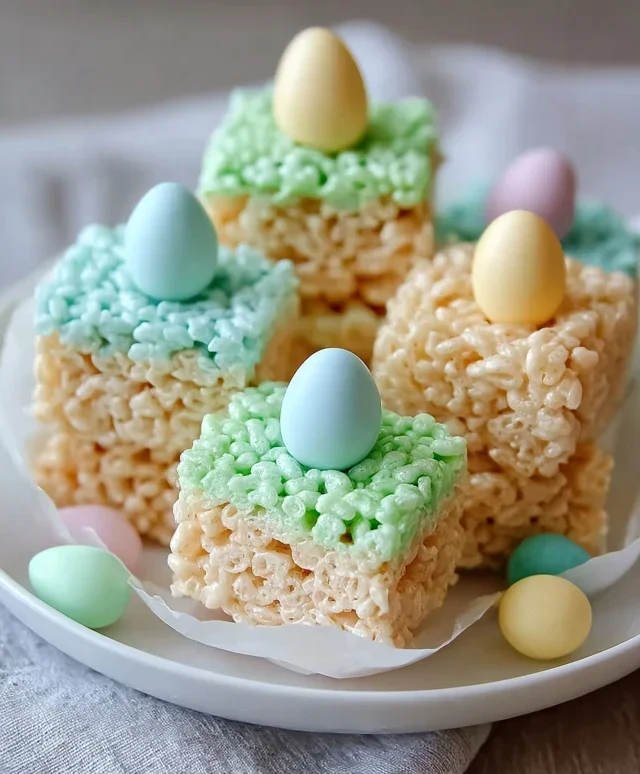
Easter Rice Krispie Treats
Easter is a time for joy, family, and of course, delicious treats! While the traditional chocolate bunnies and dyed eggs are always a hit, sometimes a simple, nostalgic sweet can steal the show. These Easter Rice Krispie Treats are just that – a fun, festive twist on a classic that’s incredibly easy to make and perfect for little hands to help with. They’re vibrant, chewy, and packed with all the fun of the season. Get ready to create a treat that will have everyone hopping with delight!
Ingredients:
Making the Magic Happen:
The beauty of Rice Krispie treats lies in their simplicity, and these Easter-themed ones are no exception. We’re going to create a base of perfectly chewy cereal treats and then elevate them with a vibrant green glaze and fun Easter candy decorations.
Step 1: Melting the Marshmallows
First things first, let’s get our marshmallow base ready. Grab a large, heavy-bottomed pot or a microwave-safe bowl. If using a pot on the stovetop, set it over low heat. Add the 2 tablespoons of unsalted butter to the pot. Allow the butter to melt completely, swirling the pot gently to coat the bottom. Once the butter is melted, add all 16 ounces of your marshmallows. It might seem like a lot, but they’ll melt down significantly. Stir the marshmallows constantly over the low heat, or microwave them in 30-second intervals, stirring in between, until they are completely smooth and melted. Be patient here; using low heat prevents the marshmallows from scorching or becoming tough. The goal is a glossy, smooth, and uniform melted marshmallow mixture.
Step 2: Combining with Cereal
Once your marshmallows are perfectly melted and smooth, it’s time to add the star of the show: the Rice Krispies cereal! Immediately pour the 7 cups of Rice Krispies cereal into the pot with the melted marshmallows. Working quickly but gently, fold the cereal into the marshmallow mixture. You want to coat every single piece of cereal with the sticky, sweet marshmallow goo. Continue to stir until the cereal is evenly distributed. Don’t overmix, as this can make the treats tough. The mixture will be quite sticky at this point, so have your spatula or wooden spoon ready.
Step 3: Pressing into Pan
Now, prepare your baking pan. Lightly grease a 9×13 inch baking pan with butter or cooking spray, or line it with parchment paper for easy removal. This is a crucial step to prevent your delicious treats from sticking! Transfer the cereal and marshmallow mixture into the prepared pan. Here’s a little trick: lightly butter your hands or a piece of parchment paper to press the mixture evenly into the pan. Don’t press too hard, as this can also result in dense, hard treats. A gentle, even press will give you that classic chewy texture. You want to create a relatively flat surface for our glaze. Let the treats cool in the pan for at least 15-20 minutes before moving on to the next stage. This allows them to set up a bit.
Step 4: Creating the Easter Glaze
While our base treats are setting, let’s whip up the festive green glaze. In a medium bowl, combine the ½ cup of unsalted butter (softened), 3 cups of powdered sugar, ¼ cup of milk, and 1 teaspoon of vanilla extract. Begin extract whisking the ingredients together. The mixture will be thick. Add a few drops of green food coloring at a time, stirring well after each addition, until you achieve a beautiful, vibrant Easter green. If the glaze is too thick, add another tablespoon of milk, a little at a time, until it reaches a drizzly but not too runny consistency. You want it thick enough to coat the treats without completely running off. If it’s too thin, add a little more powdered sugar. Taste a tiny bit to ensure the vanilla flavor is prominent and it’s sweet enough for your liking.
Step 5: Decorating Your Easter Masterpieces
Once the Rice Krispie treats have cooled and set slightly, it’s time for the fun part – decorating! Carefully cut or break the treats into desired shapes. Squares are classic, but you could even use Easter-themed cookie cutters if you have them. Now, take your green glaze and either drizzle it over the top of each treat using a spoon or spatula, or dip the tops of the treats into the glaze for a more substantial coating. As soon as the glaze is applied, scatter your Easter egg candies (mini chocolate eggs or jelly beans) over the top. The glaze will help the candies stick. Work relatively quickly, as the glaze will begin extract to set. Allow the glazed treats to sit at room temperature for another 15-20 minutes, or until the glaze has firmed up, before serving or storing. These are best enjoyed fresh, but can be stored in an airtight container at room temperature for a couple of days. Enjoy the festive fun and deliciousness!
Conclusion:
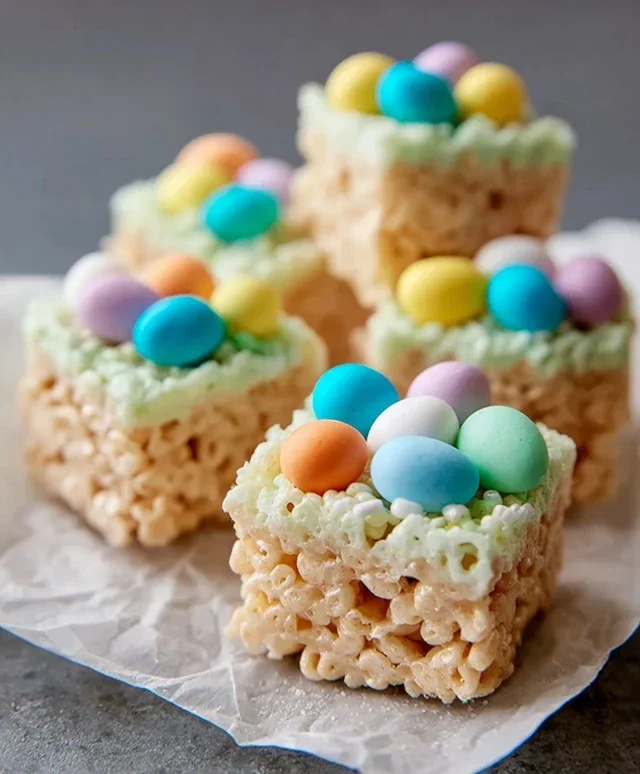
And there you have it – your guide to creating the most delightful Easter Rice Krispie Treats! This recipe is fantastic because it’s incredibly easy, wonderfully nostalgic, and offers a perfect canvas for seasonal creativity. Whether you’re a seasoned baker or just starting out, you’ll find these treats a breeze to whip up, guaranteeing smiles and happy tummies for everyone. They’re the perfect addition to your Easter brunch, a fun activity for the kids to help with, or simply a sweet way to celebrate the season. Don’t be afraid to get creative with your decorations – pastel sprinkles, edible glitter, or even some candy eggs pressed into the top can transform these simple treats into festive masterpieces!
For serving, these Easter Rice Krispie Treats are perfect on their own, but they also pair wonderfully with a glass of cold milk or even a cup of hot chocolate. Consider cutting them into different Easter-themed shapes using cookie cutters for an extra special touch. And for those looking to mix things up, the variations are endless! You could add a touch of vanilla extract for deeper flavor, a handful of mini chocolate chips for a chocolatey surprise, or even a drizzle of melted white chocolate for an elegant finish. I highly encourage you to give this recipe a try. It’s a guaranteed hit and a simple way to bring a little extra joy to your Easter celebrations.
Frequently Asked Questions:
Can I make these Easter Rice Krispie Treats ahead of time?
Absolutely! These treats are best when made a day or two in advance. This allows them to set properly and makes them easier to cut and decorate. Store them in an airtight container at room temperature.
How can I make my Easter Rice Krispie Treats softer and chewier?
To achieve a softer texture, ensure you don’t press the mixture down too firmly in the pan. Gently press just enough to compact it. Over-compacting can lead to a harder, denser treat.
Easter Rice Krispie Treats
Festive Easter-themed Rice Krispie treats with a touch of green and colorful candy eggs.
Ingredients
-
16 ounces marshmallows
-
7 cups Rice Krispies cereal
-
2 tablespoons unsalted butter
-
½ cup unsalted butter
-
3-4 cups powdered sugar
-
¼ cup milk
-
1 teaspoon vanilla extract
-
Green food coloring
-
Easter egg candies (mini chocolate eggs or jelly beans)
Instructions
-
Step 1
Grease a 9×13 inch baking dish with 2 tablespoons of unsalted butter. Set aside. -
Step 2
In a large microwave-safe bowl, melt the remaining ½ cup of unsalted butter and marshmallows on high power in 30-second intervals, stirring between each, until smooth and fully melted. This usually takes about 2-3 minutes total. -
Step 3
Stir in the vanilla extract and a few drops of green food coloring until evenly colored. Add milk gradually until desired consistency is reached. -
Step 4
Add the Rice Krispies cereal to the melted marshmallow mixture and stir until well coated. Gently fold in the Easter egg candies. -
Step 5
Press the mixture evenly into the prepared baking dish. Be careful not to pack too tightly. -
Step 6
Allow the treats to set completely at room temperature for at least 30 minutes before cutting into squares.
Important Information
Nutrition Facts (Per Serving)
It is important to consider this information as approximate and not to use it as definitive health advice.
Allergy Information
Please check ingredients for potential allergens and consult a health professional if in doubt.