Easy No-Bake Banoffee Cheesecake Recipe
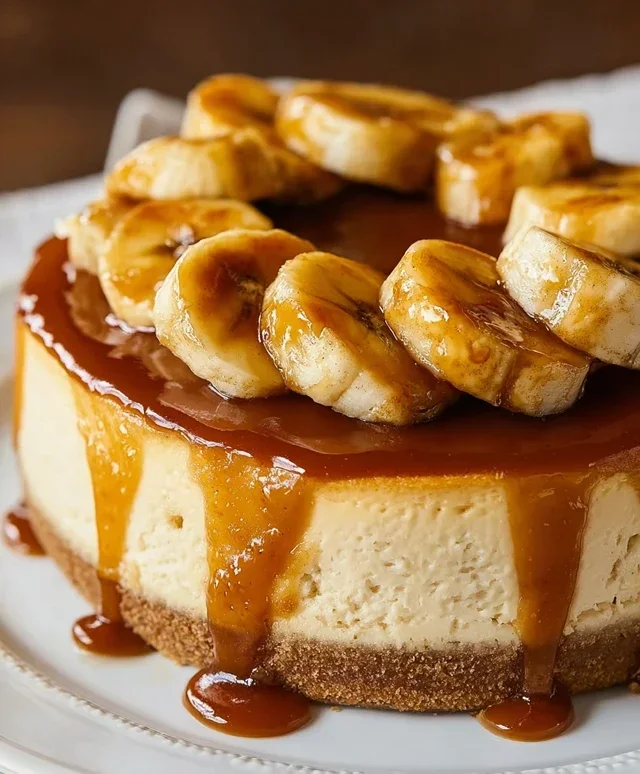
No-Bake Banoffee Cheesecake is the dessert dream you didn’t know you needed until now. Imagin extracte this: a buttery biscuit base, a layer of luscious dulce de leche, perfectly ripe banana slices, and a cloud of creamy, tangy cheesecake filling, all crowned with whipped cream and chocolate shavings. It’s a symphony of textures and flavors that’s utterly irresistible. We all adore Banoffee Pie, right? But transforming it into a no-bake cheesecake elevates it to a whole new level of decadence without the oven drama. What makes this No-Bake Banoffee Cheesecake truly special is its effortless elegance and the pure joy it brings to any occasion. It’s the perfect treat for impressing guests or simply indulgin extractg yourself after a long week.
No-Bake Banoffee Cheesecake
Get ready to indulge in a dessert that’s pure bliss without the fuss of baking! This No-Bake Banoffee Cheesecake is a dream come true for any banana and caramel lover. It’s creamy, decadent, and surprisingly easy to whip up, making it perfect for special occasions or simply treating yourself. The beauty of this recipe lies in its simplicity, relying on a few key ingredients to create that iconic banoffee flavour combination. We’re talking a crunchy biscuit base, a luscious dairy-free cream cheese filling, sweet caramel swirls, and of course, plenty of fresh banana goodness. Best of all, no oven is required, making it a fantastic option for warmer days or when you just don’t want to heat up your kitchen.
Ingredients:
Making the Base
The foundation of any great cheesecake is its base, and for this no-bake marvel, we’re keeping it classic with a buttery biscuit crum extractb. First, take your plain biscuits and blitz them into fine crum extractbs. You can do this in a food processor until they resemble coarse sand, or if you don’t have one, pop them into a sturdy zip-lock bag and bash them with a rolling pin – a surprisingly therapeutic process! In a separate bowl, melt your dairy-free butter or margarine. Once melted, pour it over the biscuit crum extractbs and mix thoroughly until all the crum extractbs are coated and the mixture starts to clump together. This ensures a firm and cohesive base.
Now, it’s time to press this mixture into your cheesecake tin. I recommend using a springform tin, typically around 20-23cm in diameter, as it makes for easy removal later. Tip the biscuit and butter mixture into the base of the tin and press it down firmly and evenly. You can use the back of a spoon or the base of a glass to get a really compact layer. This step is crucial for a base that won’t crum extractble when you slice into the finished cheesecake. Once pressed, place the tin in the refrigerator to chill and firm up while you prepare the filling. This will take at least 30 minutes.
Creating the Creamy Filling
This is where the magic truly happens. For our luscious dairy-free cream cheese filling, we’ll start by preparing the cashew nuts. Remember, these need to be pre-soaked in warm water overnight. This process softens them, allowing them to blend into a wonderfully smooth and creamy texture, mimicking traditional dairy cream cheese. Once soaked, drain the cashews thoroughly.
In a high-powered blender or food processor, combine the drained cashew nuts with the dairy-free cream cheese and the coconut cream. The coconut cream adds an extra layer of richness and a subtle tropical note that complements the caramel and banana beautifully. Add the icing sugar to the blender. Blitz everything together until you have a completely smooth and velvety mixture. You might need to scrape down the sides of the blender a few times to ensure all the nuts are incorporated. Taste the filling at this stage and add a touch more icing sugar if you prefer it sweeter, but remember we’ll be adding caramel sauce too.
Assembling the Banoffee Dream
Now for the assembly! Take your chilled biscuit base out of the refrigerator. Peel and slice your medium-sized banana. Arrange these banana slices in an even layer over the biscuit base. This layer of fresh banana is the heart of the banoffee flavour, providing natural sweetness and a delightful texture.
Next, spoon the creamy cashew filling over the banana layer. Gently spread it out with a spatula, ensuring it covers the bananas evenly and reaches all the edges of the tin. Don’t worry if your base isn’t perfectly flat; the filling will smooth over any imperfections.
Now, it’s time for the caramel! Drizzle generous amounts of your vegan caramel sauce over the top of the cream cheese filling. You can create swirls or random patterns – get creative! For an extra special touch, gently swirl the caramel into the cream cheese filling with a skewer or the tip of a knife. This creates those beautiful marbling effects that look so impressive.
Chilling to Perfection
The final and arguably most important step is allowing your No-Bake Banoffee Cheesecake to chill and set properly. Cover the cheesecake tin loosely with cling film, making sure not to let it touch the surface of the cheesecake itself. Place the cheesecake in the refrigerator and let it chill for at least 4-6 hours, or preferably overnight. This extended chilling time is essential for the filling to firm up and for all the flavours to meld together beautifully. The longer it chills, the firmer and more sliceable it will be.
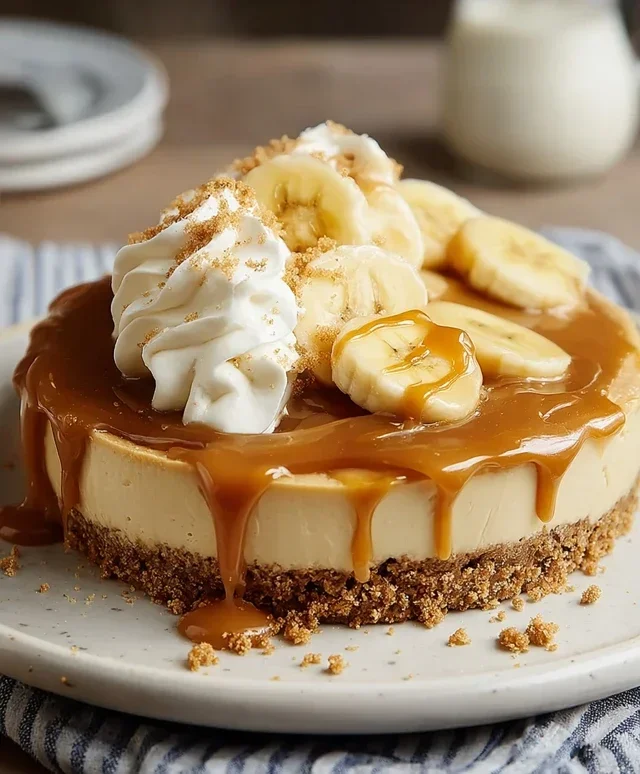
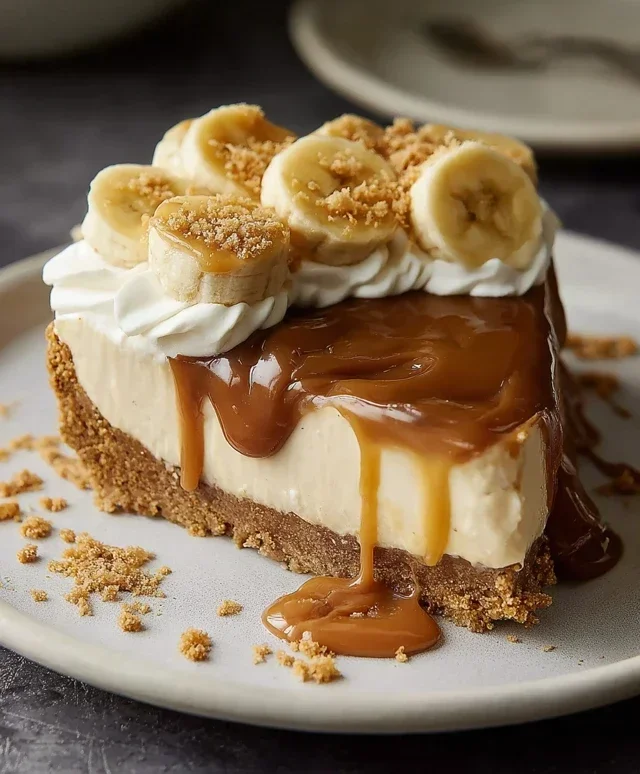
Before serving, whip the dairy-free whipping cream until soft peaks form. This will be our light and airy topping. Carefully remove the sides of your springform tin. Decorate the top of the cheesecake with dollops of whipped cream, extra slices of fresh banana, and a final generous drizzle of vegan caramel sauce. This decadent dessert is now ready to be enjoyed. It’s a showstopper that requires minimal effort, proving that incredible flavours don’t always need a hot oven. Slice generously and savour every creamy, caramelly, banoffee bite!
Conclusion:
And there you have it – a truly irresistible No-Bake Banoffee Cheesecake that’s perfect for any occasion! This recipe is a winner because it delivers all the decadent flavors of a classic banoffee pie, but with the delightful creaminess of cheesecake, all without the hassle of baking. It’s wonderfully simple to assemble, making it an ideal dessert for begin extractners or when you’re short on time. The buttery biscuit base, luscious toffee, sweet bananas, and rich cream cheese filling come together in perfect harmony, creating a dessert that’s guaranteed to impress your friends and family.
I love serving this no-bake banoffee cheesecake chilled, perhaps with a sprinkle of chocolate shavings or extra caramel drizzle for an added touch of indulgence. It’s also fantastic paired with a dollop of whipped cream or a scoop of vanilla ice cream.
Don’t be afraid to experiment with variations! For a richer toffee flavor, try using a good quality dulce de leche. You could also add a touch of espresso powder to the cream cheese mixture for a mocha twist, or sprinkle toasted chopped nuts on top of the biscuit base for added crunch. I really encourage you to give this fantastic recipe a try; it’s so rewarding and delicious!
Frequently Asked Questions:
Can I make this No-Bake Banoffee Cheesecake ahead of time?
Absolutely! This No-Bake Banoffee Cheesecake is actually best made ahead. Chilling allows the flavors to meld beautifully and the cheesecake to set perfectly. I usually prepare mine the day before I plan to serve it, and it’s always a hit!
How long does the No-Bake Banoffee Cheesecake keep in the refrigerator?
When stored in an airtight container in the refrigerator, this delicious dessert should stay fresh and enjoyable for up to 3-4 days. However, the bananas may brown slightly over time, so it’s best enjoyed within the first couple of days for optimal texture and appearance.
No-Bake Banoffee Cheesecake
A delicious and easy no-bake banoffee cheesecake with a biscuit base, creamy cashew filling, and topped with banana and caramel.
Ingredients
-
200g plain biscuits
-
100g dairy-free butter or margarine
-
140g cashew nuts (pre-soaked in warm water overnight)
-
340g dairy-free cream cheese
-
50g coconut cream
-
80g icing sugar
-
1 medium-sized banana
-
Vegan caramel sauce
-
Fresh banana slices
-
80ml dairy-free whipping cream
Instructions
-
Step 1
Crush the plain biscuits into fine crumbs. Melt the dairy-free butter or margarine and mix it thoroughly with the biscuit crumbs. Press this mixture evenly into the base of a springform cake tin. -
Step 2
Drain the pre-soaked cashew nuts. In a blender, combine the drained cashew nuts, dairy-free cream cheese, coconut cream, and icing sugar. Blend until completely smooth and creamy, scraping down the sides as needed. -
Step 3
Slice the medium-sized banana and arrange the slices over the biscuit base in the prepared tin. -
Step 4
Pour the blended cashew mixture evenly over the banana slices, smoothing the top with a spatula. -
Step 5
Drizzle a generous amount of vegan caramel sauce over the cheesecake filling. -
Step 6
Chill the cheesecake in the refrigerator for at least 4-6 hours, or preferably overnight, until set. Before serving, whip the dairy-free whipping cream until stiff peaks form and dollop it on top. Decorate with fresh banana slices and an extra drizzle of vegan caramel sauce.
Important Information
Nutrition Facts (Per Serving)
It is important to consider this information as approximate and not to use it as definitive health advice.
Allergy Information
Please check ingredients for potential allergens and consult a health professional if in doubt.