Easy Dango Recipe – Delicious Japanese Dessert
Easy Dango Recipe: If you’re looking for a delightful, customizable, and surprisingly simple sweet treat, you’ve landed in the right place! Dango, those chewy Japanese rice dumplings, are an absolute joy to make and even more of a joy to eat. People adore dango for its wonderfully satisfying texture – that perfect soft, slightly chewy bite – and its incredible versatility. Whether you enjoy it plain, dusted with kinako (roasted soybean flour), drizzled with sweet soy glaze, or topped with fresh fruit, dango is a canvas for your culinary creativity. What truly makes this easy dango recipe special is its accessibility. Forget complicated techniques or hard-to-find ingredients; this recipe is designed for everyone to experience the magic of homemade dango without any fuss. Get ready to impress yourself and your loved ones with this fuss-free, flavorful delight!
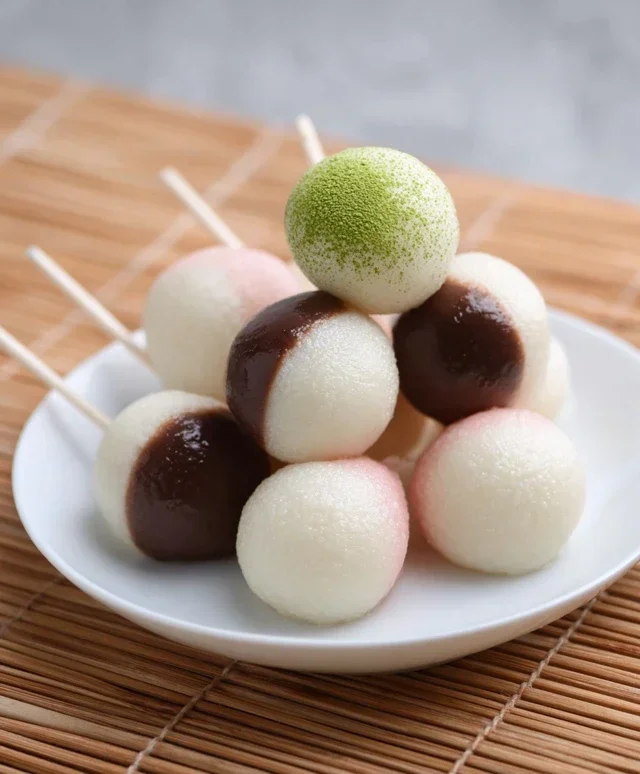
Easy Dango Recipe
Dango is a delightful Japanese sweet treat made from mochiko (rice flour) and often served on skewers. Traditionally, dango can be quite involved, requiring specific techniques and ingredients that might be a little intimidating for begin extractners. But what if I told you that you could make delicious, chewy dango right in your own kitchen with minimal fuss? That’s where this easy dango recipe comes in! We’re going to simplify the process without sacrificing that authentic, satisfying texture and flavor. This recipe is perfect for a fun afternoon activity, a unique dessert for guests, or simply when you’re craving something sweet and comforting with a touch of Japanese charm.
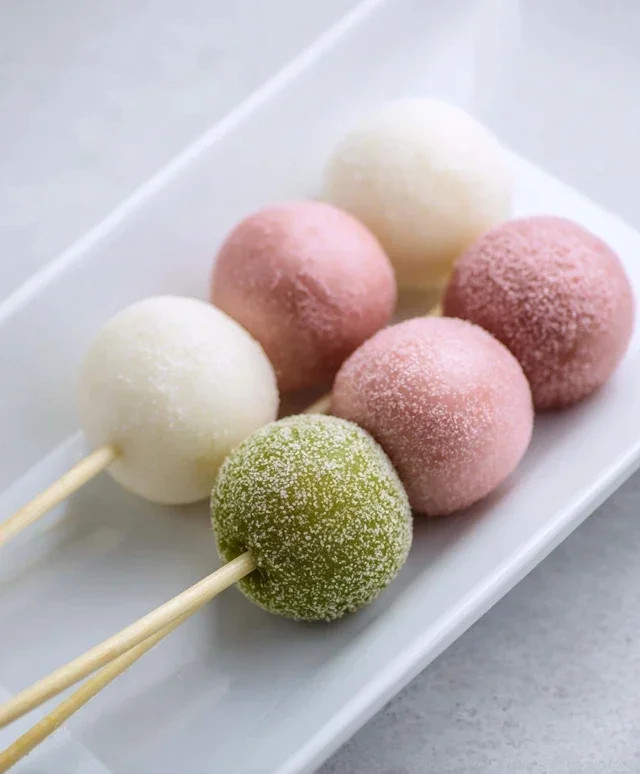
The beauty of dango lies in its versatility. While we’ll cover some basic ways to enjoy them, you can also get creative with toppings and sauces once you’ve mastered the dough. For this recipe, we’re going to make three classic variations: plain white, vibrant green matcha, and a pretty pink. Don’t worry if you’ve never made anything like this before; I’ll guide you through each step to ensure success. Get ready to impress yourself and anyone lucky enough to share these chewy, delightful dumplings!
Ingredients:
Preparing the Dango Dough
This is the core of our dango-making adventure! The combination of joshinko and shiratamako is key to achieving the perfect chewy yet tender texture. Joshinko provides a bit of chegrape juicess and structure, while shiratamako, being a sweet rice flour, contributes to the delightful softness and elasticity.
1. Mixing the Dry Ingredients: In a large mixing bowl, combine the Joshinko and Shiratamako flours. If you’re opting for a sweeter dango, this is also the time to whisk in the powdered sugar. Make sure everything is thoroughly mixed so that the flours and sugar are evenly distributed. This ensures consistent flavor and texture throughout your dango.
2. Adding the Hot Water: Gradually pour in the hot water while continuously mixing the flour mixture with a spatula or wooden spoon. The water should be hot enough to help the flours absorb moisture and begin extract to form a dough, but not boiling, as that can sometimes make the dough tough. Keep stirring until a shaggy dough starts to form. It might seem a bit sticky at first, and that’s perfectly normal.
3. Kneading the Dough: Once the mixture has cooled slightly and is comfortable to touch, it’s time to get your hands in there and knead! Turn the dough out onto a clean, lightly floured surface (or you can continue kneading in the bowl if it’s large enough). Knead the dough for about 5-7 minutes. The goal is to develop the gluten structure, making the dough smooth, elastic, and no longer sticky. It should feel like a soft, pliable playdough. If it’s too dry and crum extractbly, add a tiny bit more hot water, a teaspoon at a time. If it’s too sticky, add a little more of your flour mixture.
Dividing and Coloring the Dough
Now for the fun part – adding color and flavor! This step allows us to create our visually appealing variations.
4. Portioning and Coloring: Divide the main dough into three equal portions.
Shaping and Cooking the Dango
The final steps involve shaping our colorful dough into those signature dango balls and then cooking them to perfection.
5. Shaping the Dango Balls: Take each colored portion of dough and roll it into small balls, roughly 1-inch in diameter. You can make them slightly larger or smaller depending on your preference, but aim for consistency so they cook evenly. You can also roll them into small logs and then pinch off pieces to form balls. Some people like to flatten them slightly, giving them a more traditional teardrop shape, but round balls are perfectly fine and easier for begin extractners.
6. Boiling the Dango: Bring a large pot of water to a rolling boil. Carefully drop the dango balls into the boiling water, making sure not to overcrowd the pot. They will sink to the bottom initially. As they cook, they will float to the surface. Once they float, continue to boil them for another 2-3 minutes. This ensures that the inside is cooked through and they have that perfect chewy texture.
7. Cooling and Serving: Using a slotted spoon, carefully remove the cooked dango from the boiling water and transfer them to a bowl of ice-cold water. This shock in cold water helps to stop the cooking process and gives them an even chewier texture. Let them cool in the ice water for about a minute, then drain them well. You can serve your dango as is, or thread them onto skewers (usually 3-5 dango per skewer). They are wonderful served with a drizzle of sweet soy glaze (mitarashi sauce), kinako (roasted soybean flour), or even a simple dusting of powdered sugar. Enjoy your delicious homemade dango!
Conclusion:
And there you have it! This Easy Dango Recipe is a fantastic way to bring a touch of Japanese street food charm right into your kitchen. Its simplicity is its greatest strength, requiring just a few common ingredients and minimal fuss to create these delightful, chewy mochi balls. The result is a wonderfully satisfying treat that’s both fun to make and incredibly enjoyable to eat. Whether you’re a seasoned baker or a complete begin extractner, you’ll find success with this straightforward method.
I love serving dango skewered on a small stick, drizzled with a sweet sauce. Classic options include a rich, slightly salty soy sauce glaze (mitarashi dango) or a sweet red bean paste (anko). For a lighter touch, a sprinkle of kinako (roasted soybean flour) is also wonderful. Don’t be afraid to get creative with your toppings! Consider adding a dollop of whipped cream or some fresh fruit for extra flair. And if you’re feeling adventurous, try adding a touch of matcha powder or food coloring to the dough for vibrant, unique dango variations.
I truly hope you give this Easy Dango Recipe a try. It’s a rewarding and delicious experience that’s perfect for a quick dessert, a fun weekend project, or even to impress guests. Happy cooking!
Frequently Asked Questions:
What kind of flour should I use for dango?
For the chewiest and most authentic texture, use shiratamako (glutinous rice flour). If you can’t find shiratamako, mochiko (sweet rice flour) is a good alternative, though the texture might be slightly different. Regular all-purpose flour will not work for dango.
How do I store leftover dango?
Dango is best enjoyed fresh, as it can harden over time. However, if you have leftovers, store them in an airtight container at room temperature for no more than a day. You can gently reheat them by steaming them for a minute or two to soften them up again.
Can I make dango without skewers?
Absolutely! While skewers are traditional for serving, you can simply roll them into small balls without skewers if you prefer. They will still taste delicious!
Easy Dango Recipe
A simple and delicious recipe for making homemade Dango, a Japanese sweet rice dumpling. This recipe offers variations for color and sweetness.
Ingredients
-
{‘@type’: ‘Ingredient’, ‘name’: ‘Joshinko non-glutinous rice flour’, ‘quantity’: ‘1 1/3 cup’, ‘unitCode’: ‘cup’, ‘amount’: 150, ‘unitCodeMetric’: ‘g’}
-
{‘@type’: ‘Ingredient’, ‘name’: ‘Shiratamako glutinous sweet rice flour’, ‘quantity’: ‘1 1/2 cup’, ‘unitCode’: ‘cup’, ‘amount’: 200, ‘unitCodeMetric’: ‘g’}
-
{‘@type’: ‘Ingredient’, ‘name’: ‘Powdered sugar’, ‘description’: ‘Optional, for added sweetness’, ‘quantity’: ‘3/4 cup’, ‘unitCode’: ‘cup’, ‘amount’: 75, ‘unitCodeMetric’: ‘g’}
-
{‘@type’: ‘Ingredient’, ‘name’: ‘Hot water’, ‘quantity’: ‘1 1/3 cup’, ‘unitCode’: ‘cup’}
-
{‘@type’: ‘Ingredient’, ‘name’: ‘Matcha powder’, ‘quantity’: ‘1 teaspoon’, ‘unitCode’: ‘tsp’, ‘additionalProperty’: {‘@type’: ‘PropertyValue’, ‘name’: ‘water for matcha’, ‘value’: ‘1 tsp’}}
-
{‘@type’: ‘Ingredient’, ‘name’: ‘Pink food coloring’, ‘quantity’: ‘1 drop’}
Instructions
-
Step 1
In a large bowl, combine Joshinko, Shiratamako, and powdered sugar (if using). Mix well. -
Step 2
Gradually add hot water to the dry ingredients, mixing until a soft dough forms. Knead lightly until smooth. -
Step 3
Divide the dough into portions for coloring. For green dango, mix 1 teaspoon of matcha powder with 1 teaspoon of water and knead it into one portion of the dough until evenly colored. For pink dango, add 1 drop of pink food coloring to another portion and knead until smooth and evenly colored. Leave the remaining dough white. -
Step 4
Roll each colored portion of dough into small balls, about 1 inch in diameter. -
Step 5
Bring a pot of water to a boil. Carefully drop the dango balls into the boiling water. Cook until they float to the surface, about 3-5 minutes. -
Step 6
Using a slotted spoon, remove the cooked dango from the water and place them in a bowl. Serve warm with your favorite topping like anko (sweet red bean paste) or kinako (roasted soybean flour).
Important Information
Nutrition Facts (Per Serving)
It is important to consider this information as approximate and not to use it as definitive health advice.
Allergy Information
Please check ingredients for potential allergens and consult a health professional if in doubt.