Raspberry Lemon Cake Recipe-Easy & Delicious Treat
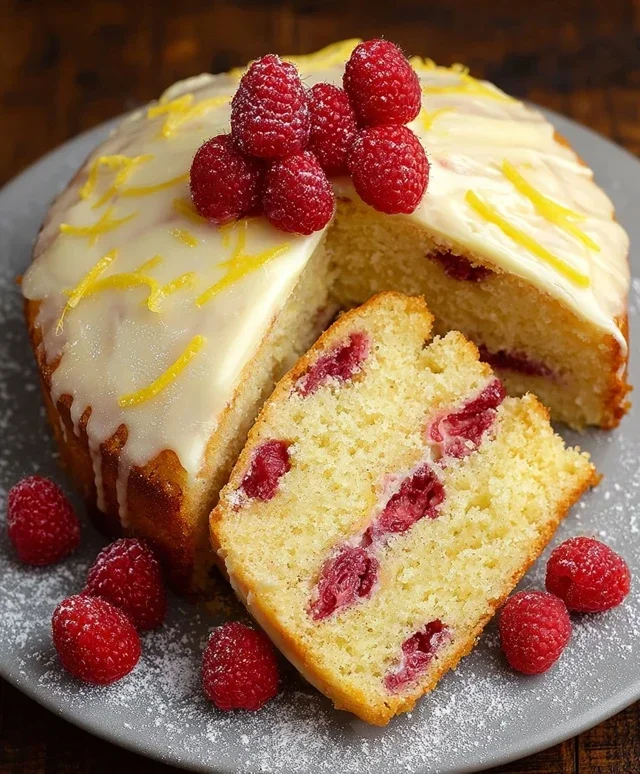
Raspberry Lemon Cake is the sunshine-filled dessert you’ve been dreaming of, and I’m so excited to share my favorite recipe with you. There’s something utterly magical about the pairing of tart, vibrant raspberries and bright, zesty lemon. It’s a classic combination for a reason – it just sings! This Raspberry Lemon Cake isn’t just any cake; it’s a delightful dance of sweet and tangy, with a moist, tender crum extractb that practically melts in your mouth. The burst of juicy raspberries throughout the cake adds beautiful pops of color and flavor, while the delicate lemon essence provides a refreshing counterpoint. Whether you’re looking for a show-stopping centerpiece for a special occasion or simply a delightful treat to brighten your afternoon, this Raspberry Lemon Cake is guaranteed to impress. Get ready to experience pure bliss with every single bite.
Raspberry Lemon Cake
There’s something truly magical about the combination of tart raspberries and bright, zesty lemons. It’s a flavor pairing that just sings, and when you bake it into a tender, moist cake, you have a dessert that’s perfect for any occasion, from a casual afternoon tea to a special celebration. This Raspberry Lemon Cake is my go-to when I want something impressive but surprisingly easy to make. The gluten-free flour blend ensures everyone can enjoy a slice, and the creamy lemon frosting adds the perfect finishing touch. Let’s get baking!
Ingredients:
Baking the Cake
The heart of this recipe is a wonderfully moist and tender cake. We’ll start by creaming together the butter and sugar, which is crucial for developing a light and airy texture. Make sure your butter is truly at room temperature – it should be soft enough to indent easily with your finger, but not melted. This allows it to incorporate air effectively when beaten with the sugar.
1. Preheat your oven to 350°F (175°C). Grease and flour two 9-inch round cake pans, or line them with parchment paper. This step is vital to prevent your beautiful cake from sticking. For gluten-free baking, a good coating of grease and flour (or parchment) is your best friend.
2. In a large bowl, cream together the 1 cup of room temperature unsalted butter and 1 ½ cups of sugar until light and fluffy. This process can take about 3-5 minutes with an electric mixer. You want to see the mixture become pnon-alcoholic ale yellow and increase in volume. Next, beat in the 3 eggs one at a time, ensuring each egg is fully incorporated before adding the next. This helps to emulsify the batter and create a stable structure. Stir in the 3 tablespoons of lemon zest and ⅓ cup of lemon juice. The zest will release its fragrant oils, infusing the cake with a beautiful citrus aroma.
3. In a separate medium bowl, whisk together the 3 cups of gluten-free flour, 1 tablespoon of baking powder, ¾ teaspoon of baking soda, and ½ teaspoon of salt. Whisking these dry ingredients together evenly distributes the leavening agents and salt, ensuring consistent rise and flavor throughout the cake.
4. Now, we’ll alternate adding the dry ingredients and the wet ingredients to the butter mixture. Add about one-third of the flour mixture to the butter mixture and mix on low speed until just combined. Then, add half of the wet ingredients (1 cup unsweetened plain yogurt and ¼ cup milk) and mix again until just combined. Repeat this process, adding another third of the flour mixture, the remaining wet ingredients, and finally the last of the flour mixture. Be careful not to overmix the batter, as this can develop the gluten in gluten-free flours too much, resulting in a tougher cake. Mix only until no dry streaks remain.
5. Gently fold in the 2 cups of fresh raspberries. It’s important to do this by hand with a spatula, rather than using the mixer, to avoid crushing the berries. You want them to remain mostly whole so they burst with flavor as the cake bakes. If you’re using frozen raspberries, do not thaw them; fold them in directly, which helps prevent them from bleeding too much color into the batter. Divide the batter evenly between the prepared cake pans. Smooth the tops with your spatula. Bake for 30-35 minutes, or until a wooden skewer inserted into the center comes out clean. Allow the cakes to cool in the pans for about 10-15 minutes before inverting them onto a wire rack to cool completely. It’s crucial that the cakes are entirely cool before frosting, otherwise, the frosting will melt and slide right off.
Making the Lemon Frosting
While the cakes are cooling, we’ll whip up a bright and tangy lemon frosting that perfectly complements the cake. This frosting is simple but delivers a powerful lemon punch.
In a large bowl, beat the 2 cups of room temperature unsalted butter with an electric mixer until creamy and smooth. Gradually add the 5 cups of powdered sugar, about a cup at a time, mixing on low speed until incorporated. This will be a very thick mixture at first. Once all the powdered sugar is added, add the 2 teaspoons of lemon juice and continue beating on medium-high speed until the frosting is light and fluffy. If the frosting is too thick, you can add another teaspoon or two of milk or lemon juice until it reaches your desired spreading consistency. Taste and adjust the lemon flavor if needed – you can always add a touch more zest or juice.
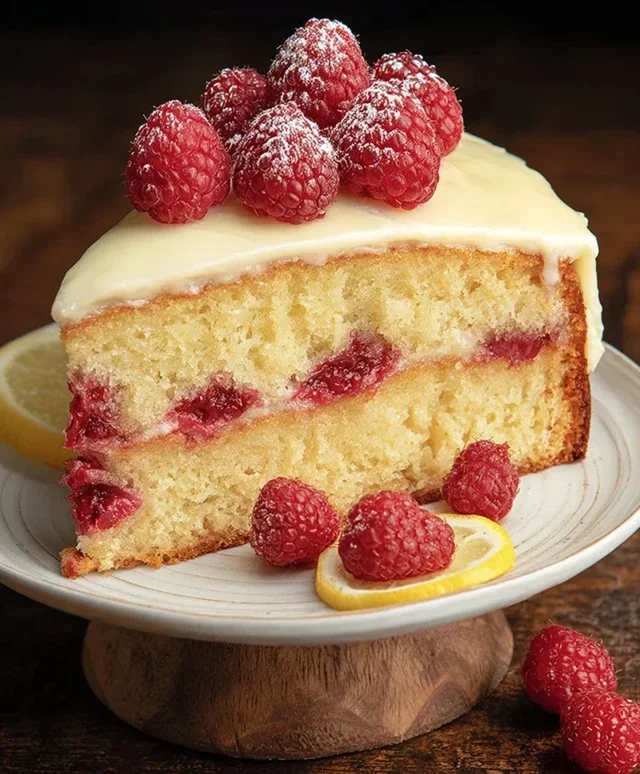
Once the cakes are completely cool, it’s time to assemble your masterpiece. Place one cake layer on your serving plate. Spread a generous amount of frosting over the top. Carefully place the second cake layer on top. Frost the top and sides of the entire cake. For a decorative touch, you can swirl the frosting with a spatula or pipe it using a piping bag and tip. Garnish with a few fresh raspberries or a sprinkle of lemon zest, and admire your beautiful homemade Raspberry Lemon Cake. Enjoy every delicious bite!
Conclusion:
I truly hope you’ve enjoyed learning how to make this delightful Raspberry Lemon Cake! It’s a recipe that I find incredibly satisfying, offering a perfect balance of sweet, tart, and fragrant notes. The vibrant raspberry swirls against the zesty lemon backdrop make it not only a delicious treat but also a beautiful centerpiece for any occasion. Whether you’re a seasoned baker or just starting out, this recipe is wonderfully approachable and guarantees a show-stopping dessert that will impress your friends and family.
For serving, I love this cake on its own, showcasing its natural flavors. However, a dollop of fresh whipped cream or a light dusting of powdered sugar can elevate it further. Consider pairing it with a cup of tea or a glass of sparkling lemonade for a truly refreshing experience. Don’t be afraid to get creative with variations! You could add a hint of vanilla bean to the batter for an extra layer of depth, or even incorporate a tablespoon of limoncello into the frosting for a boozy kick. I really encourage you to give this Raspberry Lemon Cake a try; I’m confident you’ll fall in love with its bright flavors and tender crum extractb.
Frequently Asked Questions:
Can I use frozen raspberries?
Absolutely! If using frozen raspberries, there’s no need to thaw them beforehand. You can toss them gently in a tablespoon of flour before folding them into the batter to help prevent them from sinking. This is a fantastic way to enjoy this Raspberry Lemon Cake year-round.
How long will this cake stay fresh?
This Raspberry Lemon Cake will keep well at room temperature, covered, for about 2-3 days. For longer storage, wrap it tightly and refrigerate for up to a week. The flavors often meld and deepen beautifully overnight, making it a great make-ahead dessert.
Raspberry Lemon Cake
A bright and zesty gluten-free cake bursting with fresh raspberries and a tangy lemon glaze.
Ingredients
-
3 cups gluten-free flour
-
1 ½ cups sugar
-
1 cup unsalted butter, room temperature
-
1 cup unsweetened plain yogurt
-
¼ cup milk
-
1 tbsp baking powder
-
¾ tsp baking soda
-
½ tsp salt
-
3 eggs
-
3 tbsp lemon zest
-
⅓ cup lemon juice
-
2 cups fresh raspberries
-
2 cups unsalted butter, room temperature
-
5 cups powdered sugar
-
2 tsp lemon juice
Instructions
-
Step 1
Preheat oven to 350°F (175°C). Grease and flour a 9×13 inch baking pan. -
Step 2
In a large bowl, cream together 1 cup softened butter and 1 ½ cups sugar until light and fluffy. -
Step 3
Beat in eggs one at a time, then stir in yogurt, ¼ cup milk, 3 tbsp lemon zest, and ⅓ cup lemon juice. -
Step 4
In a separate bowl, whisk together gluten-free flour, baking powder, baking soda, and salt. Gradually add the dry ingredients to the wet ingredients, mixing until just combined. -
Step 5
Gently fold in the fresh raspberries. Pour batter into the prepared pan and spread evenly. -
Step 6
Bake for 30-35 minutes, or until a toothpick inserted into the center comes out clean. -
Step 7
Let the cake cool in the pan for 10 minutes before inverting onto a wire rack to cool completely. -
Step 8
For the glaze, beat 2 cups softened butter until creamy. Gradually add 5 cups powdered sugar and 2 tsp lemon juice, beating until smooth and spreadable. Add more lemon juice if needed for desired consistency. -
Step 9
Spread the lemon glaze over the cooled cake.
Important Information
Nutrition Facts (Per Serving)
It is important to consider this information as approximate and not to use it as definitive health advice.
Allergy Information
Please check ingredients for potential allergens and consult a health professional if in doubt.