Easy Chocolate Swiss Roll Recipe-Delicious & Simple
Easy Chocolate Swiss Roll recipes are a dream for anyone craving a show-stopping dessert without the fuss. There’s something incredibly magical about a Swiss roll, isn’t there? That delicate sponge cake, unfurling to reveal a luscious cream filling, all rolled up into a beautiful spiral – it’s a classic for a reason! People adore it because it looks so impressive, yet with the right recipe, it’s surprisingly approachable for home bakers. What truly makes an easy chocolate Swiss roll special is its versatility and that irresistible combination of light, airy cake and rich, decadent chocolate. Whether you’re celebrating a birthday, hosting a tea party, or just want to treat yourself, this dessert never fails to impress. Get ready to master this delightful classic; it’s simpler than you think!
Easy Chocolate Swiss Roll
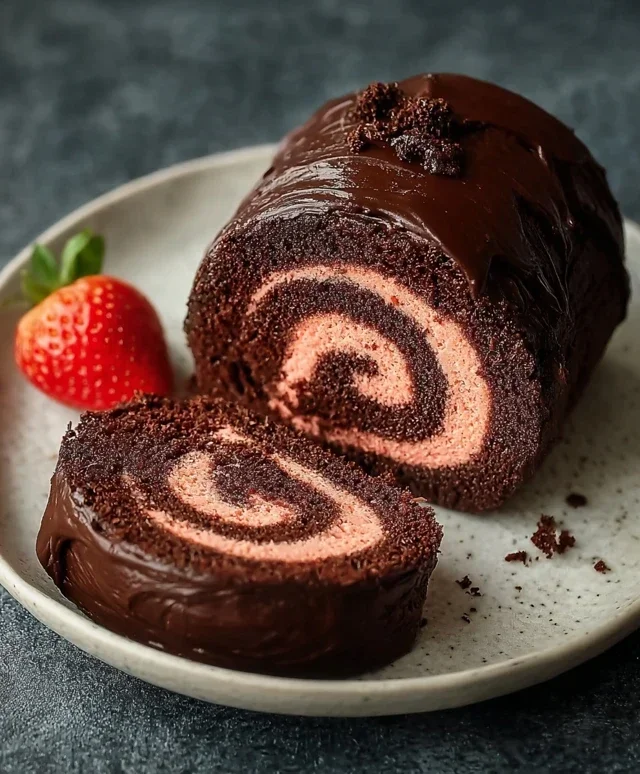
There’s something incredibly satisfying about a homemade Swiss roll. The light, airy sponge cake rolled around a luscious filling is a classic for a reason. This recipe takes that classic and gives it a delightful chocolatey twist, making it surprisingly easy to achieve impressive results. Whether you’re a seasoned baker or just starting out, this Easy Chocolate Swiss Roll is designed to be approachable and forgiving. We’ll be using a combination of gluten-free flours for a tender crum extractb, and a clever aquafaba base for that signature lightness, all without any eggs. The rich chocolate sponge paired with a tangy, fruity filling makes for a truly memorable dessert.
Ingredients:
Preparing the Chocolate Sponge
1. Preheat and Prepare Your Pan: First things first, let’s get our oven ready. Preheat it to 175°C (350°F). This is a moderate temperature that will allow the cake to bake through evenly without drying out. Now, grab a rimmed baking sheet, approximately 25 cm x 38 cm (10 x 15 inches). Line it with parchment paper, ensuring the paper extends slightly up the sides. This will make it much easier to lift the baked cake out later. For an extra layer of insurance against sticking, lightly grease the parchment paper as well.
2. Combine Dry Ingredients: In a large mixing bowl, whisk together the oat flour, cassava flour, cocoa powder, arrowroot starch, baking powder, and baking soda. Whisking them thoroughly ensures that all the leavening agents and cocoa powder are evenly distributed, which is crucial for a consistent rise and deep chocolate flavor. Sifting these dry ingredients can also help to remove any lumps and create an even lighter sponge.
3. Whip the Aquafaba: In a separate, very clean bowl (any trace of fat can prevent aquafaba from whipping), add the room temperature aquafaba. This is the liquid from a can of chickpeas, and it’s our secret ingredient for achieving a light, airy cake without eggs. Using an electric mixer, begin extract whipping the aquafaba on medium speed. Gradually add 100g of the granulated sugar, a tablespoon at a time, while continuing to whip. Continue whipping until you achieve stiff, glossy peaks, similar to meringue. This process can take about 5-10 minutes. Don’t rush this step; the stable meringue is what provides the structure for our sponge.
4. Combine Wet Ingredients and Fold into Meringue: In another bowl, whisk together the unsweetened applesauce, unsweetened dairy-free yogurt, and the remaining 100g of granulated sugar. Once the applesauce mixture is smooth, gently fold it into the whipped aquafaba. Be careful not to deflate the meringue. A gentle folding motion, using a spatula to cut through the mixture and bring it up from the bottom, is key here. Once the wet ingredients are incorporated, carefully fold in the dry ingredients, in batches if necessary. Again, gentle folding is essential to maintain as much air as possible. The batter should be smooth and slightly thick, but still pourable.
5. Bake the Sponge: Pour the batter evenly onto your prepared baking sheet, spreading it to the edges with your spatula. Bake for approximately 12-15 minutes, or until the cake springs back when lightly touched and a toothpick inserted into the center comes out clean. Keep a close eye on it, as ovens can vary. Once baked, immediately invert the cake onto a clean kitchen towel that has been generously dusted with 2 tablespoons of cocoa powder. Carefully peel off the parchment paper. While the cake is still warm, roll it up tightly within the towel, starting from one of the shorter sides. This is crucial for setting the shape and preventing cracks. Let it cool completely rolled in the towel.
Creating the Strawberry Filling and Frosting
1. Prepare the Strawberry Buttercream: In a large bowl, cream together the room temperature vegan butter until light and fluffy. Add the pulsed freeze-dried strawberry flour and continue to beat until well combined and the frosting takes on a lovely pink hue and a subtle strawberry flavor. This freeze-dried strawberry “flour” provides an intense, natural strawberry taste without adding extra moisture, which is vital for a stable frosting.
2. Assemble the Swiss Roll: Once the cake has cooled completely, carefully unroll it. You’ll notice it holds its shape beautifully. Spread the strawberry buttercream evenly over the surface of the cake, leaving a small border around the edges. Then, arrange the sliced fresh strawberries over the buttercream.
3. Roll and Chill: Starting from the same short side you initially rolled from, carefully reroll the cake, this time without the towel. Apply gentle, even pressure as you roll to create a tight spiral. Once rolled, you can either dust it with a little extra cocoa powder for a rustic finish or coat the outside with any leftover strawberry buttercream for a more decadent look. Chill the Swiss roll in the refrigerator for at least 30 minutes to allow the filling to set and the cake to firm up, making it easier to slice cleanly.
Serve your Easy Chocolate Swiss Roll chilled, sliced into generous portions. Garnish with extra fresh strawberries if desired. Enjoy this delightful treat that proves you don’t need to be a pastry chef to create something truly special!
Conclusion:
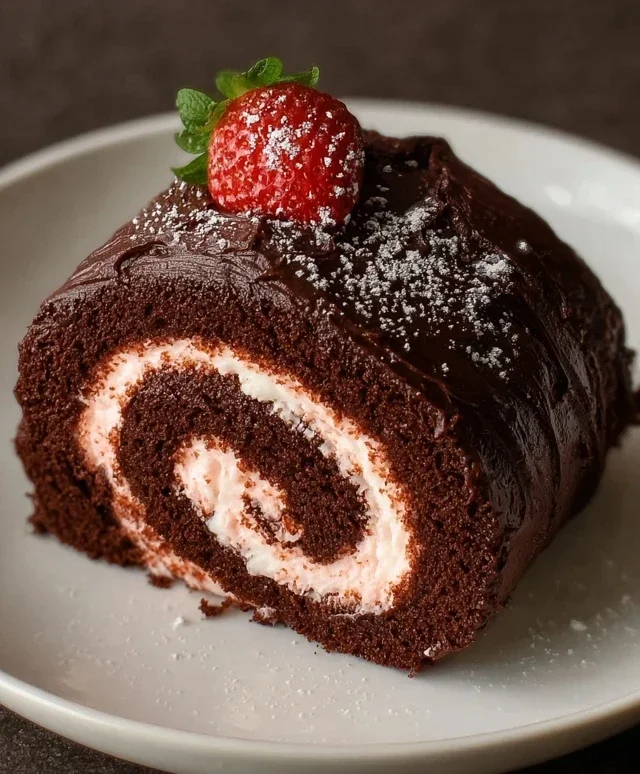
And there you have it – your very own Easy Chocolate Swiss Roll! This recipe truly proves that impressive desserts don’t need to be complicated. The light and airy sponge, coupled with the rich chocolate filling, creates a delightful balance of textures and flavors that’s sure to impress. It’s the perfect showstopper for birthdays, holidays, or just a special weekend treat. Don’t be intimidated by the rolling process; it’s more forgiving than you might think, and even a little crack adds to its rustic charm!
For serving, I love slicing this beauty into thick pieces and enjoying it as is. It’s also fantastic with a dusting of powdered sugar, a dollop of whipped cream, or even a drizzle of extra chocolate ganache. If you’re feeling adventurous, try adding a spoonful of raspberry jam to the filling for a fruity twist, or a hint of espresso powder to the sponge for a mocha delight. I really encourage you to give this Easy Chocolate Swiss Roll a try; you’ll be so proud of yourself!
Frequently Asked Questions:
What if my Swiss Roll cracks when I roll it?
Don’t worry at all! A few small cracks are perfectly normal and often happen. They add character to your homemade roll and are easily hidden with a generous layer of filling and a dusting of powdered sugar. Just proceed with the recipe – it will still taste amazing!
Can I make the chocolate filling ahead of time?
Absolutely! You can prepare the chocolate filling up to 2 days in advance and store it in an airtight container in the refrigerator. You may need to let it soften slightly at room temperature or give it a quick stir before spreading it onto the warm sponge.
What’s the best way to store leftover Swiss Roll?
Store any leftover Easy Chocolate Swiss Roll in an airtight container at room temperature for up to 2 days, or in the refrigerator for up to 4 days. If refrigerating, allow it to come to room temperature for about 15-20 minutes before serving for the best texture.
Easy Chocolate Swiss Roll
A simple and delicious vegan chocolate Swiss roll made with oat flour and a creamy strawberry filling. Perfect for a special occasion or a sweet treat.
Ingredients
-
135 g oat flour
-
30 g cassava flour
-
30 g cocoa powder
-
1 tbsp arrowroot starch
-
1 1/2 tsp baking powder
-
1/2 tsp baking soda
-
122 mL aquafaba, room temperature
-
100 g organic granulated sugar or coconut sugar, divided
-
100 g unsweetened applesauce, room temperature
-
60 g unsweetened dairy free yogurt, room temperature
-
2 tbsp cocoa powder for dusting the dish towel
-
1 cup sliced strawberries, for garnish
-
226 g vegan butter, room temperature
-
70 g freeze dried strawberries, pulsed into a flour
-
Coconut fat from 1 can full-fat coconut cream
Instructions
-
Step 1
Preheat oven to 350°F (175°C). Line a 10×15 inch baking pan with parchment paper and lightly grease. Dust with 2 tbsp cocoa powder. -
Step 2
In a large bowl, whisk together oat flour, cassava flour, 30g cocoa powder, arrowroot starch, baking powder, and baking soda. In a separate bowl, whisk together aquafaba and 100g sugar until fluffy. Gently fold in applesauce and dairy-free yogurt. -
Step 3
Pour wet ingredients into dry ingredients and mix until just combined. Pour batter into prepared pan and spread evenly. Bake for 12-15 minutes, or until a toothpick inserted into the center comes out clean. -
Step 4
While cake bakes, prepare the filling. In a bowl, cream together softened vegan butter, coconut cream fat, and the remaining 100g sugar. Add the pulsed freeze-dried strawberries and mix until smooth and creamy. -
Step 5
Invert the warm cake onto a clean kitchen towel lightly dusted with cocoa powder. Remove parchment paper and roll the cake up with the towel. Let cool completely. -
Step 6
Once cooled, carefully unroll the cake. Spread the strawberry filling evenly over the cake, leaving a small border. Arrange sliced strawberries on top of the filling. -
Step 7
Roll the cake up tightly, starting from one end. Wrap in parchment paper or plastic wrap and refrigerate for at least 30 minutes before slicing and serving.
Important Information
Nutrition Facts (Per Serving)
It is important to consider this information as approximate and not to use it as definitive health advice.
Allergy Information
Please check ingredients for potential allergens and consult a health professional if in doubt.