Nut-Free Pesto Recipe – Delicious & Easy Flavor
Nut Free Pesto is a revelation for anyone who loves the vibrant, herbaceous flavors of classic pesto but needs to avoid nuts. For years, I’ve dreamt of recreating that delicious basil-pine nut magic without the allergens, and let me tell you, this Nut Free Pesto recipe absolutely delivers! It’s a game-changer for allergy-conscious households, potlucks, or simply for those looking for a delicious twist on a beloved sauce. What makes this version so special is its ability to capture the bright, fresh essence of basil and garlic, mellowed by the richness of seeds, all without compromising on that irresistible, slightly creamy texture we all adore. This isn’t just a substitute; it’s a star in its own right, ready to elevate your pasta dishes, spread on sandwiches, or dip your favorite veggies into. Get ready to fall in love with this sensational, allergy-friendly version of a culinary classic.
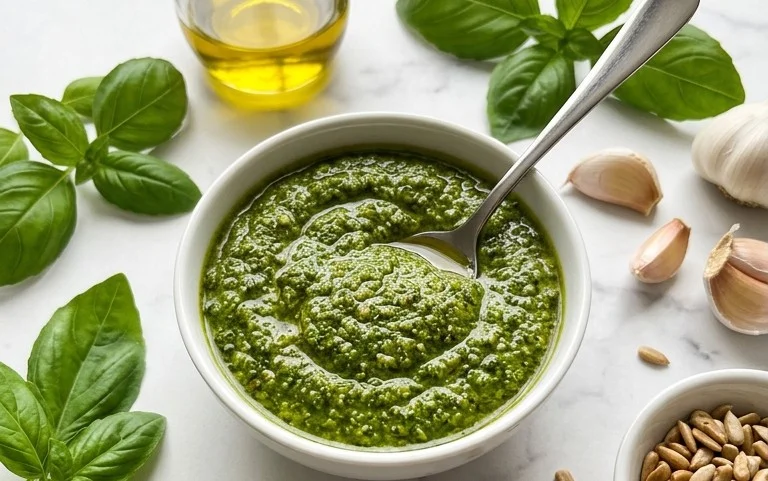
Nut Free Pesto
There’s something wonderfully vibrant and fresh about pesto. That burst of herbaceous basil, the pungent kick of garlic, and the salty richness of Parmesan cheese – it’s a flavor combination that sings. Traditionally, pesto relies on pine nuts for its creamy texture and signature nutty undertone. However, for those with nut allergies or simply looking for an alternative, a nut-free pesto is not only possible but incredibly delicious and surprisingly simple to achieve. This recipe offers all the bright, zesty goodness of classic pesto without a single nut in sight, making it a safe and satisfying option for everyone to enjoy.
This nut-free version is perfect for pasta dishes, of course, but its versatility extends far beyond. Imagin extracte swirling it into a creamy soup, spreading it on a sandwich instead of mayonnaise, using it as a dip for vegetables, or even dolloping it onto grilled chicken or fish. The possibilities are truly endless, and the vibrant green hue will add a beautiful pop of color to any meal.
The key to a fantastic nut-free pesto lies in using the freshest ingredients possible. We’re going for maximum flavor, and high-quality components will ensure that your pesto is anything but an afterthought. Don’t be tempted to substitute dried herbs here; the fresh basil is the star and provides that unmistakable, garden-fresh aroma and taste that makes pesto so irresistible. Similarly, using freshly grated Parmesan will give you a much better texture and more robust flavor than pre-shredded cheese, which often contains anti-caking agents that can affect the pesto’s smoothness.
Let’s get started on creating this delightful and safe pesto!
Ingredients:
Preparing Your Pesto: Step-by-Step
The process of making pesto is wonderfully straightforward and can be done with a food processor or a mortar and pestle for a more traditional approach. I find a food processor to be the quickest and most efficient method for a larger batch like this, but if you have a bit more time and enjoy the manual process, a mortar and pestle will yield a wonderfully rustic and authentic pesto. Whichever method you choose, the result will be a fragrant and flavorful sauce.
Step 1: Blanching the Basil (Optional but Recommended for Vibrant Color)
While you can absolutely use the basil leaves straight from the garden or store, I highly recommend a quick blanching step. This might sound a little counter-intuitive for something so fresh, but trust me, it makes a significant difference in maintaining that beautiful, vibrant green color in your finished pesto. To do this, bring a small pot of water to a rolling boil. Prepare an ice bath in a medium bowl by filling it with ice cubes and cold water. Carefully drop the basil leaves into the boiling water for about 10-15 seconds, just until they turn bright green. Immediately remove the basil with a slotted spoon and plunge it into the ice bath. This shocking process stops the cooking and locks in that brilliant color. Once cooled, gently squeeze out as much excess water as you can. This step ensures your pesto stays a gorgeous emerald green, even after storing. If you skip this, your pesto might be a bit more muted in color, but the flavor will still be fantastic.
Step 2: Processing the Greens and Garlic
In the bowl of your food processor, add the blanched and drained basil leaves. Add the peeled garlic cloves. Now, pulse the food processor a few times until the basil and garlic are roughly chopped. You don’t want a complete puree at this stage; we’re just breaking down the ingredients to make it easier for the oil to incorporate. Scrape down the sides of the bowl with a spatula to ensure everything is getting evenly processed. It’s always a good idea to keep an eye on the consistency as you go.
Step 3: Incorporating the Cheese and Seasonings
Once the basil and garlic are nicely processed, add the freshly grated Parmesan cheese to the food processor. Now, add the salt and pepper. Pulse again until the cheese is incorporated and the mixture starts to resemble a coarse paste. At this point, you’ll begin extract to see the characteristic texture of pesto forming. Again, scrape down the sides of the bowl as needed to ensure all ingredients are well combined. The salt will help to draw out the flavors and the pepper adds a subtle warmth.
Step 4: Emulsifying with Olive Oil
This is where the magic really happens! With the food processor running on a low speed, slowly drizzle in the olive oil through the feed tube. Continue processing until the pesto reaches your desired consistency. Some people prefer a chunkier pesto, while others like it smoother. I like to stop when it’s still slightly textured, as I find it holds its shape better on pasta. Be mindful not to over-process, as this can make the pesto greasy. The goal is a beautifully emulsified sauce where the oil is fully incorporated, creating a smooth yet still slightly rustic texture. Drizzle slowly to control the consistency and avoid adding too much oil too soon.
Step 5: Tasting and Adjusting
This final step is crucial for perfect flavor. Once all the olive oil has been incorporated, stop the food processor and give your pesto a good taste. This is your chance to fine-tune the seasoning. Does it need a little more salt to bring out the flavors? Perhaps a touch more pepper for a bit more zing? If you find it too thick, you can always drizzle in another tablespoon of olive oil (or even a tiny splash of lemon juice for brightness, though that’s not in the origin extractal ingredient list) and process briefly again. If you find it too thin, you can add a little more Parmesan cheese. Remember, taste is subjective, so adjust to your personal preference. Once you’re happy with the flavor and consistency, your nut-free pesto is ready to be enjoyed!
Store your delicious nut-free pesto in an airtight container in the refrigerator for up to a week. You can also freeze it in ice cube trays for smaller, convenient portions, or in freezer-safe bags for longer storage. Enjoy this versatile and allergy-friendly sauce!
Conclusion:
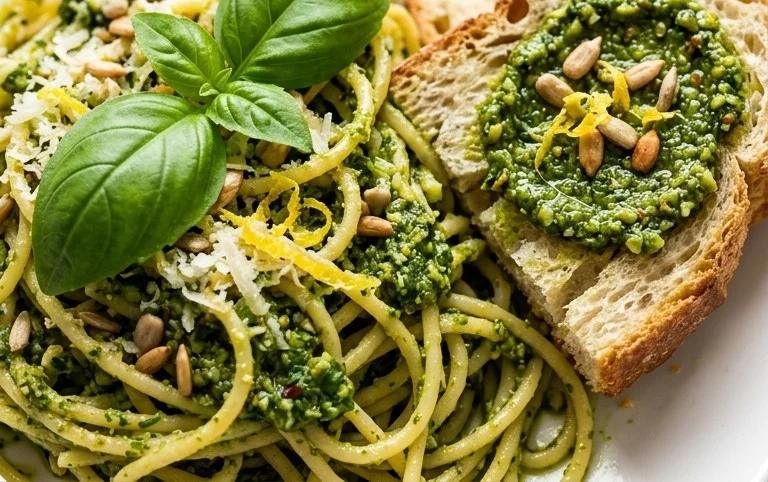
I hope you’ve enjoyed learning how to make this delightful nut-free pesto! It’s a fantastic recipe because it caters to common allergies while delivering all the vibrant, herbaceous flavor we love from traditional pesto. The absence of nuts doesn’t compromise the taste; instead, it opens up a world of delicious possibilities for everyone at your table. This versatile nut-free pesto is perfect tossed with your favorite pasta, spread on sandwiches, dolloped onto grilled chicken or fish, or even mixed into dips. Don’t be afraid to experiment with different herbs and seeds to create your own signature blend! I truly encourage you to give this recipe a try; you might just find it becomes a staple in your kitchen.
Frequently Asked Questions about Nut-Free Pesto:
Can I freeze this nut-free pesto?
Absolutely! This nut-free pesto freezes beautifully. Portion it into ice cube trays for easy single servings, or store larger amounts in airtight containers or freezer bags. It will keep its fresh flavor for up to 3-4 months in the freezer.
What can I use instead of basil if I don’t have it?
While basil is classic, this nut-free pesto is incredibly adaptable! You can successfully substitute arugula for a peppery kick, spinach for a milder flavor, or a combination of fresh parsley and mint for a different herbaceous profile. Get creative with your herb garden!
Is this recipe suitable for vegans?
Yes, the base recipe is vegan-friendly! The traditional pesto often uses Parmesan cheese. For a vegan version, simply omit the cheese or use a good quality vegan Parmesan alternative. The remaining ingredients are all plant-based and delicious.
Nut-Free Pesto
A simple and delicious nut-free pesto, perfect for pasta, sandwiches, or as a dip.
Ingredients
-
2 cups fresh basil
-
2 garlic cloves
-
1/2 cup freshly grated Parmesan cheese
-
1/4 cup olive oil
-
1/4 teaspoon salt
-
1/8 teaspoon pepper
Instructions
-
Step 1
Wash and thoroughly dry the fresh basil leaves. -
Step 2
Peel the garlic cloves. -
Step 3
Combine basil, garlic, Parmesan cheese, salt, and pepper in a food processor. -
Step 4
Pulse until the ingredients are roughly chopped. -
Step 5
With the food processor running, slowly drizzle in the olive oil until the pesto is smooth and well combined. -
Step 6
Taste and adjust seasoning if necessary.
Important Information
Nutrition Facts (Per Serving)
It is important to consider this information as approximate and not to use it as definitive health advice.
Allergy Information
Please check ingredients for potential allergens and consult a health professional if in doubt.