Easy Homemade Fruit Leather Recipe-Naturally Sweet Treat
Homemade fruit leather is a delightful treat that instantly transports me back to sun-drenched afternoons and the simple joy of pure, unadulterated fruit flavor. Forget those store-bought versions loaded with artificial colors and preservatives; making your own fruit leather is an incredibly rewarding experience. It’s a fantastic way to use up an abundance of seasonal fruits, reducing waste and creating something truly wholesome for my family. What makes this homemade fruit leather recipe so special is its incredible versatility. You can experiment with countless fruit combinations, from classic strawberry-banana to exotic mango-lime. The process itself is surprisingly easy, involving just a few simple steps and a little patience. The result? A chewy, intensely flavorful snack that’s packed with natural goodness. Get ready to unleash your inner fruit artisan and craft your own delicious batches of homemade fruit leather!
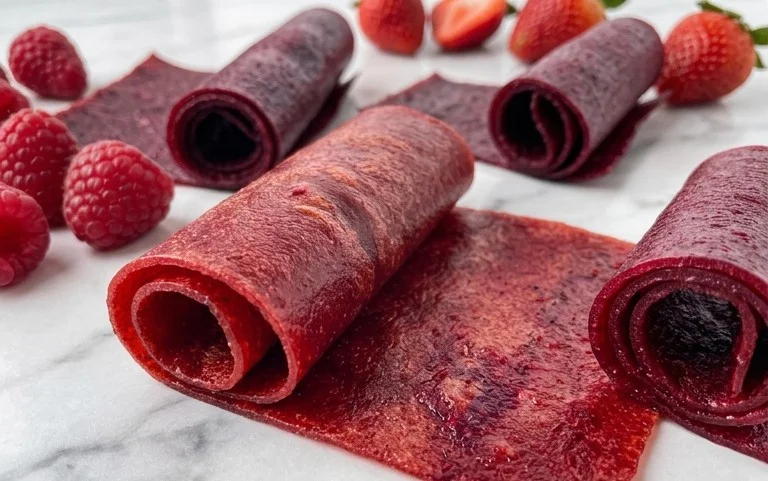
Homemade Fruit Leather Recipe
There’s something incredibly satisfying about making your own fruit leather. It’s a simple, healthy, and delicious snack that’s perfect for lunchboxes, road trips, or just a sweet treat to curb a craving. Forget those store-bought versions loaded with artificial ingredients and excessive sugar; this homemade fruit leather is pure, unadulterated fruity goodness. Plus, it’s surprisingly easy to make, requiring minimal effort for maximum deliciousness. I love using seasonal fruits for this recipe, allowing me to experiment with different flavor combinations throughout the year.
Ingredients:
Equipment You’ll Need:
Instructions:
Prepare Your Fruit and Oven
First things first, let’s get our fruit ready. Wash your chosen fruit thoroughly and chop it into manageable pieces. If you’re using apples or pears, you can leave the skin on for extra fiber and flavor, but be sure to core them. For softer fruits like berries or ripe peaches, a quick rinse is usually sufficient. Once your fruit is prepped, preheat your oven to its lowest setting, typically around 170°F (77°C). This low and slow cooking method is crucial for dehydrating the fruit without actually baking it, which preserves its vibrant color and nutrients. Line a baking sheet with parchment paper or a silicone baking mat. This is essential to prevent your fruit leather from sticking, which can be a real frustration. Ensure the liner covers the entire surface of the baking sheet.
Blend It Up!
Now, it’s time to transform our chopped fruit into a smooth puree. Place your chopped fruit into a blender or food processor. Add the 3 tablespoons of white sugar. The sugar not only adds a touch of sweetness but also helps with preservation and achieving that classic chewy texture. Finally, squeeze in the juice of half a lemon. The lemon juice serves a couple of important purposes: it brightens the fruit’s flavor, preventing it from tasting flat, and its acidity acts as a natural preservative, further enhancing the shelf life of your fruit leather. Blend everything together until you achieve a completely smooth and lump-free puree. You want a consistency similar to applesauce or a thick smoothie. If your fruit is particularly fibrous, you might need to blend for a bit longer.
Spread the Love (and the Puree)
Carefully pour the fruit puree onto the prepared baking sheet. Using a spatula, gently spread the puree evenly across the entire surface of the parchment paper or silicone mat. Aim for a consistent thickness, about ¼ inch. This is important because if the layer is too thick in some areas and too thin in others, it will dry unevenly, leading to some parts being perfectly leathery and others being too dry or still sticky. Take your time with this step; it’s the foundation of your delicious fruit leather. Gently tilt the baking sheet or use the back of your spatula to smooth out any bumps or ridges.
The Patient Dehydration Process
Once your fruit puree is spread, carefully place the baking sheet into your preheated oven. Now comes the hardest part: waiting! You’ll need to let the fruit leather dehydrate for a significant amount of time, typically between 6 to 12 hours. The exact time will depend on the moisture content of your fruit, the thickness of your spread, and the humidity in your kitchen. After about 4 hours, start checking on it every hour or so. You’re looking for the fruit leather to be firm to the touch, no longer sticky, and with a slightly leathery appearance. It should peel away cleanly from the parchment paper. If you find it’s drying too quickly on the edges and is still wet in the center, you can carefully rotate your baking sheet.
Cool, Cut, and Enjoy!
Once your fruit leather is fully dehydrated and feels leathery and dry, carefully remove the baking sheet from the oven. Let the fruit leather cool completely on the baking sheet. This is another crucial step; trying to cut or roll warm fruit leather will likely result in a sticky mess. Patience is key here! Once it’s completely cool, you can gently peel the entire sheet of fruit leather off the parchment paper. Now, it’s time to cut it into your desired shapes. You can cut it into strips using a pizza cutter or a sharp knife. Alternatively, you can use cookie cutters for fun shapes, especially if you’re making them for children. Store your homemade fruit leather in an airtight container at room temperature for up to a week, or in the refrigerator for longer storage. You can also roll up the strips in parchment paper for individual servings, making them perfect for on-the-go snacking. Enjoy your delicious, homemade creation!
Conclusion:
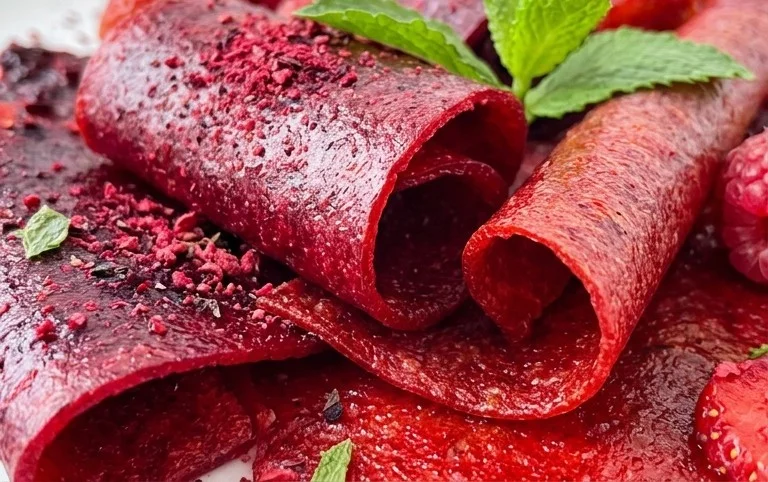
Making your own homemade fruit leather is an incredibly rewarding and surprisingly simple process. You’ll be amazed at how easily you can transform fresh or frozen fruit into delicious, chewy strips bursting with natural flavor. It’s a fantastic way to use up seasonal produce, reduce food waste, and create a healthy, satisfying snack that everyone will love. The vibrant colors and the pure fruit taste make this a truly special treat. Don’t be intimidated; this recipe is forgiving and yields fantastic results even for begin extractners. So go ahead, gather your favorite fruits, and give this delightful homemade fruit leather recipe a try. You’ll wonder why you didn’t make it sooner!
Serving suggestions are endless! Enjoy it as a wholesome snack on its own, pack it in lunches for a sweet surprise, or even chop it up and sprinkle it over yogurt or ice cream for a fun topping. The versatility is part of its charm.
Feel free to experiment with different fruit combinations. Berries, apples, pears, peaches, and mangoes all work wonderfully. You can also add a touch of cinnamon, gin extractger, or even a squeeze of lemon or lime juice for extra flavor dimensions.
Frequently Asked Questions about Homemade Fruit Leather:
Q1: How long does homemade fruit leather typically take to dehydrate?
The dehydration time can vary significantly depending on your oven temperature, the thickness of your fruit puree, and the humidity in your kitchen. Generally, it can take anywhere from 4 to 8 hours, or even longer. You’re looking for the leather to be firm and no longer sticky to the touch.
Q2: Can I make fruit leather without a dehydrator?
Absolutely! As detailed in the recipe, you can use a conventional oven set to its lowest temperature, often around 170°F (75°C) or even lower if your oven allows. Just be sure to prop the oven door open slightly to allow moisture to escape.
Q3: How should I store homemade fruit leather?
Once completely cooled and cut into strips, you can roll them up and wrap them individually in parchment paper or plastic wrap. Store the wrapped fruit leather in an airtight container at room temperature for up to two weeks, or in the refrigerator for longer storage.
Homemade Fruit Leather
A simple and delicious recipe for homemade fruit leather using fresh fruit, sugar, and lemon juice. Perfect for snacks!
Ingredients
-
2 cups fruit, chopped
-
3 tbsp white sugar
-
½ whole lemon, just the juice
-
1 cup water
-
1 tsp vanilla extract
-
1 pinch salt
Instructions
-
Step 1
Puree the chopped fruit in a blender or food processor until smooth. -
Step 2
In a saucepan, combine the fruit puree, white sugar, lemon juice, and water. Stir well. -
Step 3
Cook over medium heat, stirring occasionally, until the mixture thickens to a jam-like consistency. This will take about 15-20 minutes. -
Step 4
Stir in the vanilla extract and salt. -
Step 5
Pour the mixture onto a parchment-lined baking sheet, spreading it thinly and evenly. Aim for about 1/8 inch thickness. -
Step 6
Bake in a preheated oven at 170°F (75°C) for 3-5 hours, or until the fruit leather is no longer sticky to the touch. The baking time will vary depending on the thickness and fruit used. -
Step 7
Once cooled, peel the fruit leather off the parchment paper and cut into strips or desired shapes.
Important Information
Nutrition Facts (Per Serving)
It is important to consider this information as approximate and not to use it as definitive health advice.
Allergy Information
Please check ingredients for potential allergens and consult a health professional if in doubt.