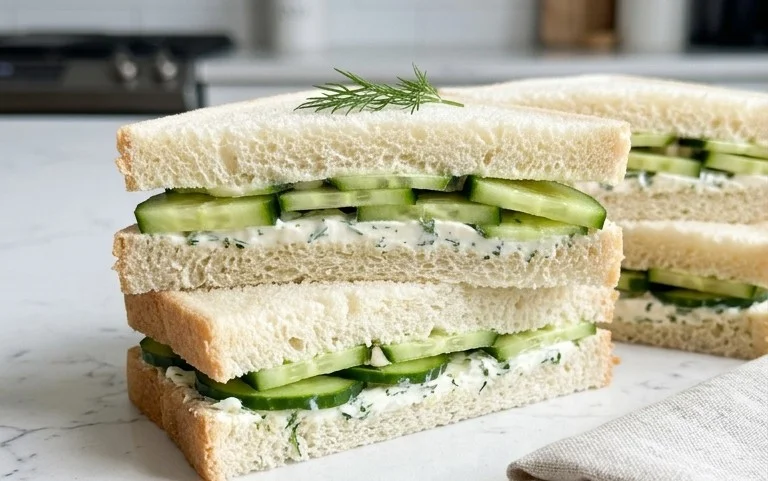
Cucumber Sandwiches- Easy Refreshing Picnic Perfect
Cucumber sandwiches are more than just a light bite; they are a whisper of elegance, a timeless classic that evokes images of sun-drenched afternoons and refined gatherings. There’s a reason these simple yet sophisticated creations have endured through generations. Perhaps it’s their refreshing simplicity, the way the cool, crisp cucumber provides a perfect counterpoint to soft, yielding bread and creamy spreads. Or maybe it’s the sheer versatility – effortlessly transitioning from a humble picnic staple to a star player at afternoon tea. What truly makes a cucumber sandwich special is its ability to feel both incredibly indulgent and wonderfully wholesome all at once. It’s a testament to the power of quality ingredients and thoughtful preparation, proving that sometimes, the most delightful flavors are born from the most straightforward combinations. Get ready to elevate your sandwich game with this delightful take on the beloved cucumber sandwich.
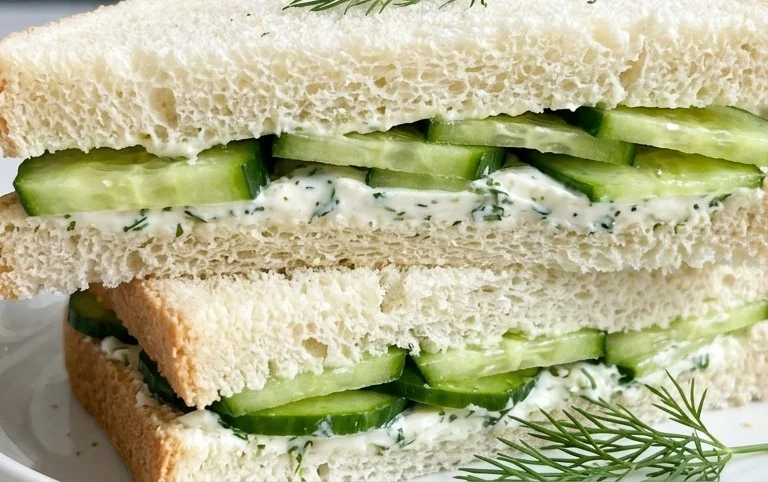
Cucumber Sandwiches
Ah, the cucumber sandwich. It’s a timeless classic, a whisper of elegance and refreshing simplicity. Perfect for afternoon tea, a light lunch, or even a sophisticated picnic, these delicate sandwiches are surprisingly easy to make and deliver an explosion of cool, crisp flavor. Forget bland, boring sandwiches; this recipe elevates the humble cucumber to star status, transforming it into a delightful culinary experience. I love making these when the weather turns warm, as they are so incredibly refreshing. The secret lies in the creamy, herb-infused filling and the perfect balance of textures. Let’s get started on creating these delightful bites!
Ingredients:
Preparing the Filling
The heart of any great cucumber sandwich is its filling, and ours is no exception. We’ll combine creamy, tangy elements with fresh, vibrant herbs to create a spread that’s both luxurious and light.
Step 1: Crafting the Creamy Base
Begin extract by taking your 8 ounces of softened cream cheese and placing it into a medium-sized mixing bowl. Ensure your cream cheese is truly softened; this will make it much easier to incorporate with the other ingredients and avoid any lumpy textures. You can leave it on the counter for about an hour, or if you’re in a hurry, a quick few seconds in the microwave on a low setting can help. To this, add the 1/4 cup of mayonnaise. The mayonnaise adds a lovely silkiness and a subtle richness that complements the cream cheese beautifully. Using a spatula or a whisk, vigorously mix the cream cheese and mayonnaise together until they are completely smooth and well combined. You want a homogenous mixture with no streaks of either ingredient visible.
Step 2: Infusing with Fresh Herbs and Zest
Now comes the fragrant part! Finely mince your fresh dill and chives. The key here is “minced” – you want small, delicate pieces that will distribute evenly throughout the filling and provide bursts of fresh flavor. Add 1 tablespoon of the minced fresh dill and 1 tablespoon of the minced fresh chives to the cream cheese and mayonnaise mixture. The dill offers a subtle anise-like sweetness, while the chives provide a mild oniony bite. Both are classic partners to cucumber and contribute to the sandwich’s refreshing profile. Next, add 1 tablespoon of fresh lemon juice. The lemon juice is crucial; it brightens up all the flavors, cuts through the richness of the dairy, and adds a delightful tang. Finally, season your filling with 1/4 teaspoon of garlic powder for a hint of savory depth (you don’t want an overpowering garlic flavor, just a whisper), 1/4 teaspoon of coarse salt, and a generous pinch of cracked black pepper to taste. Use your spatula to mix everything thoroughly until all the ingredients are evenly distributed. Taste a tiny bit (off the spatula, of course!) and adjust seasonings if needed – perhaps a little more salt or pepper depending on your preference.
Assembling the Sandwiches
With our luscious filling ready, it’s time to assemble these beautiful cucumber sandwiches. This is where the magic truly happens, transforming simple ingredients into elegant bites.
Step 3: Preparing the Bread and Cucumber
Take your 16 slices of high-quality soft white sandwich bread. The softness of the bread is important for that classic, delicate texture. Carefully remove the crusts from all 16 slices. You can do this with a sharp knife. Don’t discard the crusts; they can be saved for breadcrum extractbs! Now, let’s prepare our star ingredient: the English cucumber. English cucumbers are ideal because they have fewer seeds and a thinner skin, which means less waste and a more refined texture. Wash the cucumber thoroughly. You can choose to peel it or leave the skin on; both options are delicious. If you leave the skin on, you’ll get a lovely green fleck in your sandwich. Slice the cucumber as thinly as possible. A mandoline slicer is excellent for achieving uniform, paper-thin slices, but a sharp knife will also work. The thinner the slices, the more tender they will be and the better they will meld with the filling.
Step 4: Layering the Flavors
Lay out your 16 crustless bread slices on a clean work surface. Spread a generous, even layer of the prepared cream cheese mixture onto one side of each bread slice. Don’t be shy; this is where the creamy deliciousness comes from! Aim for a coating that’s about 1/8 inch thick. On half of these bread slices (so, 8 slices), carefully arrange a single layer of your thinly sliced cucumber. Make sure the cucumber slices overlap slightly to ensure you get a bite of cucumber in every mouthful. The goal is a neat, uniform layer.
Step 5: Completing and Chilling the Sandwiches
Take the remaining 8 bread slices, which have been spread with the cream cheese mixture, and place them cream-cheese-side down onto the cucumber-topped slices, effectively making 8 complete sandwiches. Gently press down on each sandwich to help the layers adhere and to create a more compact, tidy package. Now, for the crucial chilling step. Wrap each sandwich individually in plastic wrap, or stack them and wrap the entire stack tightly. Place the wrapped sandwiches in the refrigerator for at least 30 minutes. This chilling period is essential. It allows the flavors to meld together, the bread to absorb a little moisture from the filling (but not become soggy!), and the sandwiches to firm up, making them much easier to slice neatly.
Step 6: The Final Presentation
After chilling, unwrap your sandwiches. To achieve those perfect, elegant shapes, you can cut each sandwich in half diagonally, creating two triangles, or into three finger-like rectangles. A sharp serrated knife works best for clean cuts. You can also use cookie cutters to create fun shapes if you’re serving these to children or for a special occasion. Serve immediately and enjoy the delightful taste of summer! These cucumber sandwiches are best enjoyed the day they are made, but they can be stored, tightly wrapped, in the refrigerator for up to 24 hours.
Conclusion:
And there you have it – a truly delightful and refreshingly simple recipe for classic cucumber sandwiches! These elegant bites are perfect for any occasion, from a light lunch to a sophisticated tea party. Their understated elegance and crisp, cool flavor make them an instant crowd-pleaser. The beauty of this recipe lies in its simplicity; it’s incredibly easy to master, allowing you to whip up a batch in no time at all.
Serve these delightful cucumber sandwiches alongside a pot of fragrant tea, a glass of lemonade, or as part of a larger spread with scones and other delicate pastries. For variations, consider adding a whisper of fresh dill or mint to the cream cheese spread, or even a thin slice of smoked salmon for an extra touch of luxury. Don’t be afraid to experiment! I truly encourage you to try this recipe; it’s a wonderful way to bring a touch of effortless charm to your table.
Frequently Asked Questions:
What kind of bread is best for cucumber sandwiches?
While white bread is traditional and creates a lovely soft texture, a good quality whole wheat or a light rye can also be delicious. The key is to use bread that is fresh but not so soft that it will tear easily. Removing the crusts is optional, but adds to the classic presentation.
Can I make cucumber sandwiches ahead of time?
You can prepare the cream cheese mixture and slice the cucumbers ahead of time. However, to prevent the bread from becoming soggy, it’s best to assemble the sandwiches no more than an hour or two before serving. Ensure the cucumbers are patted dry before adding them to the bread.
What other fillings pair well with cucumber?
Beyond the classic, consider adding a thin layer of cream cheese mixed with chives, a touch of lemon zest, or even a sprinkle of paprika for a hint of color and flavor. A very thin layer of mayonnaise can also be used in place of or in addition to cream cheese.
Cucumber Sandwiches
Classic and refreshing cucumber sandwiches perfect for afternoon tea or light luncheons.
Ingredients
-
16 slices high-quality soft white sandwich bread (about 1 loaf), crusts removed
-
1 English cucumber
-
8 ounces cream cheese (softened)
-
1/4 cup mayonnaise
-
1 tablespoon minced fresh dill
-
1 tablespoon minced fresh chives
-
1 tablespoon lemon juice
-
1/4 teaspoon garlic powder
-
1/4 teaspoon coarse salt
-
Cracked black pepper (to taste)
Instructions
-
Step 1
Thinly slice the English cucumber. You can peel it if you prefer, but it’s not strictly necessary. -
Step 2
In a medium bowl, combine the softened cream cheese, mayonnaise, minced fresh dill, minced fresh chives, lemon juice, garlic powder, and coarse salt. Stir until well combined and smooth. -
Step 3
Season the cream cheese mixture generously with cracked black pepper to taste. -
Step 4
Spread a generous layer of the cream cheese mixture onto one side of each slice of white sandwich bread. -
Step 5
Arrange the cucumber slices evenly over the cream cheese mixture on half of the bread slices. -
Step 6
Top with the remaining bread slices, cream cheese side down, to form sandwiches. Gently press down. -
Step 7
Cut the sandwiches into desired shapes (triangles or rectangles). Serve immediately.
Important Information
Nutrition Facts (Per Serving)
It is important to consider this information as approximate and not to use it as definitive health advice.
Allergy Information
Please check ingredients for potential allergens and consult a health professional if in doubt.