Easy Blackberry Hand Pies Recipe – Deliciously Sweet
Blackberry hand pies are a delightful journey for the taste buds, and I’m so excited to share my favorite recipe with you today! Imagin extracte flaky, golden pastry cradling a warm, bursting filling of sweet and tart blackberries. It’s no wonder these individual treasures are universally loved. The beauty of a hand pie lies in its perfect portability and inherent charm. They’re little parcels of pure comfort, ideal for picnics, afternoon tea, or just a sweet treat to brighten your day. What truly sets these blackberry hand pies apart is the balance of flavors – the slight tang of the berries beautifully complementing the buttery, tender crust. They’re simple enough for a begin extractner baker but sophisticated enough to impress, making them a truly special dessert that you’ll want to make again and again.
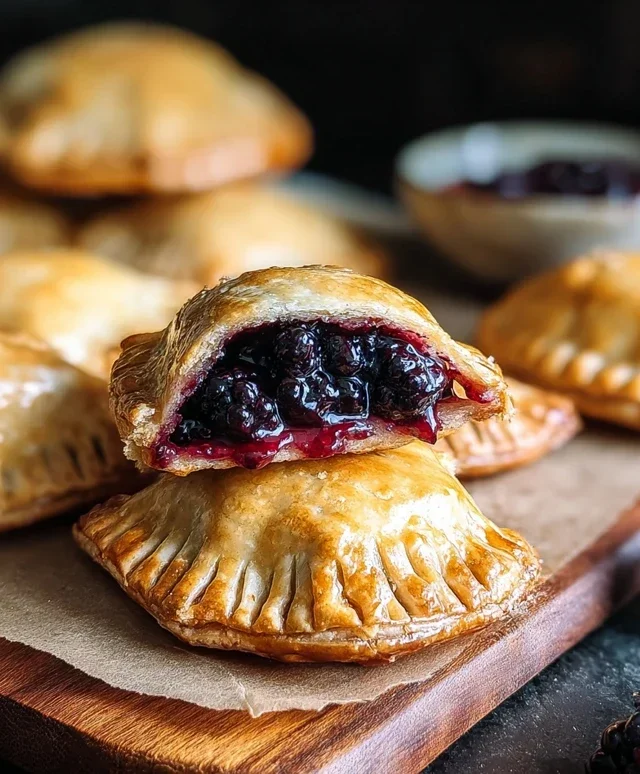
Blackberry Hand Pies
There’s something incredibly satisfying about a warm, portable pastry filled with sweet, slightly tart fruit. Blackberry hand pies are just that – little pockets of deliciousness that are perfect for breakfast, a snack, or even a simple dessert. They’re surprisingly easy to make, especially when you have a little help from the pantry staples. These hand pies offer a delightful balance of flaky crust and juicy blackberry filling, all in a perfectly portioned package. Whether you’re a seasoned baker or just starting out, you’ll find these recipes approachable and the results undeniably rewarding.
The beauty of hand pies lies in their individual servings. No need to slice and serve; everyone gets their own little treasure. Plus, they’re fantastic for picnics, lunchboxes, or simply enjoying with a cup of coffee or tea. The slightly tart burst of blackberries is wonderfully complemented by a sweet glaze, creating a flavor combination that’s simply irresistible. Let’s get started on creating these delightful treats!
Ingredients:
Preparing the Filling and Dough
Before we start assembling, it’s important to have your ingredients ready. Open the can of blackberry pie filling and give it a quick stir. Sometimes the filling can separate a bit in the can, and a gentle stir ensures a consistent texture for your pies. If you prefer a slightly thicker filling, you can let it sit in a colander for about 10-15 minutes to drain off any excess liquid, though this is often not necessary with most commercial pie fillings.
Next, carefully unroll your refrigerated pie crusts. It’s best to let them sit at room temperature for about 10-15 minutes as directed on the packagin extractg. This makes them more pliable and less likely to crack when you’re working with them. If you find your crust is still a bit stiff, gently working with it in your hands for a minute or two can help. We want a smooth, workable dough for creating beautiful hand pies.
Assembling the Hand Pies
1. Lay one of the pie crusts flat on a lightly floured surface. Using a round cookie cutter or the rim of a glass, cut out as many circles as possible. Aim for a diameter of about 4-5 inches. You’ll likely get about 6-8 circles from one crust, depending on the size of your cutter. Gently re-roll the scraps once to cut out any remaining circles, but avoid overworking the dough, as this can make the crust tough.
2. Place a heaping tablespoon of the blackberry pie filling onto one half of each dough circle. Be careful not to overfill, or the filling will ooze out during cooking. Leave a small border around the edge of the dough, about ½ inch. This border will be crucial for sealing the pies.
3. Moisten the edge of the dough circle with a little bit of water using your finger or a pastry brush. This acts as a “glue” to help seal the two halves of the pie together. Now, take the other half of the dough circle and fold it over the filling, creating a half-moon shape. Press the edges firmly together to seal. You can crimp the edges with a fork for a decorative finish and an extra secure seal. Ensure there are no gaps where the filling can escape.
4. Using a sharp knife or a toothpick, cut a small vent or two on the top of each hand pie. This allows steam to escape during frying, preventing the pies from puffing up too much and potentially bursting. It also helps the crust to cook through evenly.
Frying the Hand Pies
Now for the fun part – turning these beauties into golden, crispy delights! You’ll need a medium-sized heavy-bottomed pot or a deep skillet for frying. Add enough vegetable oil to reach a depth of about 2-3 inches. Heat the oil over medium-high heat until it reaches approximately 350°F (175°C). If you don’t have a thermometer, you can test the oil by dropping a small piece of dough into it; it should sizzle and bubble immediately.
Gently slide 2-3 hand pies into the hot oil at a time, being careful not to overcrowd the pot. Overcrowding will lower the oil temperature, resulting in greasy pies. Fry the hand pies for about 2-3 minutes per side, or until they are golden brown and puffed up. Use a slotted spoon or spider strainer to carefully turn the pies over to cook the other side evenly. Once both sides are beautifully golden, remove the fried hand pies from the oil and place them on a wire rack set over a baking sheet. This allows excess oil to drip off, keeping the crust nice and crisp.
Glazing the Blackberry Hand Pies
While the hand pies are still warm (but not piping hot), it’s time to add that sweet finishing touch. In a small bowl, whisk together the powdered sugar, corn syrup, and water until you have a smooth, glossy glaze. The corn syrup helps to make the glaze shiny and prevents it from hardening too quickly. You can adjust the consistency by adding a tiny bit more water if it’s too thick, or a bit more powdered sugar if it’s too thin.
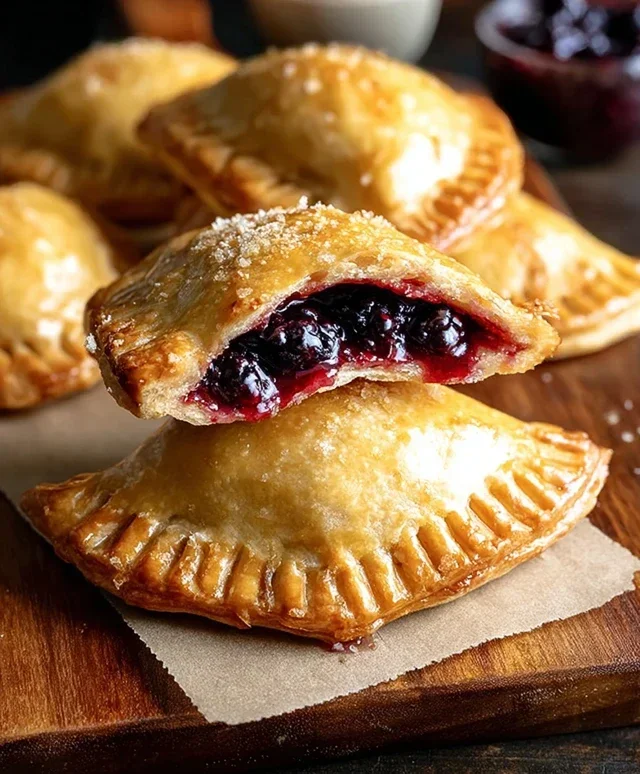
Drizzle the glaze generously over the warm hand pies. The warmth of the pies will help the glaze to melt slightly and coat them beautifully. You can also use a pastry brush to apply the glaze for more precise coverage. Let the glaze set for a few minutes before serving. The result is a wonderfully sweet, slightly crackly glaze that perfectly complements the tart blackberry filling and flaky crust. Enjoy these delightful blackberry hand pies while they’re still warm for the ultimate experience!
Conclusion:
I hope you’re as excited as I am to whip up these delicious blackberry hand pies! They truly are a fantastic treat – the perfect balance of flaky, buttery crust and a sweet, slightly tart blackberry filling. They’re relatively simple to make, making them an approachable dessert for bakers of all skill levels. The individual portions make them ideal for picnics, potlucks, or simply enjoying as a personal indulgence with your afternoon tea or coffee.
These hand pies are wonderfully versatile. Serve them warm, perhaps with a scoop of vanilla ice cream or a dollop of whipped cream for an extra decadent touch. For a simpler approach, a dusting of powdered sugar is also lovely. Don’t be afraid to experiment with variations! You could try adding a pinch of cinnamon or nutmeg to the filling for warmth, or even a splash of lemon zest to brighten the blackberry flavor even further. If blackberries aren’t in season, feel free to substitute with other berries like raspberries or blueberries, or a mix of your favorites.
I strongly encourage you to give these blackberry hand pies a try. I’m confident they’ll become a go-to recipe for you. Enjoy the process and the incredibly rewarding, delicious result!
Frequently Asked Questions:
Can I make the dough ahead of time?
Absolutely! The pie dough can be made up to 2-3 days in advance and stored, well-wrapped, in the refrigerator. It’s often even easier to work with when it’s slightly chilled. You can also freeze the dough for up to a month, just be sure to thaw it completely in the refrigerator before rolling.
How should I store leftover hand pies?
Leftover blackberry hand pies can be stored in an airtight container at room temperature for up to 2 days, or in the refrigerator for up to 4-5 days. For the best texture, gently reheat them in a warm oven or toaster oven before serving.
What if my filling seems too watery?
If your blackberry filling seems a little too thin after cooking, you can thicken it further. Remove the filling from the heat and stir in a slurry made from 1 teaspoon of cornstarch mixed with 1 tablespoon of cold water. Return to low heat and stir constantly until thickened, then let it cool completely before assembling the pies.
Blackberry Hand Pies
Delicious and easy blackberry hand pies perfect for a quick dessert or snack. Fried to golden perfection and drizzled with a sweet glaze.
Ingredients
-
21 oz. can blackberry pie filling
-
1 package refrigerated pie crust
-
1/2 cup powdered sugar
-
1 teaspoon corn syrup
-
1 tablespoon water
-
Vegetable oil for frying
Instructions
-
Step 1
Prepare the pie crusts according to package directions, typically unrolling and cutting into circles. -
Step 2
Spoon about 2 tablespoons of blackberry pie filling onto one half of each pie crust circle. -
Step 3
Fold the other half of the pie crust over the filling to create a half-moon shape. Crimp the edges with a fork to seal. -
Step 4
Heat vegetable oil in a skillet over medium heat. Carefully place the hand pies into the hot oil, ensuring not to overcrowd the pan. -
Step 5
Fry the hand pies for about 3-5 minutes per side, until golden brown and crispy. -
Step 6
While the pies are frying, whisk together the powdered sugar, corn syrup, and water in a small bowl to create a glaze. -
Step 7
Remove the fried hand pies from the oil and place them on a wire rack to drain any excess oil. Drizzle with the prepared glaze.
Important Information
Nutrition Facts (Per Serving)
It is important to consider this information as approximate and not to use it as definitive health advice.
Allergy Information
Please check ingredients for potential allergens and consult a health professional if in doubt.