Perfect Grilled Pizza Recipe- Easy & Delicious
How to Make the Perfect Grilled Pizza: Forget soggy bottoms and unevenly cooked crusts. Today, we’re diving headfirst into the smoky, slightly charred, and utterly irresistible world of grilled pizza. There’s something undeniably primal and satisfying about transforming simple dough and toppings into a gourmet masterpiece right on your grill. What is it about grilled pizza that captures our hearts (and taste buds)? It’s the magic that happens when direct heat kisses the dough, creating an incredible crispiness that oven-baked pizzas often struggle to achieve. The smoky char imparts a depth of flavor that’s simply unparalleled. Plus, it’s the ultimate crowd-pleaser, a fantastic way to gather friends and family around the grill for a truly interactive and delicious meal. Get ready to elevate your pizza night to a whole new level with this foolproof guide to making the perfect grilled pizza.
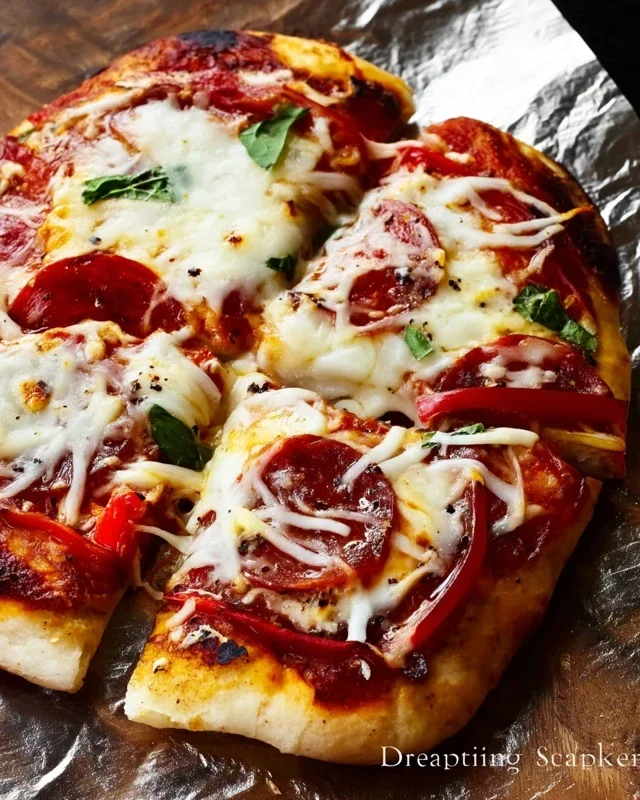
How to Make the Perfect Grilled Pizza
There’s something undeniably magical about pizza. And when you take that beloved comfort food and elevate it with the smoky char and subtle crispness of the grill, you achieve a whole new level of deliciousness. Forget soggy crusts and unevenly cooked toppings. Today, we’re diving into the art of making the perfect grilled pizza, a technique that’s surprisingly simple yet yields restaurant-quality results right in your backyard.
The beauty of grilled pizza lies in its speed and the intense heat of the grill. This allows the dough to puff up beautifully and develop a fantastic texture that’s both chewy and slightly crispy. Plus, it’s a fantastic way to entertain, as you can prep most of your ingredients ahead of time and then assemble and grill pizzas to order, keeping everyone happy and fed.
Ingredients:
Getting Started: Preparing Your Workspace and Dough
Before you even think about firing up the grill, it’s crucial to have everything prepped and ready. This is a fast-cooking process, so you don’t want to be scrambling for ingredients while your dough is on the heat.
First, let’s talk about the dough. If you’re using store-bought dough, allow it to come to room temperature for at least 30 minutes to an hour. This makes it much easier to stretch and handle without tearing. If you’ve made your own, ensure it has had its final proof.
Next, prepare your grilling station. You’ll want a clean grill with two heat zones: a direct heat zone (hot coals or burners on high) and an indirect heat zone (fewer coals or burners on medium-low). This is key for controlling the cooking and preventing burning.
On your counter, lay out a large piece of parchment paper or a clean, lightly floured surface. Sprinkle this surface liberally with cornmeal or flour. This will act as a non-stick barrier and give the bottom of your pizza a nice, rustic texture.
Now, let’s prep the toppings. Having everything sliced, diced, and ready to go in separate bowls is essential. Think about pre-cooking any meats like sausage or beef bacon to ensure they are fully cooked. For vegetables, slicing them thinly will help them cook quickly on the grill.
The Grilling Process: Step-by-Step
The actual grilling of the pizza is where the magic happens. It’s a quick process, so pay close attention.
1. Prepare the Grill and Dough: Preheat your grill to medium-high heat (around 400-450 degrees Fahrenheit). While the grill heats up, take your pizza dough and gently stretch it into your desired shape – a rough circle or rectangle works perfectly. Aim for about a 1/4-inch thickness. Be careful not to overwork the dough; if it springs back, let it rest for a few minutes before continuing. Once stretched, lay the dough onto your prepared cornmeal-dusted surface.
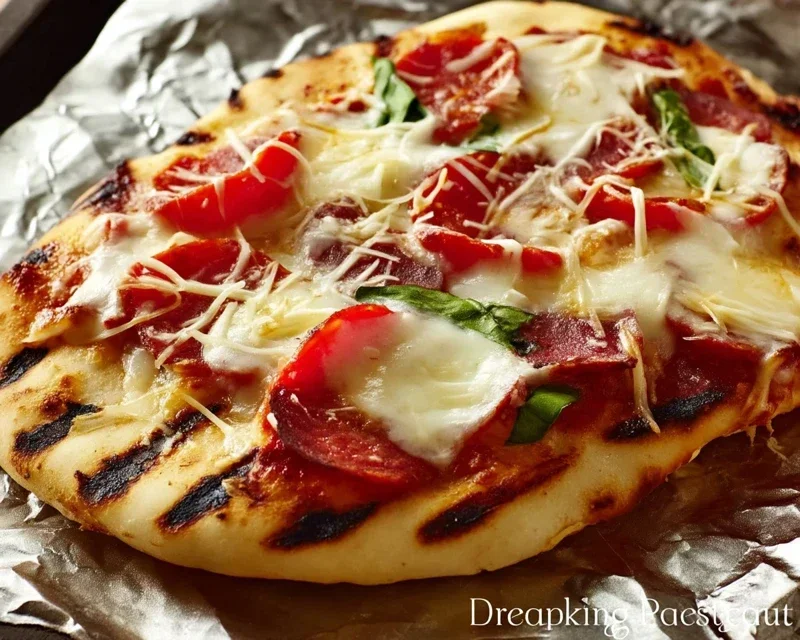
2. Grill One Side of the Dough: Carefully transfer the stretched dough directly onto the preheated grill grates over the direct heat zone. Brush the top side of the dough generously with olive oil. Close the grill lid and cook for 2 to 4 minutes, or until the bottom of the dough is golden brown and has developed grill marks. You’ll want to peek underneath to check for doneness. This initial grilling step is crucial for creating a sturdy base that won’t get soggy.
3. Flip and Sauce: Using a sturdy spatula or tongs, carefully flip the grilled dough over so the cooked side is now facing up. Immediately, and working quickly, spread your pizza sauce evenly over the cooked side, leaving a small border for the crust. Don’t overload the sauce, as too much moisture can lead to a soggy pizza.
4. Add Cheese and Toppings: Sprinkle the shredded mozzarella cheese evenly over the sauce. Then, artfully arrange your chosen toppings over the cheese. Again, resist the urge to pile on too many toppings, as this can prevent even cooking and make the pizza heavy. You want a balanced distribution that allows everything to cook through.
5. Finish Cooking on Indirect Heat: Once all your toppings are in place, carefully move the pizza from the direct heat zone to the indirect heat zone of the grill. Close the grill lid and continue to cook for another 5 to 8 minutes, or until the cheese is melted and bubbly, and the crust is golden brown and cooked through. The indirect heat will allow the toppings to cook and the cheese to melt without burning the bottom of the crust. You can rotate the pizza halfway through this stage if your grill has hot spots.
Serving Your Masterpiece
Once your grilled pizza is perfectly cooked, carefully slide it off the grill onto a cutting board. Let it rest for a minute or two before slicing. This allows the cheese to set slightly and prevents all the toppings from sliding off. Garnish with fresh basil leaves if desired.
Grilled pizza is best enjoyed immediately, hot off the grill. The contrast of the smoky, slightly charred crust with the melted cheese and fresh toppings is truly unbeatable. So gather your friends and family, fire up that grill, and prepare to be amazed by how simple yet spectacular a homemade grilled pizza can be. It’s a culinary adventure that’s incredibly rewarding and, most importantly, utterly delicious.
Conclusion:
There you have it – the secrets to crafting the perfect grilled pizza right in your own backyard! This method offers an unparalleled smoky char and a wonderfully crisp crust that you simply can’t achieve in a conventional oven. The beauty of this recipe lies in its simplicity and adaptability, allowing you to unleash your inner pizzaiolo with confidence. The high heat of the grill sears the dough beautifully, creating those desirable leopard spots and a delightful chew.
Serve your masterpiece hot off the grill with a fresh side salad, some garlic knots, or even a glass of your favorite Italian grape juice. Don’t be afraid to experiment with toppings! Think beyond the classic Margherita. Consider a white pizza with ricotta and spinach, a spicy sausage and pepper concoction, or even a dessert pizza with Nutella and fruit. The possibilities are truly endless, and the results are always delicious.
So, gather your ingredients, fire up the grill, and give this grilled pizza recipe a try. You’ll be amazed at how easy and rewarding it is to create restaurant-quality pizza at home. Happy grilling!
Frequently Asked Questions:
How do I prevent my pizza dough from sticking to the grill grates?
The key is to ensure your grill grates are clean and well-oiled. Before placing the dough, lightly brush the grates with a high-heat oil like canola or grapeseed oil. Also, work quickly once the dough is on the grill, and don’t try to move it too early – let it form a slight crust first.
What kind of dough works best for grilled pizza?
A good, sturdy pizza dough is essential. You can use your favorite homemade recipe or a high-quality store-bought dough. Look for one with a good gluten structure that can withstand the heat and the flipping process. Avoid overly wet or sticky doughs.
Can I grill my pizza on a charcoal grill?
Absolutely! A charcoal grill can provide even more intense heat and smoky flavor, which is fantastic for grilled pizza. Just ensure you have a consistent, medium-high heat zone before you start grilling.
The Perfect Grilled Pizza
Master the art of making delicious pizza on the grill with this simple recipe. Achieve a crispy crust and perfectly melted toppings.
Ingredients
-
Pizza dough
-
Olive oil
-
Tomato sauce
-
Mozzarella cheese
-
Pepperoni
-
Fresh basil
Instructions
-
Step 1
Preheat your grill to medium-high heat (around 400-450°F). Lightly oil the grill grates. -
Step 2
Stretch or roll out your pizza dough to your desired thickness and shape. -
Step 3
Brush one side of the dough generously with olive oil. Place the oiled side down on the hot grill grates. -
Step 4
Grill for 2-4 minutes, or until the bottom is golden brown and has grill marks. Flip the dough. -
Step 5
Quickly spread tomato sauce over the grilled side of the dough, then top with mozzarella cheese, pepperoni, and fresh basil. -
Step 6
Close the grill lid and cook for another 3-5 minutes, or until the cheese is melted and bubbly and the crust is fully cooked. -
Step 7
Remove from grill, let cool slightly, slice, and serve.
Important Information
Nutrition Facts (Per Serving)
It is important to consider this information as approximate and not to use it as definitive health advice.
Allergy Information
Please check ingredients for potential allergens and consult a health professional if in doubt.