Easter Bunny Coconut Tails- Easy & Delightful Recipe
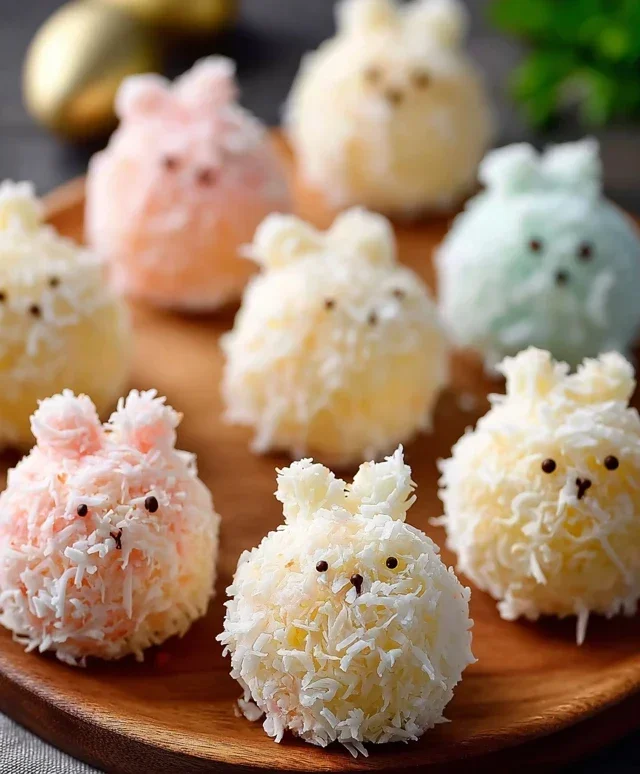
Easter Bunny Coconut Tails are about to become your new favorite springtime treat! These adorable, melt-in-your-mouth confections are more than just a dessert; they’re a delightful edible embodiment of everything we love about Easter. Imagin extracte the pure joy on the faces of your loved ones as they discover these fluffy, sweet delights, each one a miniature masterpiece. What makes these Easter Bunny Coconut Tails so utterly irresistible? It’s the perfect harmony of tender, shredded coconut, a touch of creamy sweetness, and that signature fluffy texture that mimics the softest bunny tail. They’re incredibly easy to make, making them a fantastic activity to do with kids, and they always disappear in a flash, leaving everyone wanting more. Get ready to hop into deliciousness with this simple yet spectacular recipe!
Easter Bunny Coconut Tails
These Easter Bunny Coconut Tails are an absolutely delightful and surprisingly easy treat to whip up for your Easter celebrations! They’re fluffy, sweet, and have that irresistible chewy coconut flavor that just screams springtime and fun. Imagin extracte a basket full of these adorable little tails, peeking out from behind chocolate eggs – pure Easter magic! They’re also a fantastic activity to get the kids involved in the kitchen. The simple shaping and decorating are perfect for little hands, and the joy on their faces when they see their creations come to life is truly rewarding. So, let’s get started and make some Easter magic!
Ingredients:
Making the Coconut Tails
This is where the magic really begin extracts to happen! We’re going to create a wonderfully pliable and fragrant coconut mixture that will be the base for our adorable bunny tails. It’s a simple process, but paying attention to a few details will ensure your tails are perfectly formed and delicious.
Melting the Base
1. In a medium, microwave-safe bowl, combine the mini marshmallows and the butter. Place this bowl in the microwave and heat on high for 30-second intervals, stirring well between each interval, until the marshmallows are completely melted and smooth. This usually takes about 1 to 1.5 minutes in total, depending on your microwave’s power. It’s important to stir thoroughly to ensure no lumpy bits of marshmallow remain and that the butter is fully incorporated. Be careful not to overheat, as this can make the mixture tough. Once melted and smooth, stir in the vanilla extract. The vanilla adds a lovely aroma and a subtle depth of flavor that complements the sweetness of the marshmallows and the coconut beautifully.
Incorporating the Coconut
2. Once your marshmallow mixture is smooth and fragrant, it’s time to add the star of the show: the shredded coconut! Add the 2 cups of shredded coconut to the melted marshmallow mixture. Using a sturdy spoon or a silicone spatula, stir everything together until the coconut is evenly coated and fully incorporated into the marshmallow fluff. This step requires a bit of elbow grease! You want to make sure every single strand of coconut is bound together by the sweet, sticky marshmallow mixture. The mixture will become quite thick and pliable, making it perfect for shaping. If it seems a little too stiff to mix, you can pop it back into the microwave for another 10-15 seconds, stirring vigorously afterwards. However, be cautious not to over-microwave at this stage, as it can lead to a drier, crum extractbly texture.
Shaping the Tails
3. Allow the coconut mixture to cool slightly until it’s comfortable to handle. This usually takes about 5-10 minutes. Once it’s cool enough, you can begin extract shaping your bunny tails. Take about 1-2 tablespoons of the coconut mixture at a time and roll it between your palms to form a roughly oval or slightly elongated ball, resembling a fluffy bunny tail. Don’t worry about making them perfectly uniform; a little bit of variation adds to their charm! As you shape them, place each tail onto a baking sheet lined with parchment paper. This prevents them from sticking and makes them easy to transport for the next step. You should aim to make them a consistent size so they bake and melt evenly in the next step.
Adding the White Chocolate “Fluff”
4. Now, it’s time to add that extra touch of sweetness and a delightful visual cue. Place the 1 cup of white chocolate chips in a small microwave-safe bowl. Microwave on 30-second intervals, stirring well after each interval, until the white chocolate is melted and smooth. Again, be careful not to overheat, as white chocolate can seize up if it gets too hot. Once melted, you’re going to lightly dip or drizzle the white chocolate onto the tops of your shaped coconut tails. You can use a fork or a small spoon for this. The idea is to mimic the fluffy, soft texture of a bunny’s tail. You don’t need to completely cover them; a light coating or a few dollops is perfect. This also helps to bind the tails together slightly. Return the baking sheet with the tails to the refrigerator for about 15-20 minutes, or until the white chocolate has set. This will firm up your tails nicely.
Decorating the Tails
5. Once the white chocolate has set and your coconut tails are firm, it’s time for the fun decorating part! Prepare your pink candy melts. You can melt them in a small microwave-safe bowl according to the package directions, usually in short bursts of 15-20 seconds, stirring in between, until smooth. You can also melt them in a double boiler if you prefer. Once melted, you can either dip the very tips of the coconut tails into the pink candy melts to create a little pink accent, or you can use a toothpick or a small piping bag to add little pink dots or swirls to resemble the underside of a bunny’s tail. Get creative! You can also add a tiny pink candy nose if you want to be extra fancy. Place the decorated tails back onto the parchment-lined baking sheet and allow the candy melts to set completely at room temperature or in the refrigerator for about 10 minutes.
These Easter Bunny Coconut Tails are now ready to be enjoyed! They are best stored in an airtight container at room temperature for a few days, or in the refrigerator for a slightly longer shelf life, although they might become a bit firmer when chilled. These sweet little treats are perfect for Easter baskets, a festive dessert table, or just a fun way to bring some springtime cheer into your kitchen. Enjoy every delightful bite!
Conclusion:
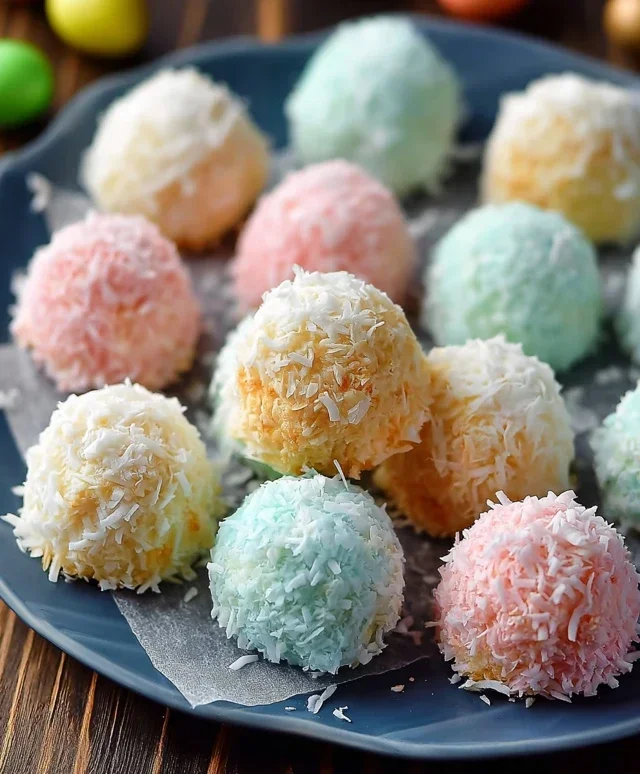
These Easter Bunny Coconut Tails are an absolutely delightful treat that’s sure to bring smiles to everyone’s faces this spring! They’re wonderfully simple to make, allowing you to create a beautiful and delicious addition to your Easter celebrations without a fuss. The combination of sweet, chewy coconut and the festive bunny shape makes them incredibly appealing, especially for little hands and eager eyes. They’re not just a dessert; they’re a charming centerpiece!
I highly recommend serving these adorable coconut tails alongside your Easter brunch or as part of your dessert spread. They pair beautifully with fresh fruit, pastel-colored cupcakes, or even a refreshing glass of lemonade. For a touch of extra elegance, dust them with a hint of edible glitter or add a few colorful sprinkles before the chocolate sets.
Don’t be afraid to get creative with variations! You can experiment with different types of chocolate for dipping – milk chocolate, dark chocolate, or even a white chocolate drizzle for a snow-like effect. For a richer flavor, try adding a touch of almond extract to the coconut mixture. The possibilities are endless! I truly encourage you to give this Easter Bunny Coconut Tails recipe a try. It’s a rewarding and fun baking project that will undoubtedly be a hit.
Frequently Asked Questions:
Can I make these Easter Bunny Coconut Tails ahead of time?
Absolutely! These coconut tails can be made 2-3 days in advance. Store them in an airtight container at room temperature. If it’s very warm, you might want to refrigerate them, but ensure they are completely set before storing to prevent condensation.
What if I don’t have coconut extract? Can I still get a good coconut flavor?
Yes, you can! While coconut extract enhances the flavor, the shredded coconut itself provides a strong coconut taste. If you’re missing extract, simply omit it. You could also add a tiny bit more vanilla extract to boost the overall sweetness and aroma of these Easter Bunny Coconut Tails.
Easter Bunny Coconut Tails
Sweet and fluffy coconut tails dipped in white chocolate, perfect for Easter.
Ingredients
-
2 cups shredded coconut
-
1½ cups mini marshmallows
-
¼ cup butter
-
1 teaspoon vanilla extract
-
1 cup white chocolate chips
-
Pink candy melts for decoration
Instructions
-
Step 1
In a microwave-safe bowl, combine shredded coconut, mini marshmallows, and butter. Microwave on high for 1 minute, stir, and microwave for another 30 seconds until marshmallows are melted and butter is incorporated. -
Step 2
Stir in the vanilla extract until well combined. The mixture will be sticky. -
Step 3
Let the mixture cool slightly, then shape it into small oval or tear-drop shapes resembling bunny tails. Place on parchment paper. -
Step 4
Melt the white chocolate chips according to package directions. Dip each coconut tail into the melted white chocolate, coating thoroughly. Place back on parchment paper. -
Step 5
Melt the pink candy melts according to package directions. Drizzle the melted pink candy over the white chocolate-dipped tails for a decorative touch. Allow the chocolate to set completely.
Important Information
Nutrition Facts (Per Serving)
It is important to consider this information as approximate and not to use it as definitive health advice.
Allergy Information
Please check ingredients for potential allergens and consult a health professional if in doubt.