Arugula Pear Salad – Fresh & Delicious Recipe
Arugula pear salad is a dish that truly sings with the seasons, a vibrant symphony of flavors and textures that I find myself craving year-round. It’s more than just a salad; it’s an experience. The peppery bite of fresh arugula, with its slightly bitter undertones, is perfectly balanced by the sweet, juicy crispness of ripe pears. This delightful contrast is a major reason why so many of us adore this simple yet sophisticated creation. What truly elevates this arugula pear salad is its effortless elegance and versatility. It’s the kind of dish that can be a light lunch on a sunny afternoon, a refreshing starter for a dinner party, or even a beautiful side to grilled chicken or fish. The inherent simplicity allows the quality of the ingredients to shine, making each bite a delightful surprise.
Why You’ll Love This Arugula Pear Salad
The Perfect Balance of Sweet and Peppery
This recipe is designed to be incredibly easy to follow, even for begin extractner cooks. We’ll walk through each step, ensuring you achieve that perfect balance every time.
Arugula Pear Salad
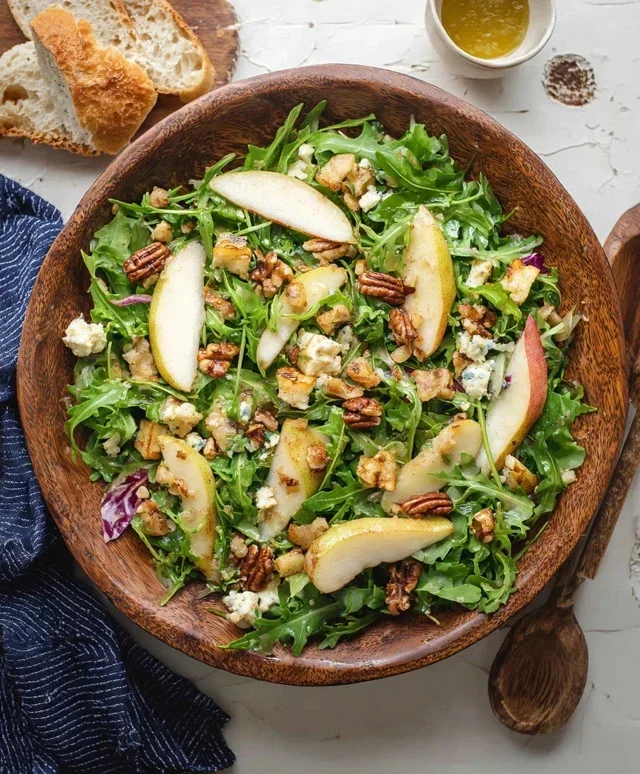
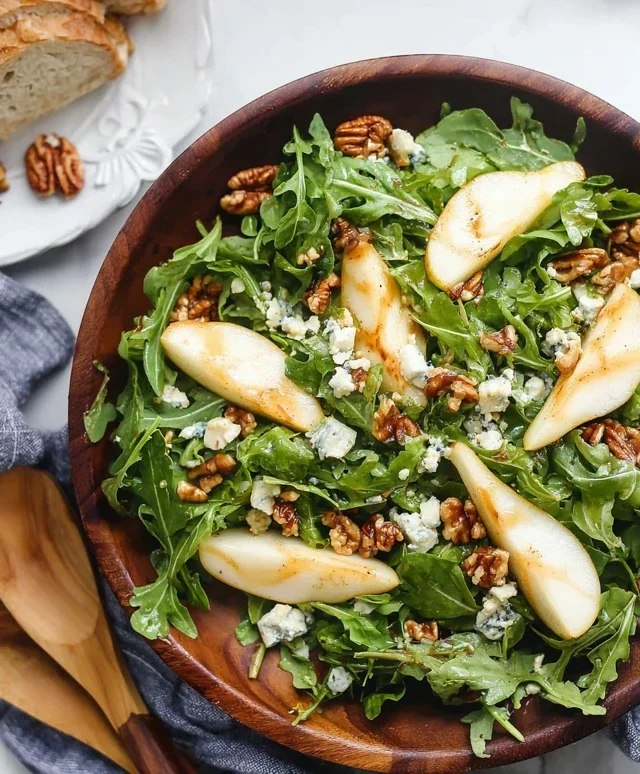
There are some dishes that just sing with seasonal freshness, and this Arugula Pear Salad is undeniably one of them. It’s a vibrant symphony of peppery greens, sweet, juicy pears, crunchy walnuts, and a delightful tang from the blue cheese, all brought together by a simple yet elegant dressing. This salad is incredibly versatile – it’s perfect as a light lunch, a refreshing starter to a more elaborate meal, or even as a side dish to grilled meats or roasted chicken. The beauty lies in its simplicity and the quality of its ingredients, which truly shine through. I find myself making this salad again and again, especially when pears are at their peak, and I’m always met with delighted compliments. Let’s get started on creating this culinary delight!
Ingredients:
Preparing Your Salad Components
The foundation of a great salad is in its preparation. We want each ingredient to be at its best. This initial step ensures everything comes together harmoniously.
Toasting the Walnuts
Toasting the walnuts is a crucial step that elevates their flavor and texture. Un-toasted walnuts can be a bit bland and chewy, but a quick toast brings out their natural oils, intensifying their nutty aroma and giving them a satisfying crunch.
1. Method for Toasting: You have a couple of excellent options here. My preferred method is using a dry skillet over medium-low heat. Place the walnuts in the skillet and stir them frequently. You’ll notice them starting to smell fragrant after about 5-7 minutes. They should be lightly golden, not dark brown. Another equally effective method is to toast them in a preheated oven at 350°F (175°C) for about 8-10 minutes, keeping a close eye on them to prevent burning. Once toasted, immediately remove them from the hot pan or baking sheet and spread them out on a plate to cool completely. This prevents them from continuing to cook and becoming bitter. Once cooled, you can gently break them into smaller pieces if you prefer, though leaving them whole or in halves is also lovely.
2. Preparing the Pears: The sweetness and juiciness of ripe pears are essential for this salad. Choose pears that are ripe but still firm enough to hold their shape when sliced. Varieties like Bosc, Anjou, or Bartlett are excellent choices. To prepare them, you can either core and slice them thinly, or if you prefer, peel them first. I often leave the peel on for added color and nutrients, but if you’re not a fan of pear skin, a gentle peel will do. To prevent the sliced pears from browning, especially if you’re preparing them ahead of time, you can toss them lightly with a tiny bit of lemon juice, though in this recipe, we’re typically assembling it fairly quickly, so it’s often not necessary. Ensure your slices are relatively uniform in thickness so they are pleasant to eat with each bite.
3. Washing and Drying the Arugula: Baby arugula has a distinct peppery bite that pairs beautifully with the sweetness of the pears. It’s important to wash it thoroughly to remove any grit and then dry it completely. Excess water will dilute the dressing and make your salad soggy. A salad spinner is your best friend here, but if you don’t have one, you can wash the arugula in a colander and then spread it out on clean kitchen towels or paper towels to pat it dry. Ensure there’s no visible moisture before adding it to the salad bowl.
4. Crum extractbles of Blue Cheese: The blue cheese adds a wonderful pungent and salty contrast to the sweetness of the fruit and the peppery greens. Choose a blue cheese that you enjoy – some are milder, while others are quite sharp. Crum extractble it into bite-sized pieces. If you’re not a huge fan of blue cheese, you can substitute it with feta cheese or goat cheese for a different but still delicious creamy and tangy element.
Crafting the Dressing
The dressing for this salad is a simple vinaigrette that complements, rather than overpowers, the main ingredients. It’s all about balance.
5. Whisking the Vinaigrette: In a small bowl, combine the extra virgin extract olive oil, apple cider vinegar, honey, Dijon mustard, fine salt, and black pepper. Whisk vigorously until the ingredients are well emulsified and the dressing is smooth and creamy. The honey adds a touch of sweetness that balances the tartness of the vinegar and the sharpness of the Dijon mustard. The Dijon mustard acts as an emulsifier, helping to bind the oil and vinegar together, and also adds a subtle depth of flavor. Taste the dressing and adjust the seasoning if needed – you might want a touch more honey for sweetness or a pinch more salt.
Assembling and Serving Your Salad
This is where all the beautiful components come together to create a masterpiece. The key is to assemble the salad just before serving to maintain the crispness of the arugula and pears.
1. Tossing the Salad: In a large salad bowl, gently combine the baby arugula, sliced pears, and crum extractbled blue cheese. Drizzle about half of the prepared vinaigrette over the salad. Toss gently to coat all the ingredients without bruising the delicate arugula leaves. Add more dressing as needed, tasting as you go, until the salad is lightly coated and flavorful. You might not need all of the dressing, depending on your preference.
2. Final Touches and Serving: Sprinkle the toasted walnuts over the top of the salad. Give it one last gentle toss to distribute the walnuts evenly. Serve immediately. This salad is best enjoyed fresh, so avoid making it too far in advance. For a beautiful presentation, you can plate individual servings and garnish with a few extra walnut pieces or a light sprinkle of blue cheese. This Arugula Pear Salad is a delightful celebration of textures and flavors, and I’m confident it will become a favorite in your recipe repertoire. Enjoy!
Conclusion:
I hope you’ve enjoyed learning how to create this delightful Arugula Pear Salad! This recipe is truly a winner because it strikes the perfect balance between peppery, sweet, and tangy flavors, all while being incredibly quick and easy to assemble. The fresh crunch of the arugula, the juicy sweetness of the ripe pears, and the creamy richness of the cheese create a harmonious bite that’s both refreshing and satisfying. It’s the ideal starter for a dinner party, a light lunch on a warm afternoon, or even a sophisticated side dish to accompany grilled chicken or fish. Don’t hesitate to get creative with your own twists – this salad is wonderfully versatile!
For serving, this Arugula Pear Salad shines as a standalone appetizer or as a vibrant side. It pairs beautifully with a simple vinaigrette, but feel free to explore richer dressings if you prefer. Consider adding toasted walnuts or pecans for extra texture and nuttiness, or perhaps some crum extractbled goat cheese for a creamier, tangier experience. The beauty of this salad lies in its adaptability, so make it your own! I truly encourage you to give this recipe a try; I’m confident it will become a fast favorite in your culinary repertoire.
Frequently Asked Questions:
Q: Can I make this Arugula Pear Salad ahead of time?
A: While it’s best enjoyed fresh for optimal texture, you can prepare most of the components ahead. Wash and dry the arugula, slice the pears just before serving to prevent browning, and have your dressing ready. Toss everything together right before you plan to eat to maintain the crispness.
Q: What other fruits can I substitute for pears?
A: Apples, especially crisp varieties like Honeycrisp or Fuji, make an excellent substitute. For a more tropical twist, you could also try sliced figs or even chunks of ripe mango.
Arugula Pear Salad
A refreshing salad featuring peppery arugula, sweet pears, crunchy walnuts, and tangy blue cheese, tossed in a simple vinaigrette.
Ingredients
-
½ cup (60 grams) walnuts, lightly toasted
-
3 juicy and ripe pears, sliced
-
5oz (150 grams) baby arugula
-
4oz (110 grams) blue cheese, crumbled
-
1 ½ tablespoon extra virgin olive oil
-
1 ½ tablespoon apple cider vinegar
-
2 teaspoons honey
-
½ teaspoons Dijon mustard
-
¼ teaspoon fine salt
-
⅛ teaspoon black pepper
Instructions
-
Step 1
In a large bowl, combine the arugula, sliced pears, toasted walnuts, and crumbled blue cheese. -
Step 2
In a small bowl, whisk together the extra virgin olive oil, apple cider vinegar, honey, Dijon mustard, fine salt, and black pepper until well combined. -
Step 3
Pour the dressing over the salad ingredients. -
Step 4
Gently toss the salad to evenly coat all ingredients with the dressing. -
Step 5
Serve immediately.
Important Information
Nutrition Facts (Per Serving)
It is important to consider this information as approximate and not to use it as definitive health advice.
Allergy Information
Please check ingredients for potential allergens and consult a health professional if in doubt.