No-Bake Peanut Butter Energy Bites Quick Recipe
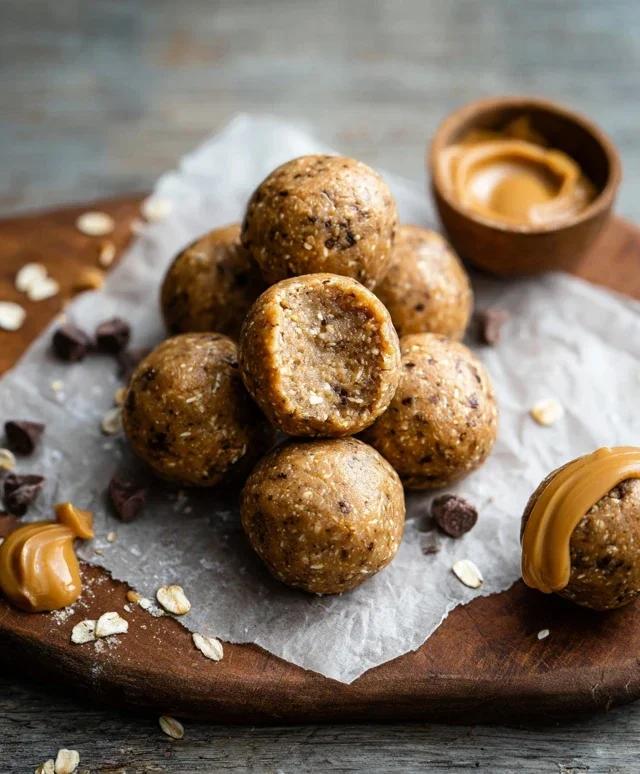
No-Bake Peanut Butter Energy Bites are about to become your new best friend when that mid-afternoon slump hits or you need a quick, wholesome snack. Seriously, who has time to wait for an oven to preheat when deliciousness is just a few stirs away? These delightful little spheres are incredibly popular for a reason: they deliver a satisfying punch of flavor and sustained energy without any fuss. What makes these No-Bake Peanut Butter Energy Bites so special is their effortless simplicity and versatility. Imagin extracte the perfect blend of creamy peanut butter, wholesome oats, and a hint of sweetness, all rolled into perfectly portioned morsels ready to fuel your day. They’re the ultimate grab-and-go solution for busy lives, and the best part? You can customize them with your favorite add-ins to make them uniquely yours. Get ready to conquer your cravings and power through your day with these sensational bites.
No-Bake Peanut Butter Energy Bites
Feeling that afternoon slump? Or maybe you’re looking for a quick, healthy snack to fuel your workouts or keep the kids happy between meals? I’ve got you covered with these incredibly easy No-Bake Peanut Butter Energy Bites. They’re so simple to whip up, requiring absolutely no oven time, and they’re packed with deliciousness and wholesome goodness. These little powerhouses are perfect for grabbing on the go, adding to lunchboxes, or simply enjoying as a sweet treat without the guilt. The best part? You probably already have most of the ingredients in your pantry! Let’s get started on creating these delightful little spheres of energy.
Ingredients:
Instructions:
Prepare Your Workspace and Gather Ingredients: The first step in creating these amazing energy bites is to make sure you have everything ready to go. Find a medium-sized mixing bowl. Open your container of quick oats and measure out a ½ cup. Quick oats are ideal here because they break down nicely and absorb the wet ingredients well, resulting in a pleasant texture without being too chewy. Next, grab your peanut butter. For this recipe, any type of peanut butter will work – creamy, chunky, natural, or conventional. If you’re using natural peanut butter that has separated, give it a good stir to recombine the oil and solids before measuring out ¼ cup. Measure your honey carefully; 2 tablespoons will provide the perfect amount of sweetness and help bind everything together. Finally, measure out your ¼ cup of mini chocolate chips. These add a delightful burst of flavor and a touch of indulgence. Having all your ingredients measured and ready before you start mixing will make the whole process smooth and efficient. You might want to have a spoon or spatula ready for mixing and a plate or baking sheet lined with parchment paper (optional, but helpful for chilling) for when you’re done rolling.
Combine the Dry Ingredients: In your medium-sized mixing bowl, add the ½ cup of quick oats. If you have any larger clumps of oats, you can gently break them up with your fingers or the back of a spoon. Now, add the ¼ cup of mini chocolate chips to the bowl with the oats. The mini chocolate chips are a wonderful addition, offering little pockets of chocolatey goodness in every bite. You can, of course, omit these if you prefer a less sweet option or have dietary restrictions, but I find they really elevate the flavor profile. Give these dry ingredients a quick stir together just to distribute them evenly within the bowl. This ensures that the chocolate chips are spread throughout the final energy bites, rather than all clumping together in one spot.
Incorporate the Wet Ingredients: Now it’s time to add the binders and sweeteners. Pour the 2 tablespoons of honey directly into the bowl with the oats and chocolate chips. Then, add the ¼ cup of peanut butter. As mentioned before, make sure your peanut butter is well-stirred if it’s a natural variety. Using a sturdy spoon or a spatula, begin extract to mix the wet ingredients into the dry ingredients. This is where the magic happens! You’ll need to stir vigorously. At first, it might seem like the peanut butter and honey aren’t going to mix well with the oats and chocolate chips, but keep stirring. You’re aiming to create a cohesive, sticky mixture that can be rolled into balls. You might need to use the back of your spoon to press down and incorporate the peanut butter fully. Don’t be afraid to get in there with your hands once the mixture is somewhat combined, as this often makes it easier to ensure everything is incorporated and the right consistency for rolling.
Mix Until a Dough Forms: Continue mixing and stirring until all the ingredients are thoroughly combined and the mixture starts to resemble a thick, slightly sticky dough. If the mixture seems too dry and crum extractbly, and you’re having trouble getting it to hold together, you can add another teaspoon of honey or a tiny splash of water. Conversely, if it’s too wet and sticky to roll, you can add a tablespoon more of oats. The goal is a texture that’s pliable enough to form into balls but not so sticky that it’s unmanageable. This stage might take a minute or two of dedicated mixing. Really work the ingredients together. If you’re using your hands, this is where you can really feel the consistency. Press the mixture together and see if it holds its shape. A good test is to try and pinch a small amount between your fingers – if it sticks together without falling apart, you’re ready for the next step.
Roll into Bite-Sized Balls: Once you have a well-combined, sticky mixture, it’s time to roll your energy bites. Take a small amount of the mixture, about a tablespoon’s worth, and roll it between your palms to form a compact ball. The size is up to you, but aiming for about 1-inch diameter balls is a good starting point. If the mixture is sticking to your hands, you can lightly dampen your hands with water or lightly grease them with a tiny bit of peanut butter or coconut oil. This will help prevent sticking and make the rolling process smoother. Continue this process, rolling out all the mixture into individual energy bites. Place the finished bites onto your prepared plate or baking sheet. You can arrange them closely together if you plan to eat them soon, or spread them out a little if you’re going to freeze them.
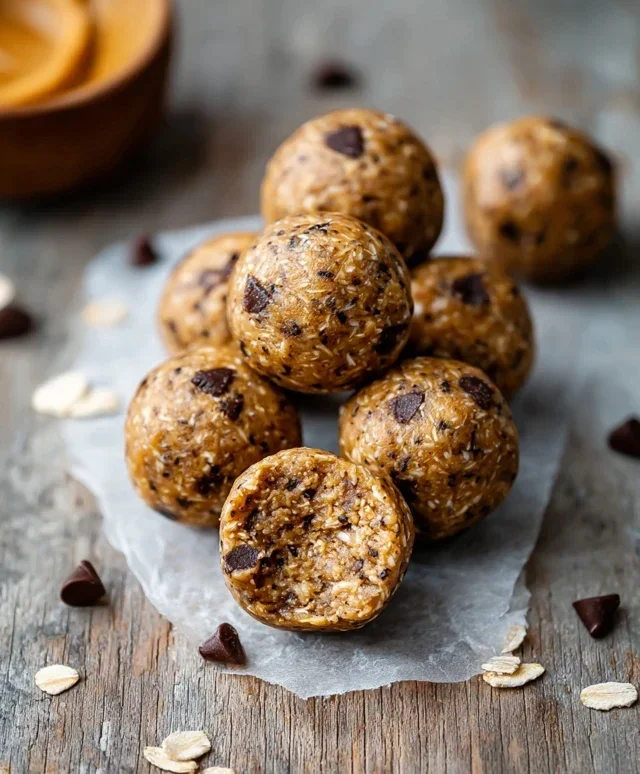
Chill and Enjoy: To firm up the energy bites and make them easier to handle, it’s best to chill them. Place the plate or baking sheet with the rolled energy bites into the refrigerator for at least 30 minutes. This allows the peanut butter and honey to firm up, holding the oats and chocolate chips in place and giving the bites a better texture. Once chilled, they are ready to be enjoyed! You can store them in an airtight container in the refrigerator for up to a week. They’re perfect for a quick breakfast, a post-workout snack, or a healthy treat anytime you need a little pick-me-up. You can even freeze them for longer storage; just place them in a freezer-safe bag or container and they’ll last for up to a month.
Conclusion:
There you have it – your simple, delicious, and incredibly satisfying recipe for No-Bake Peanut Butter Energy Bites! I truly believe this recipe is a game-changer for anyone looking for a healthy, on-the-go snack. It’s incredibly versatile, requires minimal effort, and the result is a burst of flavor and energy that’s perfect for busy mornings, pre-workout fuel, or a healthy afternoon pick-me-up. The combination of peanut butter, oats, and your favorite add-ins creates a wonderfully chewy texture and a satisfyingly sweet treat without any of the guilt.
Feel free to get creative with serving suggestions! Enjoy them straight from the fridge for a firmer bite, or at room temperature for a softer chew. They are fantastic tucked into lunchboxes, shared at gatherings, or simply enjoyed as a personal moment of indulgence. Don’t be afraid to experiment with variations either; adding a sprinkle of cinnamon, a dash of vanilla extract, or even some mini chocolate chips can transform these bites into something truly unique. I encourage you to give these No-Bake Peanut Butter Energy Bites a try – you won’t be disappointed!
Frequently Asked Questions:
Can I make these energy bites ahead of time?
Absolutely! These No-Bake Peanut Butter Energy Bites are perfect for making in advance. I usually make a big batch at the begin extractning of the week and store them in an airtight container in the refrigerator. They stay fresh and delicious for up to a week, making them ideal for meal prepping.
What are some good variations if I don’t have all the ingredients?
That’s the beauty of this recipe – it’s so adaptable! If you don’t have honey, maple syrup or agave nectar work just as well. For the oats, rolled oats are preferred for texture, but quick oats can also be used, though the bites might be a bit softer. You can also swap the peanut butter for almond butter, sunflower seed butter, or any other nut or seed butter you prefer. Feel free to get creative with add-ins like chia seeds, flax seeds, or even a scoop of protein powder for an extra boost.
How should I store these energy bites?
For the best texture and freshness, I highly recommend storing your No-Bake Peanut Butter Energy Bites in an airtight container in the refrigerator. This helps them firm up nicely and prevents them from becoming too sticky or messy. They will last for about a week when stored this way.
No-Bake Peanut Butter Energy Bites
Quick and easy no-bake energy bites perfect for a healthy snack.
Ingredients
-
1/2 cup quick oats
-
1/4 cup peanut butter
-
2 tablespoons honey
-
1/4 cup mini chocolate chips
-
1 tablespoon chia seeds
-
1 teaspoon vanilla extract
Instructions
-
Step 1
In a medium bowl, combine the quick oats and chia seeds. -
Step 2
Add the peanut butter, honey, and vanilla extract to the bowl. -
Step 3
Stir everything together until well combined and a thick dough forms. -
Step 4
Gently fold in the mini chocolate chips. -
Step 5
Roll the mixture into small balls, about 1-inch in diameter. -
Step 6
Place the energy bites on a parchment-lined plate or baking sheet and refrigerate for at least 30 minutes to firm up.
Important Information
Nutrition Facts (Per Serving)
It is important to consider this information as approximate and not to use it as definitive health advice.
Allergy Information
Please check ingredients for potential allergens and consult a health professional if in doubt.