Spicy Salmon Sushi Cups- Quick Easy Recipe
Spicy Salmon Sushi Cups are about to become your new favorite weeknight obsession. Forget the complicated rolling and sticky fingers; these delightful little bites deliver all the vibrant flavors of your favorite sushi in an incredibly easy-to-make, handheld package. Why do we love them so much? It’s the perfect harmony of textures and tastes: the tender, seasoned rice providing a comforting base, the bursts of fresh, slightly spicy salmon, and the crisp, refreshing crunch of your chosen toppings. What truly elevates these Spicy Salmon Sushi Cups from simply good to absolutely irresistible is their customizable nature. Whether you’re a fan of creamy avocado, sharp pickled gin extractger, or a drizzle of umami-rich soy sauce, you can tailor each cup to your personal preference, creating a truly bespoke culinary experience right in your own kitchen. Get ready to impress yourself and anyone lucky enough to snag a taste!
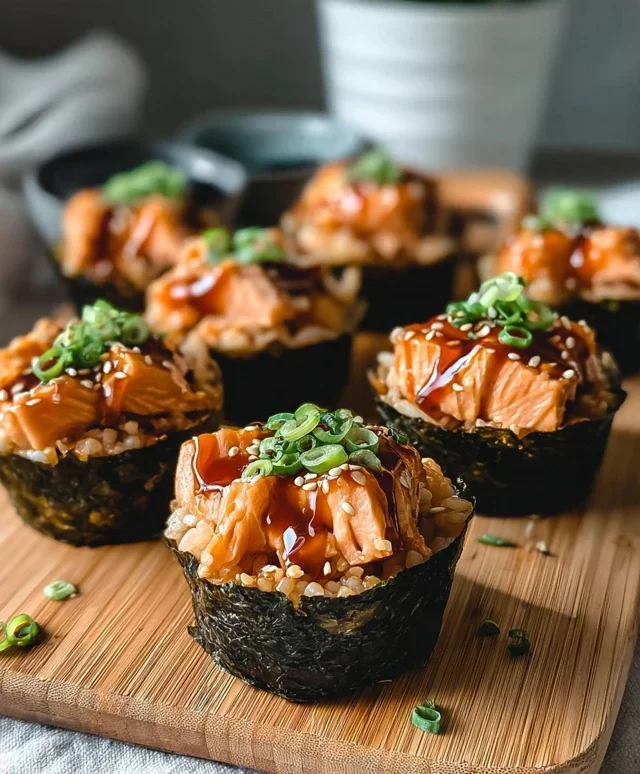
Spicy Salmon Sushi Cups
Sushi cups are a fantastic way to enjoy all the vibrant flavors of sushi without the fuss of rolling. These Spicy Salmon Sushi Cups are incredibly easy to assemble and pack a punch of deliciousness. They’re perfect for a quick weeknight meal, a fun appetizer, or even a portable lunch. The combination of tender, marinated salmon, perfectly cooked sushi rice, and a creamy, spicy mayo topping is simply irresistible. Let’s dive into making these delightful bites!
Ingredients:
Cooking Instructions:
1. Prepare the Sushi Rice:
The foundation of any great sushi dish is perfectly cooked rice. Start by rinsing your sushi rice under cold water until the water runs clear. This removes excess starch, which is crucial for achieving that slightly sticky, clumped texture we love in sushi. Cook the rice according to the package instructions. For a standard stovetop method, this usually involves combining the rinsed rice with the specified amount of water in a pot, bringin extractg it to a boil, then reducing the heat to low, covering, and simmering until all the water is absorbed. Once cooked, let the rice steam, covered, for about 10 minutes off the heat. While the rice is still warm, gently stir in the rice vinegar. This adds a subtle tang that balances the richness of the salmon. Fluff the rice with a fork or rice paddle to ensure the vinegar is evenly distributed and to cool it down slightly.
2. Marinate the Salmon:
While the rice is cooking, let’s prepare our star ingredient – the salmon. In a medium bowl, combine the cubed salmon with 2 tablespoons of Japanese mayonnaise, 1 tablespoon of sriracha (if you like it extra spicy, feel free to add a little more!), and ¼ teaspoon of sesame oil. Gently toss everything together, making sure each piece of salmon is coated. The mayonnaise helps to bind the marinade to the salmon, and the sriracha and sesame oil add a wonderful depth of flavor and a hint of heat. Finally, add 1 ½ tablespoons of soy sauce to the bowl. Be careful not to over-mix, as we want to keep the salmon cubes intact. Let this mixture marinate for at least 10-15 minutes at room temperature. This allows the flavors to meld beautifully.
3. Assemble the Nori Cups:
Now for the fun part! Take your nori sheets and carefully cut each one into 4 equal squares. These squares will form the base of our sushi cups. You can either place a square of nori directly into the bottom of a small ramekin or muffin tin, pressing it gently to create a cup shape, or if you prefer a more free-form cup, simply place the nori square on your serving plate. For a sturdier cup that holds its shape well, lightly toasting the nori sheets before cutting can help make them a bit more pliable and less likely to crack. Just a few seconds on each side over a low flame or in a dry pan will do the trick.
4. Layer the Sushi Cups:
Once your rice has cooled slightly and your nori squares are ready, it’s time to start building the cups. Begin extract by spooning a generous amount of the prepared sushi rice into the center of each nori square. Gently press the rice down, creating a slightly concave surface to hold the salmon. Next, carefully spoon the marinated salmon mixture on top of the rice. Aim to distribute the salmon evenly amongst the cups, ensuring each one gets a good portion. Don’t be afraid to get a little creative with the presentation here; the vibrant orange of the salmon against the dark nori and white rice is already visually appealing.
5. Create the Spicy Mayo Topping and Finish:
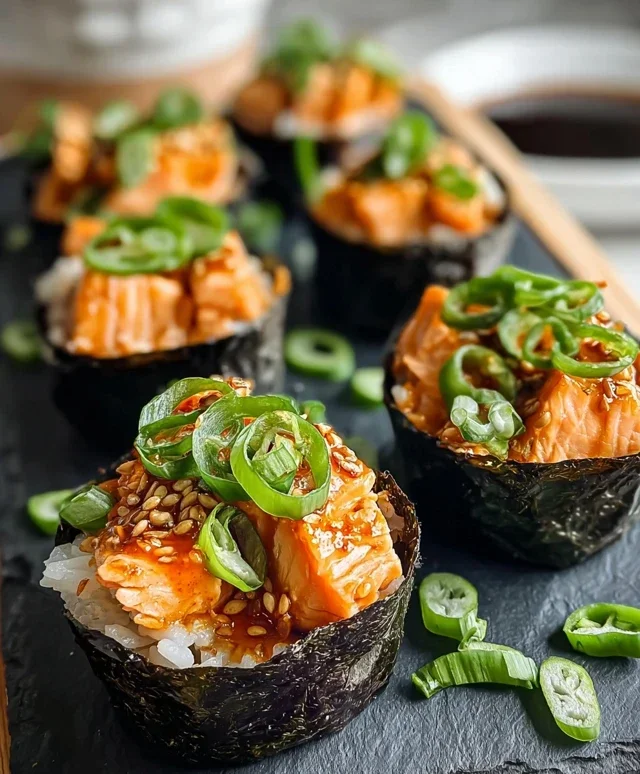
To elevate these sushi cups from delicious to utterly divine, we’ll whip up a quick and easy spicy mayo. In a small bowl, combine ¼ cup of Japanese mayonnaise with 1 tablespoon of sriracha. Stir well until you achieve a smooth, creamy, and perfectly pink mixture. You can adjust the sriracha to your preferred level of heat. Once your spicy mayo is ready, drizzle a generous amount over the salmon in each cup. For the final flourish, sprinkle with sliced green onions and a pinch of toasted sesame seeds. These additions not only add a pop of color but also provide a delightful crunch and fresh flavor. Serve your Spicy Salmon Sushi Cups immediately and enjoy every bite! They are best enjoyed fresh, allowing all the textures and flavors to shine.
Conclusion:
So there you have it – a simple yet incredibly satisfying way to enjoy the vibrant flavors of Spicy Salmon Sushi Cups right in your own kitchen! This recipe is fantastic because it takes all the deliciousness of sushi and makes it approachable, mess-free, and incredibly versatile. The creamy, spicy salmon paired with the perfectly seasoned sushi rice creates a delightful explosion of taste and texture that’s sure to impress. They’re perfect for a quick weeknight meal, a fun appetizer for guests, or even a healthy lunch option. Don’t be afraid to get creative with your toppings!
For serving, these cups shine on their own, but you can elevate them further by adding a sprinkle of toasted sesame seeds, a drizzle of extra spicy mayo, or even some thinly sliced jalapeños for an extra kick. They pair wonderfully with a side of pickled gin extractger and a bit of soy sauce for dipping. If you’re feeling adventurous, try swapping out the salmon for cooked shrimp or even cubed avocado for a vegetarian twist. I truly encourage you to give this Spicy Salmon Sushi Cups recipe a try – I have a feeling you’ll be making them again and again!
Frequently Asked Questions:
Can I use raw salmon?
For this recipe, we recommend using sushi-grade salmon that is specifically intended for raw consumption. However, if you are hesitant about raw fish, using cooked salmon (flaked and mixed with the spicy sauce) is a perfectly delicious alternative that ensures food safety and still delivers amazing flavor.
What if I don’t have sushi rice?
While sushi rice is ideal due to its stickiness and texture, you can use short-grain white rice as a substitute. Make sure to rinse it thoroughly and season it with the rice vinegar, sugar, and salt mixture just as you would sushi rice. The texture might be slightly different, but the flavor will still be great.
How far in advance can I prepare these?
You can prepare the sushi rice a few hours in advance and store it at room temperature, covered. The spicy salmon mixture is best made closer to serving time to maintain its freshness and texture. Assembling the cups is quick, so it’s usually best to do that just before you plan to eat them to avoid the rice becoming too hard or the toppings getting soggy.
Spicy Salmon Sushi Cups
Quick and easy spicy salmon sushi cups, perfect for a light meal or appetizer.
Ingredients
-
1 lb salmon, cut into small cubes
-
2 tablespoons Japanese mayonnaise (kewpie or regular)
-
1 tablespoon sriracha (optional)
-
¼ teaspoon sesame oil
-
1 ½ tablespoons soy sauce
-
3 nori sheets, cut into 4 squares each
-
⅔ cup uncooked sushi rice or sticky Jasmine rice
-
Water as per rice package instructions
-
1 tablespoon rice vinegar
-
¼ cup Japanese mayonnaise (kewpie or regular)
-
1 tablespoon sriracha
-
Sliced green onions
-
Sesame seeds
Instructions
-
Step 1
Cook sushi rice or jasmine rice according to package directions. While rice is cooking, prepare the salmon mixture. In a bowl, combine 1 lb salmon (cut into small cubes), 2 tablespoons Japanese mayonnaise, 1 tablespoon sriracha (if using), ¼ teaspoon sesame oil, and 1 ½ tablespoons soy sauce. Mix well and refrigerate. -
Step 2
Once the rice is cooked, gently stir in 1 tablespoon rice vinegar. Let it cool slightly. -
Step 3
Prepare the spicy mayo for drizzling. In a small bowl, whisk together ¼ cup Japanese mayonnaise and 1 tablespoon sriracha. -
Step 4
Cut 3 nori sheets into 4 squares each. These will form the base of your sushi cups. -
Step 5
To assemble, place a nori square into the palm of your hand, creating a cup shape. Fill the nori cup with a spoonful of the prepared rice. Press the rice down gently to form a firm base. -
Step 6
Top the rice with a generous portion of the spicy salmon mixture. Drizzle with the prepared spicy mayo. -
Step 7
Garnish with sliced green onions and sesame seeds.
Important Information
Nutrition Facts (Per Serving)
It is important to consider this information as approximate and not to use it as definitive health advice.
Allergy Information
Please check ingredients for potential allergens and consult a health professional if in doubt.