Garlic Herb Chickpea Flour Crackers – Easy Snack
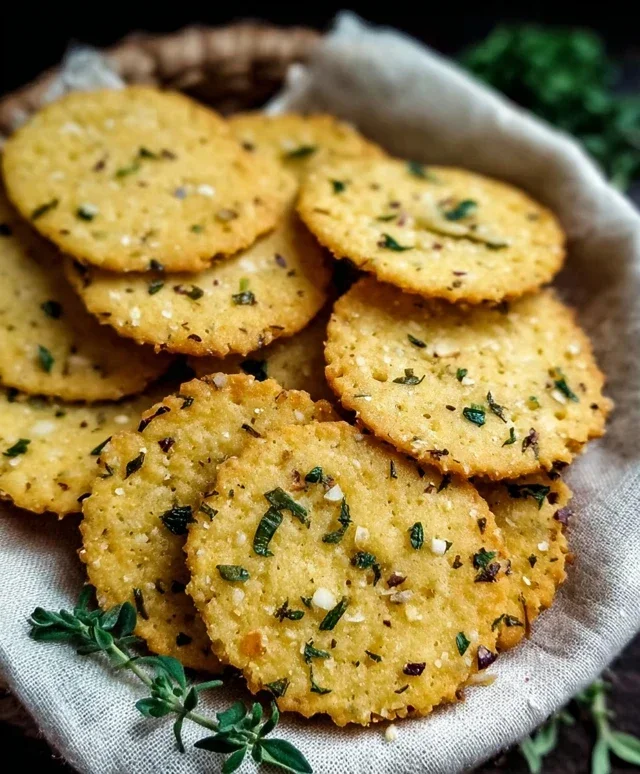
Garlic and Herb Chickpea Flour Snack Crackers are about to become your new go-to for guilt-free snacking! Are you tired of store-bought crackers that are full of artificial ingredients and leave you feeling less than satisfied? I know I was! That’s why I set out to create a simple, delicious, and incredibly versatile snack that I could feel genuinely good about munching on. These delightful Garlic and Herb Chickpea Flour Snack Crackers offer a satisfying crunch with a burst of savory flavor from fresh garlic and aromatic herbs. What makes them truly special is their naturally gluten-free and protein-packed base, thanks to the humble chickpea flour. They’re perfect for dipping, topping, or simply enjoying on their own, and the amazing aroma that fills your kitchen as they bake is just the begin extractning of the joy they bring. Get ready to revolutionize your snack drawer!
Ingredients:
Garlic and Herb Chickpea Flour Snack Crackers
Hello, fellow food enthusiasts! Today, I’m thrilled to share a recipe that’s become a staple in my kitchen for its simplicity, versatility, and deliciousness. These Garlic and Herb Chickpea Flour Snack Crackers are incredibly easy to make and perfect for any occasion – whether you need a quick afternoon snack, a sophisticated appetizer, or a healthy dipper for your favorite hummus or dips. The best part? They’re made with a few pantry staples and are naturally gluten-free, making them a fantastic option for many dietary needs.
I love that chickpea flour, also known as besan, lends a wonderful nutty flavor and a satisfyingly crisp texture to these crackers. The combination of garlic powder and mixed herbs creates an aromatic and savory profile that’s utterly irresistible. You can customize the herbs to your liking – I often experiment with different blends depending on what I have on hand.
Let’s get started and create some fantastic homemade crackers!
Preparing the Dough
1. Combine the Dry Ingredients: In a medium-sized mixing bowl, add your 1 cup of chickpea flour. This forms the base of our crackers. Next, measure in 1 teaspoon of garlic powder, which will infuse every bite with that lovely garlicky punch. Add ½ teaspoon of salt to enhance all the flavors and ¼ teaspoon of black pepper for a subtle warmth. Finally, toss in 1 teaspoon of your favorite dried mixed herbs. Ensure everything is well combined by whisking it together with a fork or a small whisk. This step is crucial to distribute the seasonings evenly throughout the flour, preventing pockets of blandness or overwhelming spice.
2. Incorporate the Wet Ingredients: Now, it’s time to bring our dough together. Create a well in the center of your dry ingredients. Pour in 2 tablespoons of olive oil. This healthy fat will contribute to the crispness and richness of the crackers. Then, slowly add ½ cup of water, a little at a time, while stirring. You can use a fork or a spatula for this. The goal is to form a cohesive dough. You might not need all the water, or you might need a tiny bit more, depending on the humidity and the specific brand of chickpea flour you’re using. The dough should be thick and slightly sticky, but not overly wet or crum extractbly. If it feels too dry, add water a teaspoon at a time. If it’s too wet, add a tablespoon of chickpea flour.
3. Knead and Rest the Dough: Once you have a rough dough, turn it out onto a lightly floured surface (using chickpea flour is ideal, but all-purpose flour works too). Gently knead the dough for about 1-2 minutes. You don’t need to develop gluten like you would with wheat flour; you’re just aiming to create a smooth, unified ball of dough. This short kneading process helps to ensure all the ingredients are well incorporated. After kneading, wrap the dough in plastic wrap or place it in a clean bowl and cover it with a damp cloth. Let it rest for about 15-20 minutes. This resting period allows the chickpea flour to fully absorb the liquid, making the dough easier to roll out and resulting in a better texture for your crackers.
Shaping and Baking the Crackers
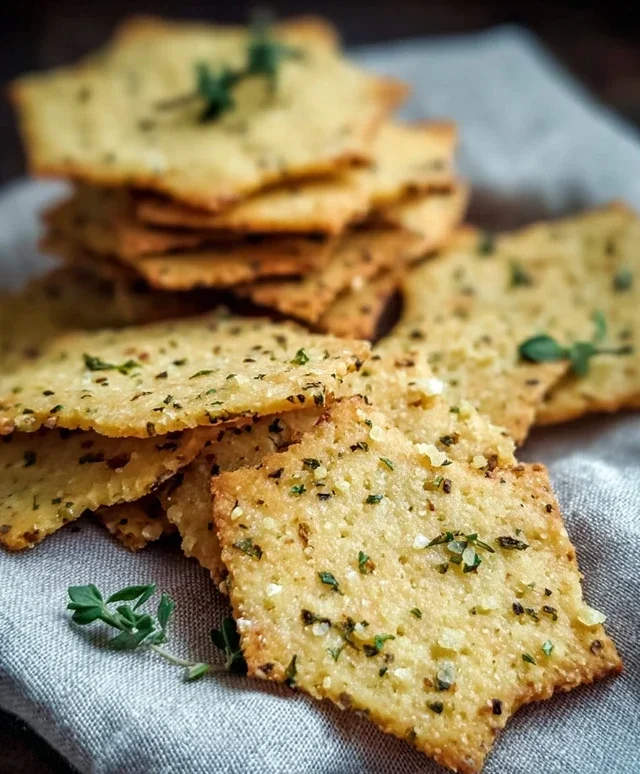
4. Roll and Score the Dough: Preheat your oven to 375°F (190°C). Line a baking sheet with parchment paper. This step is essential to prevent sticking and makes for easy cleanup. Unwrap your rested dough. You can either roll the dough out directly onto the parchment paper-lined baking sheet or roll it between two sheets of parchment paper. Aim for a thickness of about 1/16 to 1/8 inch. The thinner you roll, the crispier your crackers will be. This might take a bit of practice, but don’t worry if they’re not perfectly uniform – rustic charm is part of the appeal! Once rolled out, use a pizza cutter or a sharp knife to score the dough into your desired cracker shapes. Squares, rectangles, or even diamonds are all great. You can also prick each cracker a few times with a fork to prevent them from puffing up too much during baking.
5. Add Toppings and Bake: Now for the fun part – decorating! Brush the surface of the scored dough lightly with a little extra olive oil. This will help the toppings adhere and give the crackers a lovely golden sheen. Sprinkle generously with sesame seeds for a nutty crunch and a beautiful visual appeal. Follow with a sprinkle of flaky sea salt for that extra burst of savory goodness. You can also add a pinch of additional dried herbs for an extra aroma and flavor boost. Carefully transfer the baking sheet to your preheated oven. Bake for 15-20 minutes, or until the edges of the crackers are golden brown and they are firm to the touch. Keep an eye on them, as oven temperatures can vary, and thinner crackers will bake faster. You might even want to rotate the baking sheet halfway through for even baking.
Cooling and Enjoying
Once baked, remove the crackers from the oven. If you scored them well, you should be able to easily break them apart along the scored lines. Let them cool completely on the baking sheet or transfer them to a wire rack to cool. They will become even crispier as they cool. Store your delicious homemade Garlic and Herb Chickpea Flour Snack Crackers in an airtight container at room temperature for up to a week. Enjoy them plain, with your favorite dips, cheeses, or as a side to soups and salads!
Conclusion:
I truly hope you’ve enjoyed learning how to make these incredibly simple yet satisfying Garlic and Herb Chickpea Flour Snack Crackers. These crackers are a fantastic option for anyone looking for a healthier, gluten-free, and incredibly flavorful snack. They’re surprisingly easy to whip up, requiring just a few pantry staples and minimal effort. The combination of aromatic garlic and fragrant herbs baked into a perfectly crispy chickpea flour base is simply divine. They’re versatile enough to be enjoyed on their own as a delightful afternoon treat, or they can be elevated with your favorite toppings.
For serving, I love pairing these crackers with a creamy hummus, a sharp cheddar cheese, or even a dollop of avocado. They also make a wonderful base for mini pizzas or bruschetta. If you’re feeling adventurous with variations, consider adding a pinch of smoked paprika for a smoky kick, or a sprinkle of nutritional yeast for a cheesy, umami flavor. Don’t be afraid to experiment with your favorite dried herbs too – rosemary and thyme are also wonderful additions. I genuinely encourage you to give these Garlic and Herb Chickpea Flour Snack Crackers a try. I’m confident you’ll find them to be a staple in your snacking repertoire.
Frequently Asked Questions:
Q: How should I store these crackers?
A: Once completely cooled, store your garlic and herb chickpea flour snack crackers in an airtight container at room temperature for up to 5 days. If they lose their crispness, you can briefly reheat them in a low oven (around 250°F or 120°C) for a few minutes.
Q: Can I make these crackers ahead of time?
A: Absolutely! These crackers are perfect for making ahead. Bake a batch over the weekend and you’ll have a delicious and healthy snack ready to go for the week.
Q: What if I don’t have fresh garlic or herbs?
A: No problem at all! You can substitute with dried garlic powder and dried herbs. Start with about 1 teaspoon of garlic powder and 1-2 teaspoons of dried Italian seasoning or your preferred herb blend, and adjust to your taste.
Garlic and Herb Chickpea Flour Snack Crackers
Crispy and flavorful homemade crackers made with chickpea flour, garlic, and mixed herbs. Perfect for snacking or serving with dips.
Ingredients
-
1 cup chickpea flour (besan)
-
½ cup water
-
2 tablespoons olive oil
-
1 teaspoon dried mixed herbs
-
1 teaspoon garlic powder
-
½ teaspoon salt
-
¼ teaspoon black pepper
-
Sesame seeds
-
Flaky sea salt
-
Additional dried herbs
-
Extra olive oil for brushing
Instructions
-
Step 1
Preheat oven to 350°F (175°C). Line a baking sheet with parchment paper. -
Step 2
In a medium bowl, whisk together chickpea flour, dried mixed herbs, garlic powder, salt, and black pepper. -
Step 3
Gradually add the water and olive oil to the dry ingredients, mixing until a thick, smooth batter forms. It should be like a thick pancake batter. -
Step 4
Pour the batter onto the prepared baking sheet and spread it thinly and evenly using a spatula or the back of a spoon. Aim for a thickness of about 1/8 inch. -
Step 5
Sprinkle the surface with sesame seeds, flaky sea salt, and additional dried herbs, if desired. -
Step 6
Brush the surface lightly with extra olive oil. -
Step 7
Bake for 20-25 minutes, or until the edges are golden brown and the crackers are firm. The baking time will depend on the thickness. -
Step 8
Once baked, carefully break or cut the crackers into desired shapes while still warm. Let cool completely on the baking sheet or a wire rack before serving.
Important Information
Nutrition Facts (Per Serving)
It is important to consider this information as approximate and not to use it as definitive health advice.
Allergy Information
Please check ingredients for potential allergens and consult a health professional if in doubt.