Sweet Spicy Peach Salsa Canning Recipe-Homemade
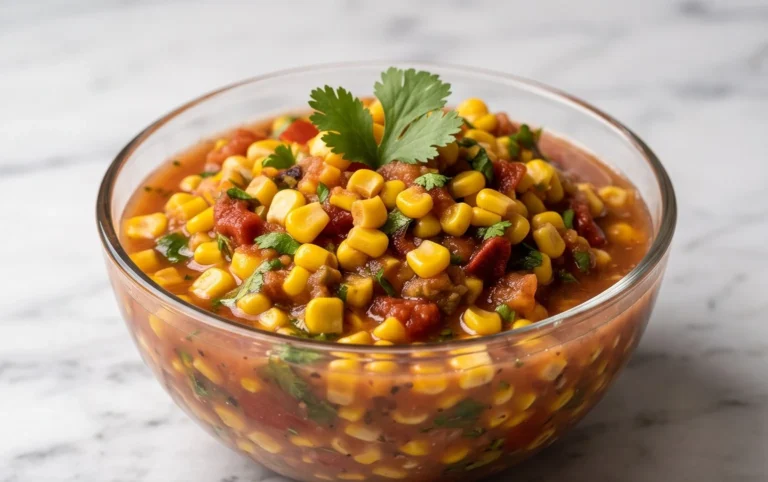
Sweet & Spicy Peach Salsa Canning Recipe is your ticket to bottling up sunshine and a flavor explosion that will tantalize your taste buds all year round. Imagin extracte the sweet burst of ripe summer peaches, kissed with just the right amount of heat from a hint of chili, all perfectly preserved for whenever the craving strikes. This isn’t just another canning project; it’s an adventure in flavor that brings the vibrant essence of peak-season produce right into your pantry. People adore this sweet and spicy peach salsa because it’s incredibly versatile. It’s the perfect accompaniment to grilled chicken or fish, a delightful topping for tacos and quesadillas, and surprisingly addictive scooped up with tortilla chips. What truly makes this Sweet & Spicy Peach Salsa Canning Recipe special is the beautiful balance it strikes between sweet, tangy, and spicy, creating a complex yet harmonious flavor profile that’s both refreshing and deeply satisfying.
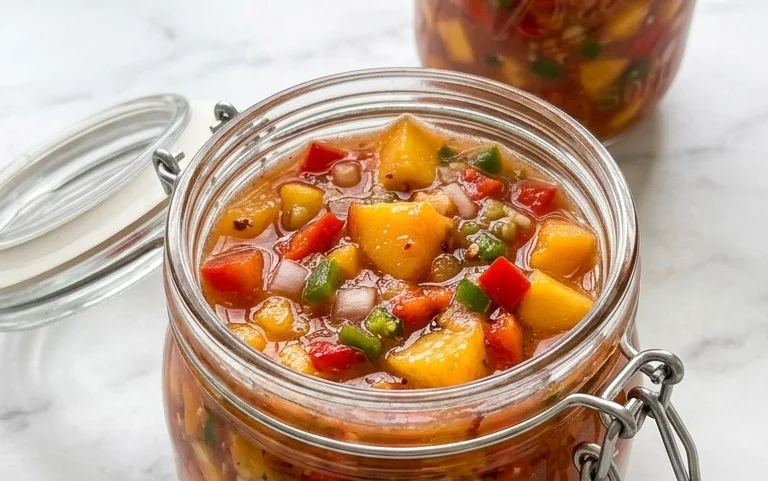
Sweet & Spicy Peach Salsa Canning Recipe
There’s something incredibly satisfying about opening a jar of homemade salsa, bursting with the flavors of summer, even when it’s the depths of winter. This Sweet & Spicy Peach Salsa is a perfect example of that, blending the natural sweetness of ripe peaches with the vibrant tang of tomatoes and a kick of heat from chiles. It’s a versatile salsa that’s fantastic with chips, grilled chicken or fish, or even as a topping for beef. Canning this delicious salsa ensures you can enjoy its sunshiney goodness all year round. Let’s get started!
Ingredients:
Preparing Your Peaches and Other Produce
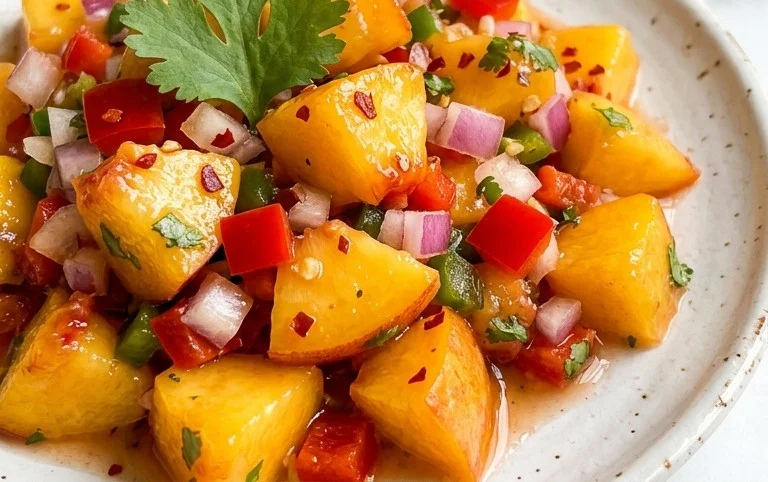
The first step to any great canning project is to prepare your ingredients. For this peach salsa, we want perfectly ripe but firm peaches. You’ll want to peel, pit, and dice them into roughly 1/2-inch pieces. Don’t worry about them being perfectly uniform; a little variation adds character. For the tomatoes, any firm, ripe variety will work. Roma or plum tomatoes are excellent choices because they have less liquid and seeds, which can make your salsa too watery. Dice them similarly to the peaches.
When it comes to the chile peppers, this is where you can really customize the heat level. For a mild salsa, use poblano or Anaheim peppers. For a medium heat, jalapeños are a classic choice. If you like it really spicy, consider serranos or even a hint of habanero (use with caution!). Remember to wear gloves when handling hotter peppers and avoid touching your eyes. Remove the seeds and membranes for less heat, or leave some in if you dare! Dice them finely. Red onion adds a wonderful sweetness and bite, so dice that up as well. Finally, mince your garlic.
Cooking the Salsa Base
Now it’s time to bring all those beautiful ingredients together. In a large, non-reactive pot (stainless steel or enamel is ideal), combine the diced peaches, diced tomatoes, diced chile peppers, diced red onion, and minced garlic. This is where the magic begin extracts to happen.
Add the liquids: the distilled white vinegar and bottled lime juice. The vinegar acts as a preservative, and the lime juice adds a bright, zesty flavor that complements the sweetness of the peaches beautifully. Next, stir in the chile pepper flakes and sea salt. Start with the lower amount of chile flakes and taste later; you can always add more heat, but you can’t take it away! Stir everything thoroughly to ensure the salt and flakes are evenly distributed.
Simmering to Perfection
Turn the heat to medium-high and bring the mixture to a boil, stirring occasionally. Once it reaches a rolling boil, reduce the heat to medium-low and let it simmer, uncovered, for about 30-40 minutes. This simmering time is crucial for several reasons. It allows the flavors to meld and deepen, softening the peaches and tomatoes slightly while still maintaining their texture. It also helps to evaporate some of the excess liquid, resulting in a thicker, more concentrated salsa.
Stir the salsa frequently during the simmering process to prevent it from sticking to the bottom of the pot. You’ll notice the mixture will thicken and the peaches will become tender. Taste the salsa periodically during the last 10-15 minutes of simmering. This is your chance to adjust the seasoning. Does it need a little more salt? Perhaps more chile flakes for an extra kick? Don’t be afraid to tweak it until it’s exactly to your liking. Remember, the flavors will continue to develop slightly after canning.
Preparing for Canning
While your salsa is simmering, it’s time to prepare your canning equipment. This is a critical step for food safety. You’ll need canning jars, lids, and bands. Make sure your jars are clean and free of any cracks or chips. Wash them thoroughly in hot, soapy water and rinse well. You can sterilize them by boiling them in water for at least 10 minutes, or by running them through the sanitize cycle in your dishwasher. Keep the jars hot until you’re ready to fill them; this helps prevent breakage when filling with hot salsa.
Prepare your lids according to the manufacturer’s instructions, which usually involves simmering them in hot water. The bands do not need to be sterilized, but they should be clean. You’ll also need a canning pot or a large, deep stockpot with a rack, a jar lifter, a funnel, and a headspace tool or ruler.
Filling and Processing the Jars
Once your salsa has finished simmering and your canning supplies are ready, it’s time to fill your jars. Ladle the hot salsa into your hot jars, leaving a 1/2-inch headspace (the space between the top of the salsa and the rim of the jar). Use a funnel to make this process cleaner. Remove any air bubbles by sliding a non-metallic utensil (like a plastic spatula or chopstick) around the inside of the jar. Wipe the rims of the jars with a clean, damp cloth to ensure a good seal.
Place the prepared lids on the jars and screw on the bands fingertip-tight. Do not overtighten them, as air needs to escape during processing. Carefully place the filled jars into your canning pot, ensuring they are covered with at least 1-2 inches of water. Bring the water to a rolling boil. Once boiling, process the jars for the recommended time (typically 15-20 minutes for half-pint or pint jars, adjusting for altitude if you live more than 1,000 feet above sea level).
Cooling and Storing
After the processing time is complete, turn off the heat and let the jars sit in the canner for another 5 minutes. This helps prevent siphoning (liquid escaping from the jars). Carefully remove the jars from the canner using a jar lifter and place them on a towel-lined counter or a cooling rack, leaving at least an inch of space between them. Listen for the satisfying “ping” sound as the lids seal.
Let the jars cool undisturbed for 12-24 hours. Once cooled, check the seals by pressing down on the center of each lid. If the lid is firm and doesn’t flex, it’s senon-alcoholic aled. If a lid doesn’t seal, refrigerate that jar and consume it within a few weeks, or reprocess it. Remove the bands from senon-alcoholic aled jars, wipe them clean, and store the jars in a cool, dark, and dry place. Properly canned salsa can last for at least a year. Enjoy your delicious homemade Sweet & Spicy Peach Salsa!
Conclusion:
Preserving the vibrant flavors of summer with this Sweet & Spicy Peach Salsa canning recipe is incredibly rewarding! Not only do you get to enjoy the taste of perfectly ripe peaches with a delightful kick of spice year-round, but you also create a versatile condiment that elevates countless dishes. The balance of sweet, juicy peaches with the warmth of chili peppers and the tang of lime is simply irresistible. This recipe is fantastic because it’s relatively simple to follow and yields a beautiful, flavorful salsa that’s perfect for gifting or keeping all to yourself.
Serving suggestions abound! Imagin extracte topping grilled chicken or beef with this vibrant salsa, using it as a dip for tortilla chips alongside your favorite guacamole, or even spooning it over creamy vanilla ice cream for a surprising sweet and spicy dessert. If you’re feeling adventurous, consider variations like adding a touch of smoked paprika for depth or a handful of finely chopped cilantro for extra freshness. I truly encourage you to give this Sweet & Spicy Peach Salsa canning recipe a try; you’ll be so glad you did when you crack open a jar on a chilly evening and are transported back to sunnier days.
Frequently Asked Questions:
Q: Can I use frozen peaches for this recipe?
A: Yes, you can use frozen peaches! Thaw them completely and drain off any excess liquid before proceeding with the recipe. The texture might be slightly softer after canning, but the flavor will still be wonderful.
Q: How long will the canned salsa last?
A: Properly canned salsa, stored in a cool, dark place, can last for at least 12-18 months. Always check for signs of spoilage like a bulgin extractg lid or off smell before consuming.
Q: I don’t like too much spice. How can I adjust the heat level?
A: To reduce the spiciness, you can use fewer jalapeños or substitute them with milder peppers like Anaheim or poblano peppers. You can also remove the seeds and membranes from the jalapeños before chopping them, as this is where most of the heat resides.
Sweet & Spicy Peach Salsa Canning Recipe
A vibrant and flavorful salsa combining sweet peaches with a spicy kick from chili peppers, perfect for canning and enjoying year-round.
Ingredients
-
8 cups diced peaches (peeled and pitted)
-
4 cups diced tomatoes
-
2 cups diced chile peppers (choose pepper according to your heat preference)
-
2 cups diced red onion
-
5-7 cloves garlic (minced)
-
1 1/2 cup distilled white vinegar
-
1 cup bottled lime juice
-
1-2 tablespoons chile pepper flakes (more or less according to to taste)
-
1 tablespoon sea salt
Instructions
-
Step 1
Prepare your canning jars and lids by washing and sterilizing them. Keep jars hot until ready to fill. -
Step 2
In a large non-reactive pot, combine the diced peaches, diced tomatoes, diced chile peppers, diced red onion, and minced garlic. Stir gently to combine. -
Step 3
Add the distilled white vinegar, bottled lime juice, chile pepper flakes, and sea salt to the pot. Stir well. -
Step 4
Bring the mixture to a rolling boil over medium-high heat, stirring occasionally. Once boiling, reduce heat slightly and simmer for 20 minutes, stirring frequently, to allow flavors to meld and the mixture to thicken slightly. -
Step 5
Carefully ladle the hot salsa into the prepared hot canning jars, leaving a 1/2-inch headspace. -
Step 6
Wipe the rims of the jars clean with a damp cloth. Place the lids on the jars and screw on the bands until fingertip tight. -
Step 7
Process the jars in a boiling water canner for 15 minutes for half-pint or pint jars, adjusting for altitude if necessary. Remove jars from the canner and let them cool on a towel-lined surface for 12-24 hours. Check seals before storing.
Important Information
Nutrition Facts (Per Serving)
It is important to consider this information as approximate and not to use it as definitive health advice.
Allergy Information
Please check ingredients for potential allergens and consult a health professional if in doubt.