Quick Pickled Red Onions- Easy & Flavorful Recipe
Pickled red onions are an absolute game-changer in my kitchen, and I’m so excited to share this simple recipe with you! If you’ve ever wondered what that vibrant, tangy garnish is that elevates tacos, sandwiches, or salads to a whole new level, chances are you’ve encountered these beauties. They bring an electrifying punch of flavor and a gorgeous visual appeal that instantly brightens any dish. What makes pickled red onions so universally loved? It’s their incredible versatility and the perfect balance of sweet, sour, and savory they offer. They’re not just a condiment; they’re a flavor enhancer that can transform even the most humble meal into something extraordinary. What truly makes them special is how easy they are to whip up, requiring just a few pantry staples and a little bit of patience. Get ready to fall in love with the magic of homemade pickled red onions!
Pickled Red Onions: The Bright, Tangy Topping You Need
There are few culinary additions that can instantly elevate a dish quite like vibrant, perfectly pickled red onions. These aren’t just a garnish; they’re a flavor explosion, adding a beautiful pop of color and a delightful tangy crunch to everything from tacos and sandwiches to salads and roasted vegetables. Forget those bland, store-bought versions. Making your own is surprisingly simple and incredibly rewarding. The process is quick, requiring minimal active time, and the result is a versatile condiment that will live in your refrigerator, ready to rescue any meal from mediocrity. They are surprisingly forgiving, and even if you’re new to pickling, you’ll find this recipe to be a breeze. The transformation of a humble red onion into this ruby-red marvel is almost magical.
Ingredients:
Instructions:
Step 1: Prepare the Onions
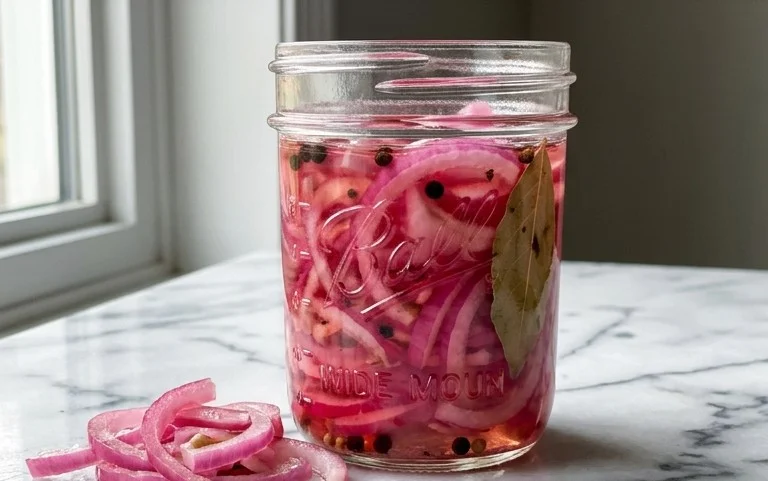
The first step to achieving pickled perfection is to properly prepare your red onion. You want to slice it thinly. The best way to do this is to peel the outer papery layers off the onion, then slice it in half pole-to-pole. Place each half flat-side down on your cutting board. Now, using a sharp knife, slice the onion as thinly as you can, aiming for consistent, paper-thin rings. This thinness is crucial for two reasons: it allows the onion to absorb the pickling brine quickly and evenly, and it ensures a pleasant, not overwhelmingly crunchy, texture in the finished product. If you have a mandoline, this is the perfect tool for achieving incredibly uniform slices. Be sure to use the safety guard if you go this route! Once sliced, place all the onion rings into a heatproof jar or a medium-sized bowl. I prefer using a glass jar because it’s easy to see the beautiful color develop, and it’s ready to be stored directly in the fridge.
Step 2: Create the Brine
Now, let’s get to the heart of pickling: the brine. This is a simple mixture of vinegar, water, sugar, and salt that does all the heavy lifting. In a small saucepan, combine 1 cup of white vinegar, 1 cup of water, 1 tablespoon of sugar, and 2 teaspoons of kosher salt. If you’re watching your sugar intake or prefer a tarter flavor, feel free to reduce or omit the sugar entirely. A sugar substitute can also be used if desired. Place the saucepan over medium heat. We’re not looking for a rolling boil here, but rather to gently heat the liquid until the sugar and salt are completely dissolved. Stir occasionally to help them along. This process should take just a few minutes. Once everything is dissolved and the liquid is hot, remove it from the heat.
Step 3: Combine Onions and Brine
This is where the magic starts to happen. Carefully pour the hot brine over the sliced red onions in your jar or bowl. Make sure that all the onion slices are submerged in the liquid. If your onions are piled high and some are sticking out, gently press them down with a spoon or a clean spatula to ensure they are fully immersed. The hot brine will immediately begin extract to work its magic, slightly wilting the onions and starting the pickling process. You’ll notice the onions starting to change color almost immediately, losing their raw, pungent bite and taking on a softer hue.
Step 4: Let Them Pickle and Cool
Once the onions are submerged in the hot brine, you have a couple of options. If you used a bowl, you’ll want to transfer everything to a clean, airtight container or jar for storage. If you’re using a jar from the start, you’re already ahead of the game. Allow the jar to sit on your counter at room temperature for about 30 minutes to an hour. This cooling period is important. It allows the onions to continue pickling as they gradually cool down. During this time, you’ll observe a dramatic transformation in color; the onions will deepen into a stunning, vibrant pink or ruby-red. This is your visual cue that the pickling process is well underway and they are developing their signature tangy flavor.
Step 5: Chill and Enjoy
After the initial cooling period on the counter, it’s time to refrigerate your pickled red onions. Seal the jar tightly and place it in the refrigerator. For the best flavor and texture, I recommend waiting at least a few hours before diggin extractg in. Ideally, let them sit for at least 24 hours to fully develop their tangy, slightly sweet, and pleasantly crunchy character. The longer they sit in the brine, the more the flavors will meld and deepen. These pickled red onions will keep in the refrigerator for several weeks, making them an excellent pantry staple. They are incredibly versatile. Try them on avocado toast, as a topping for burgers or pulled beef sandwiches, mixed into a potato salad, or as a bright counterpoint to rich, fatty dishes. The possibilities are truly endless, and you’ll find yourself reaching for them time and time again. Enjoy the vibrant addition they bring to your culinary creations!
Conclusion:
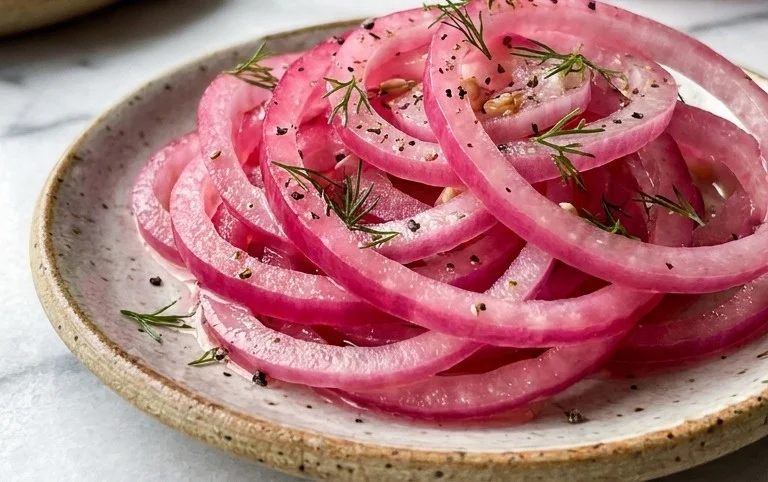
There you have it! Crafting your own batch of vibrant, tangy pickled red onions is incredibly rewarding and surprisingly simple. This recipe is a game-changer because it elevates everyday dishes with a burst of flavor and a beautiful pop of color. The satisfying crunch and bright acidity cut through richness, making them the perfect accompaniment to so many meals. From tacos and salads to sandwiches and grilled meats, these pickled red onions add that special something that transforms ordinary into extraordinary. Don’t be afraid to experiment with different vinegars or even add a pinch of your favorite spices for a personalized touch.
I truly encourage you to give this recipe a try. It’s a fantastic way to reduce food waste and have a delicious, versatile condiment always on hand. Enjoy the delightful tangy taste!
Frequently Asked Questions:
How long do pickled red onions last?
Properly stored in an airtight container in the refrigerator, these pickled red onions will last for at least 2 to 3 weeks. The flavor often intensifies as they sit, becoming even more delicious.
Can I use a different kind of vinegar?
Absolutely! While apple cider vinegar and red grape juice vinegar are popular choices for their flavor profiles, you can certainly experiment. White grape juice vinegar, cbeef hampagne vinegar, or even a rice vinegar can offer subtle variations. Just be mindful that the sweetness level might change, and you might need to adjust the sugar accordingly.
What if I don’t have red onions?
While red onions are ideal for their color and slightly milder flavor when pickled, you can use white or yellow onions in a pinch. Keep in mind that the color won’t be as vibrant, and the flavor might be a touch sharper.
Pickled Red Onions
Quick and easy pickled red onions that add a vibrant tang and crunch to any dish. Perfect for tacos, sandwiches, salads, and more.
Ingredients
-
1 large Red onion
-
1 cup White Vinegar
-
1 cup Water
-
1 tablespoon Sugar
-
2 teaspoons Kosher salt
-
1/2 teaspoon Black peppercorns
-
1 bay leaf
Instructions
-
Step 1
Thinly slice the red onion. A mandoline is helpful for uniform slices. -
Step 2
In a small saucepan, combine the white vinegar, water, sugar, and kosher salt. Heat over medium heat, stirring until the sugar and salt are dissolved. Do not boil. -
Step 3
Place the sliced red onion into a heatproof jar or container. -
Step 4
Add the black peppercorns and bay leaf to the jar with the onions. -
Step 5
Pour the warm brine over the onions, ensuring they are fully submerged. -
Step 6
Let the mixture cool to room temperature, then cover and refrigerate for at least 30 minutes before serving. For best flavor, let them pickle for a few hours or overnight.
Important Information
Nutrition Facts (Per Serving)
It is important to consider this information as approximate and not to use it as definitive health advice.
Allergy Information
Please check ingredients for potential allergens and consult a health professional if in doubt.