Sweet Potato Tortillas – Gluten-Free Vegan Wraps
Sweet potato tortillas are about to become your new kitchen obsession. If you’re searching for a delicious, healthy, and versatile alternative to traditional flour wraps, look no further! These vibrant, naturally sweet delights offer a delightful twist that will have everyone asking for seconds. We all know how challengin extractg it can be to find satisfying gluten-free and vegan options that truly hit the spot, but these sweet potato tortillas are a game-changer. Their tender texture and subtly sweet flavor profile make them perfect for everything from breakfast burritos to hearty lunch wraps, and even as a base for creative appetizers. What truly makes these sweet potato tortillas special is their beautiful color, their satisfying chew, and the fact that they’re packed with nutrients, making them a guilt-free indulgence you can feel great about serving. Get ready to elevate your meal prep and embrace a world of delicious possibilities!
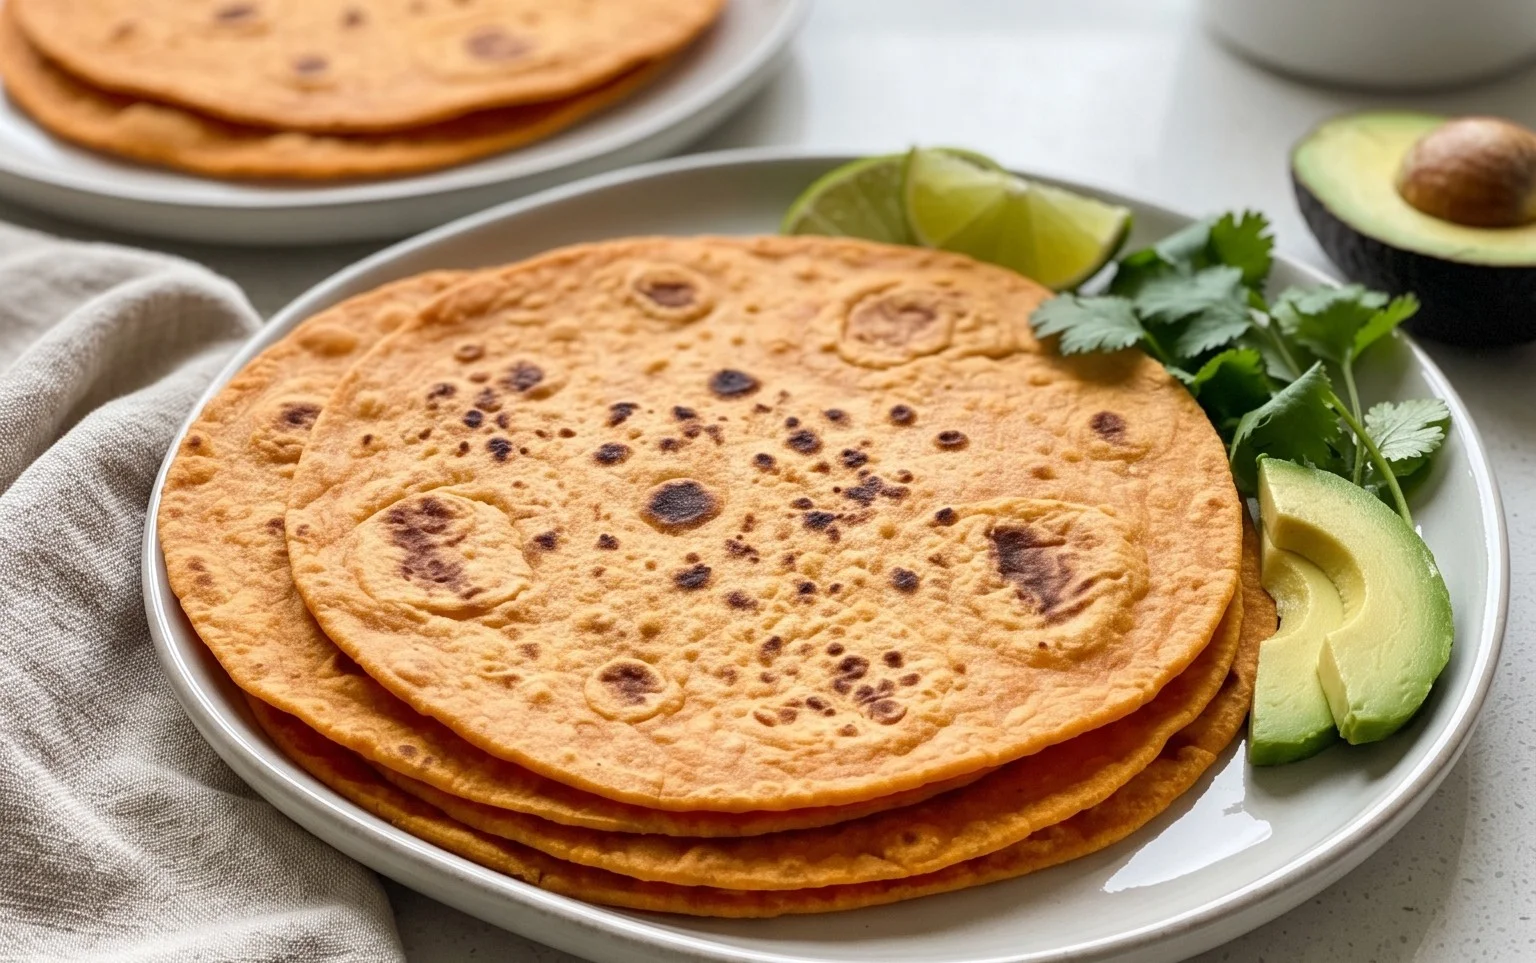
Sweet Potato Tortillas (Gluten-Free Vegan Wraps)
Get ready to elevate your wrap game with these incredibly delicious and satisfying Sweet Potato Tortillas! If you’re looking for a gluten-free and vegan alternative that doesn’t compromise on flavor or texture, you’ve found your match. These wraps are naturally vibrant, packed with nutrients, and wonderfully pliable, making them perfect for everything from breakfast burritos to hearty lunch wraps and even as a base for quesadillas. The subtle sweetness of the sweet potato, combined with savory spices, creates a truly delightful experience that will have you ditching store-bought options in no time. Plus, they’re surprisingly easy to make, even if you’re new to gluten-free baking. Let’s get started on creating these wholesome and versatile wraps!
Ingredients:
Crafting Your Sweet Potato Tortillas
The process of making these tortillas is quite straightforward, focusing on combining moist and dry ingredients to create a workable dough. The key is to ensure your sweet potato is thoroughly cooked and mashed without any excess moisture, as this can make the dough too sticky to handle.
1. Prepare the Sweet Potato Base: Start by ensuring your sweet potatoes are cooked until they are fork-tender. Steaming or boiling them without allowing them to absorb excess water is ideal. Once cooked, mash them thoroughly in a bowl until you have a completely smooth puree. It’s important to get rid of any lumps, as these can affect the texture of your final tortillas. You should aim for a consistency similar to mashed potatoes, but without any water. If you used a method that might have introduced moisture (like boiling), gently press the mashed sweet potato through a fine-mesh sieve or let it air dry for a bit to remove any excess liquid.
2. Combine Wet Ingredients and Spices: In a large mixing bowl, combine the mashed sweet potato with the softened vegan butter. Cream these together until well incorporated and smooth. Next, add the sea salt, black pepper, onion powder, and garlic powder. Stir these spices in thoroughly. This step infuses the dough with delicious savory notes that will beautifully complement the sweetness of the potato. If your vegan butter is very firm, you might need to gently warm it to ensure it blends easily with the mashed sweet potato.
3. Incorporate the Binder and Leavener: Now it’s time to add the gluten-free sourdough starter. If you don’t have active gluten-free sourdough starter, don’t worry! You can substitute it with an equal amount of plain, unsweetened plant-based yogurt (like coconut or soy) mixed with 1 tablespoon of apple cider vinegar and let it sit for 5 minutes to mimic the tang and activating properties. This is where the psyllium husk comes in. Sprinkle the psyllium husk powder over the wet ingredients and stir vigorously. Psyllium husk is a game-changer in gluten-free baking, acting as a binder and creating elasticity in doughs that would otherwise be crum extractbly. It’s essential for achieving a pliable tortilla. If you’re using the optional baking powder for a puffier result, add it now as well. Mix everything together until it’s well combined.
4. Add the Flour and Form the Dough: Gradually add the arrowroot flour (or your chosen starchy flour) to the mixture, starting with 2 tablespoons. Mix until a dough begin extracts to form. You may need to add the third tablespoon, or even a little more, depending on the moisture content of your sweet potato and the humidity in your kitchen. The dough should start to pull away from the sides of the bowl and become manageable. If the dough feels too dry and crum extractbly, add the hot water, 1 tablespoon at a time, mixing well after each addition, until the dough comes together. It should be soft and slightly sticky, but not overly wet. Be careful not to add too much water, as this will make the tortillas difficult to handle. Knead the dough gently in the bowl for a minute or two until it’s relatively smooth.
5. Rest and Divide the Dough: Cover the bowl with a damp cloth or plastic wrap and let the dough rest for about 15-20 minutes. This resting period allows the psyllium husk to fully hydrate and the gluten-free flours to absorb moisture, making the dough much easier to work with. After resting, turn the dough out onto a lightly floured surface (use a little more arrowroot flour or your chosen gluten-free flour). Divide the dough into 6-8 equal portions, depending on how large you want your tortillas to be. Roll each portion into a ball.
Cooking Your Wraps to Perfection
Once your dough is ready, it’s time to shape and cook your beautiful tortillas. This is where they truly transform into delicious, pliable wraps.
1. Shape the Tortillas: Take one ball of dough and flatten it slightly. You can roll it out using a rolling pin on a lightly floured surface, or you can use the “press” method. To press, place the dough ball between two pieces of parchment paper and press it down with a flat-bottomed pot or a tortilla press until it’s about 6-8 inches in diameter and fairly thin. Aim for an even thickness for consistent cooking. If you’re rolling, try to get them as round as possible, but don’t worry if they’re not perfect – rustic charm is part of the appeal! The psyllium husk should make them relatively easy to roll or press without tearing.
2. Cook the Tortillas: Heat a dry, non-stick skillet or a cast-iron griddle over medium-high heat. Once the pan is hot, carefully place one shaped tortilla onto the hot surface. Cook for about 1-2 minutes per side, or until you see small bubbles forming on the surface and the tortilla starts to puff up slightly. Flip the tortilla and cook the other side for another 1-2 minutes until golden brown spots appear. The cooking time will vary depending on the thickness of your tortilla and the heat of your pan. Avoid overcrowding the pan; cook one or two at a time.
3. Keep Them Soft and Pliable: As soon as each tortilla is cooked, immediately transfer it to a plate and cover it with a clean kitchen towel or a large lid. This is a crucial step to keep them soft and flexible. The steam trapped under the cover will prevent them from drying out and becoming brittle. Continue this process with the remaining dough balls until all your tortillas are cooked. Stack them as you go, ensuring they are always covered.
Enjoy your homemade Sweet Potato Tortillas warm, or store them in an airtight container at room temperature for a day or two, or in the refrigerator for up to 4 days. They also freeze beautifully for longer storage. Reheat them gently in a dry skillet, on a griddle, or even in the microwave for a few seconds to bring them back to their soft, pliable glory. These are truly a versatile and healthy addition to any kitchen!
Conclusion:
I hope you’ve enjoyed learning how to make these delicious and incredibly versatile Sweet Potato Tortillas (Gluten-Free Vegan Wraps)! These wraps are a fantastic alternative to traditional tortillas, offering a naturally vibrant color, a subtle sweetness, and a wonderfully soft texture, all while being completely gluten-free and vegan. They’re packed with nutrients from the sweet potato and are surprisingly easy to whip up, making them a perfect addition to your weeknight meal rotation. The satisfying chegrape juicess and slight earthy sweetness mean you can fill them with almost anything and they’ll be a hit!
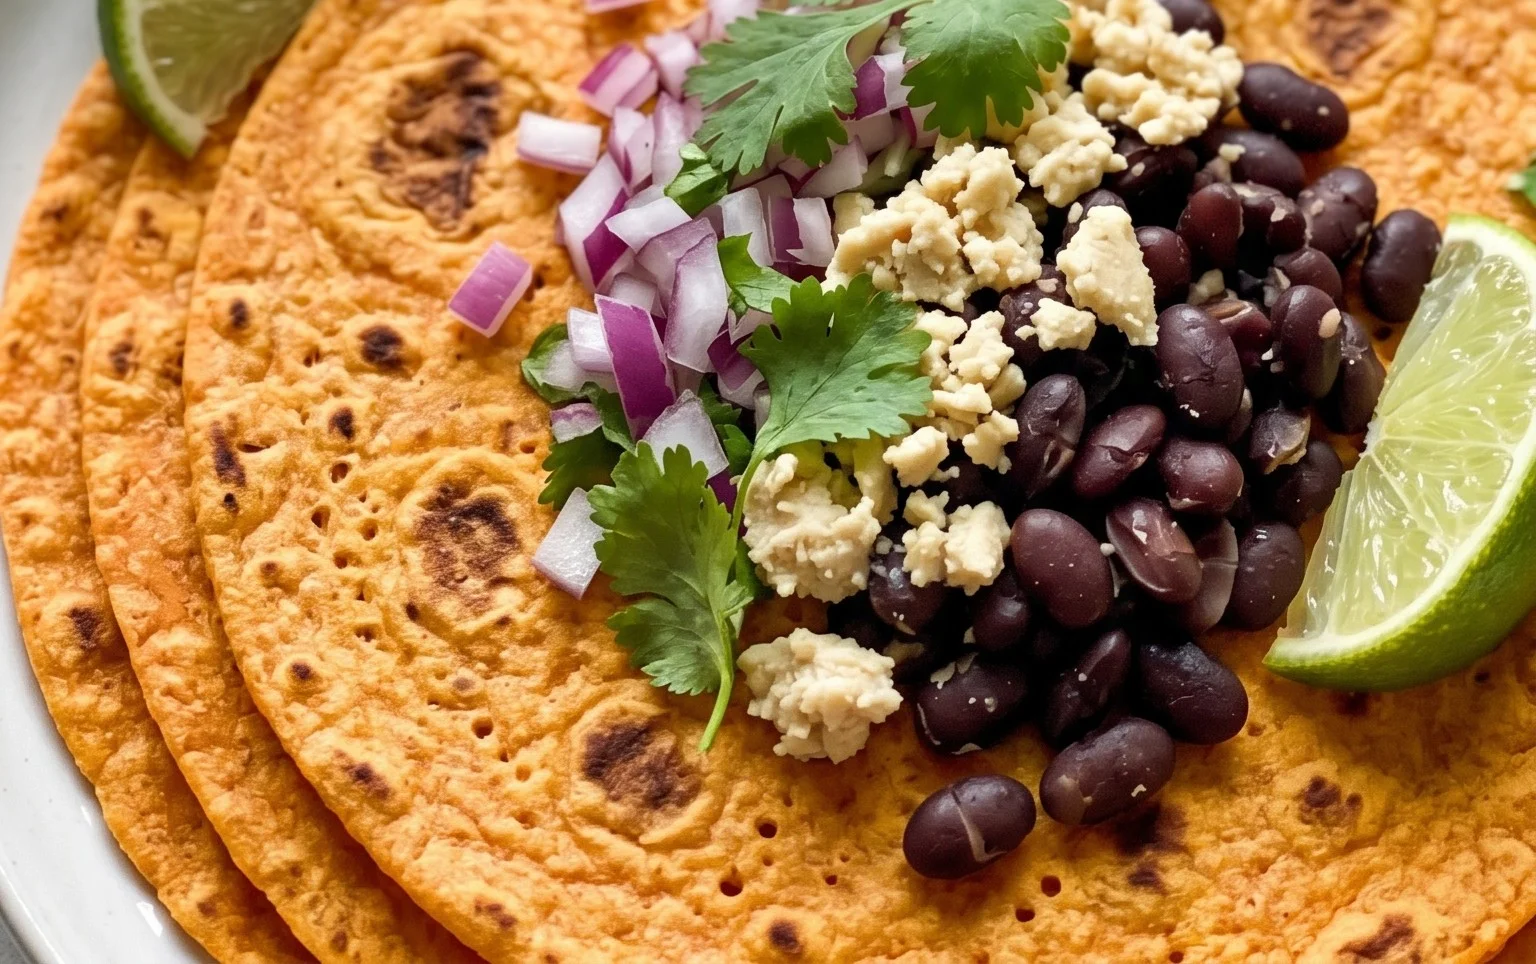
Think about filling them with spiced black beans and avocado for a hearty vegan taco, layering in grilled vegetables and hummus for a healthy lunch wrap, or even using them as a base for a breakfast burrito with scrambled tofu and salsa. For variations, feel free to experiment with different spices added to the dough – a pinch of cumin or smoked paprika can add an exciting new dimension. You can also adjust the amount of sweet potato for a slightly different flavor profile or texture. Don’t be afraid to get creative!
I truly encourage you to give these sweet potato tortillas a try. They’re a testament to how delicious and satisfying gluten-free and vegan cooking can be. You might just find them becoming your new go-to wrap!
Frequently Asked Questions:
Why are my sweet potato tortillas not holding together?
This can often happen if the dough is too dry. Ensure you’ve used enough sweet potato mash to create a cohesive dough. If it’s still a bit crum extractbly, try adding a tablespoon of water or more sweet potato mash at a time until it comes together nicely. Overworking the dough can also make it tough, so mix just until combined.
Can I make these ahead of time?
Absolutely! You can prepare the dough and refrigerate it for up to 2 days before cooking. Cooked tortillas can be stored in an airtight container at room temperature for a day or two, or in the refrigerator for up to a week. Reheat them gently in a dry skillet or microwave before serving to restore their softness.
What’s the best way to store the cooked tortillas?
For short-term storage (1-2 days), keep them in an airtight container or a resealable bag at room temperature. For longer storage, allow them to cool completely, then wrap them tightly in plastic wrap or place them in a freezer bag and freeze for up to 2-3 months. Thaw them overnight in the refrigerator or reheat directly from frozen.
Sweet Potato Tortillas (Gluten-Free Vegan Wraps)
Delicious and healthy gluten-free vegan wraps made with sweet potato.
Ingredients
-
2 small sweet potatoes – steamed or boiled (no liquid / mashed)
-
2 tbsp vegan butter
-
1-2 tbsp hot water
-
3/4 tsp sea salt
-
dash black pepper
-
1/2 tsp onion powder
-
1/2 tsp garlic powder
-
3/4 cup gluten free sourdough starter
-
2 tsp psyllium husk
-
2-3 tbsp arrowroot flour
Instructions
-
Step 1
Mash the steamed or boiled sweet potatoes until very smooth, ensuring no liquid is present. -
Step 2
In a bowl, combine the mashed sweet potato with vegan butter, hot water, sea salt, black pepper, onion powder, and garlic powder. Mix well. -
Step 3
Stir in the gluten-free sourdough starter and psyllium husk until fully incorporated. -
Step 4
Gradually add the arrowroot flour, mixing until a dough forms. Add more flour if needed to achieve a workable consistency. -
Step 5
Divide the dough into equal portions and roll each into a ball. Flatten each ball into a thin tortilla shape. -
Step 6
Cook the tortillas on a lightly oiled skillet or griddle over medium heat for 2-3 minutes per side, until lightly browned and cooked through.
Important Information
Nutrition Facts (Per Serving)
It is important to consider this information as approximate and not to use it as definitive health advice.
Allergy Information
Please check ingredients for potential allergens and consult a health professional if in doubt.