Chicken Avocado Melt Sandwich – Easy & Delicious
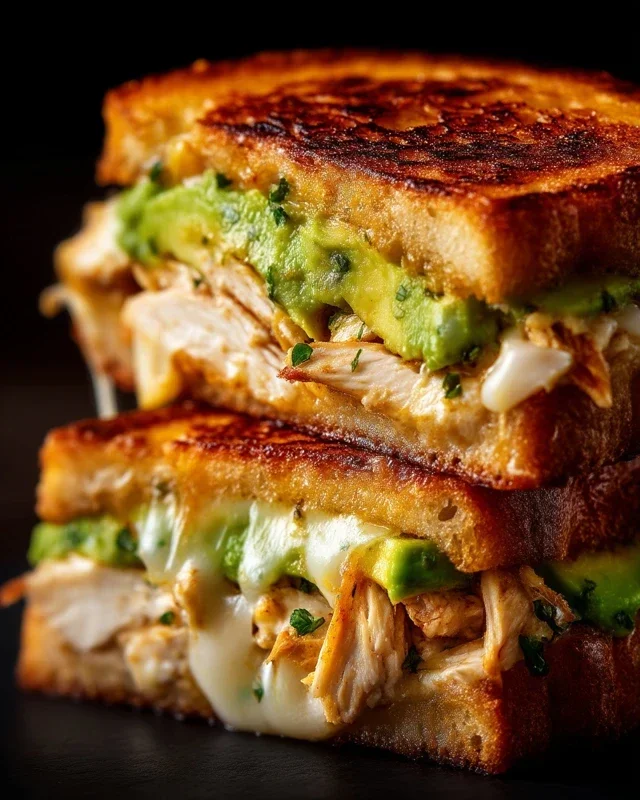
The Chicken Avocado Melt Sandwich is an absolute game-changer for your lunch routine, and honestly, any meal of the day. There’s a reason this sandwich has become a beloved classic for so many of us. It’s that perfect harmony of textures and flavors that just sings. Imagin extracte tender, juicy chicken meeting the creamy, luxurious embrace of ripe avocado, all nestled between slices of perfectly toasted bread. It’s a dish that manages to be both incredibly satisfying and surprisingly healthy, making it a go-to for busy weeknights and lazy weekend brunches alike. What truly makes this Chicken Avocado Melt Sandwich so special is its versatility. You can customize it endlessly, adding your favorite cheeses, a hint of spice, or a sprinkle of fresh herbs to make it uniquely yours. Get ready to fall in love with this incredible creation!
Ingredients:
Chicken Avocado Melt Sandwich Recipe
This Chicken Avocado Melt Sandwich is a flavor explosion waiting to happen! It’s hearty, satisfying, and surprisingly easy to whip up for a quick lunch or a casual dinner. The creamy avocado, melted cheese, and tender chicken combine for a truly delightful bite. Let’s get cooking!
Preparing the Chicken
The first step to creating this amazing sandwich is to get our chicken ready. We want it seasoned and cooked through so it’s tender and flavorful.
1. Season and Cook the Chicken: Pat your boneless, skinless chicken breasts dry with paper towels. This helps create a better sear. Season both sides generously with salt and pepper. Heat 1 tablespoon of olive oil in a skillet over medium-high heat. Once the oil is shimmering, carefully add the chicken breasts. Cook for about 5-7 minutes per side, or until the chicken is cooked through and no longer pink in the center. The internal temperature should reach 165°F (74°C). Once cooked, remove the chicken from the skillet and let it rest on a cutting board for about 5-10 minutes. This resting period is crucial as it allows the juices to redistribute throughout the meat, resulting in a much more tender and moist chicken. After resting, you can either leave the chicken breasts whole for slicing or dice them into smaller, bite-sized pieces, depending on your preference for sandwich filling. For this melt, slicing them thinly will allow them to layer nicely.
Assembling the Sandwich
Now that our chicken is ready, it’s time to bring all the delicious components together. This is where the magic really happens!
2. Prepare the Bread and Spreads: While the chicken is resting, let’s get our bread ready. Toast the bread slices lightly if you prefer a bit of crunch, or use them as is if you like a softer sandwich. In a small bowl, mix together the 2 tablespoons of mayonnaise and 1 tablespoon of Dijon mustard. This creates a zesty and creamy spread that adds a fantastic tang to the sandwich. Spread this mixture evenly on one side of each of the four bread slices. This will be the inside of your sandwiches, so make sure to cover the surface well.
3. Layer the Fillings: Begin extract assembling your sandwiches. On two of the bread slices (the ones with the spread facing up), start by placing the sliced cooked chicken breasts. Arrange them in an even layer. Next, add the thinly sliced red onion. The sharpness of the red onion will cut through the richness of the other ingredients beautifully. Follow this with the sliced tomato. Then, carefully arrange the sliced avocado over the tomato. The creamy texture of the avocado is a star player in this melt.
4. Add the Cheese and Top: Now for the glorious cheese! Place two slices of your chosen cheese on top of the avocado on each of the two assembled sandwich halves. The cheese will melt and bind everything together, creating that irresistible gooey factor we all crave in a melt. Finally, take the other two bread slices (with the spread facing down) and place them on top of the cheese-covered halves to complete your sandwiches. You should now have two beautifully stacked sandwiches ready for grilling.
Grilling the Melts
The final stage is to grill these masterpieces to golden-brown perfection and achieve that wonderful melted cheese.
5. Grill to Golden Perfection: Heat a skillet or griddle over medium heat. Add a tablespoon of butter or olive oil to the hot pan. Once the butter is melted and begin extracts to foam, or the oil is shimmering, carefully place the assembled sandwiches into the skillet. Grill for 3-5 minutes per side, or until the bread is golden brown and toasted, and the cheese is fully melted and gooey. You may need to adjust the heat slightly to ensure the bread doesn’t burn before the cheese has a chance to melt. Press down gently with a spatula as they cook to help everything meld together. Once both sides are beautifully browned and the cheese is oozing out, carefully remove the sandwiches from the skillet.
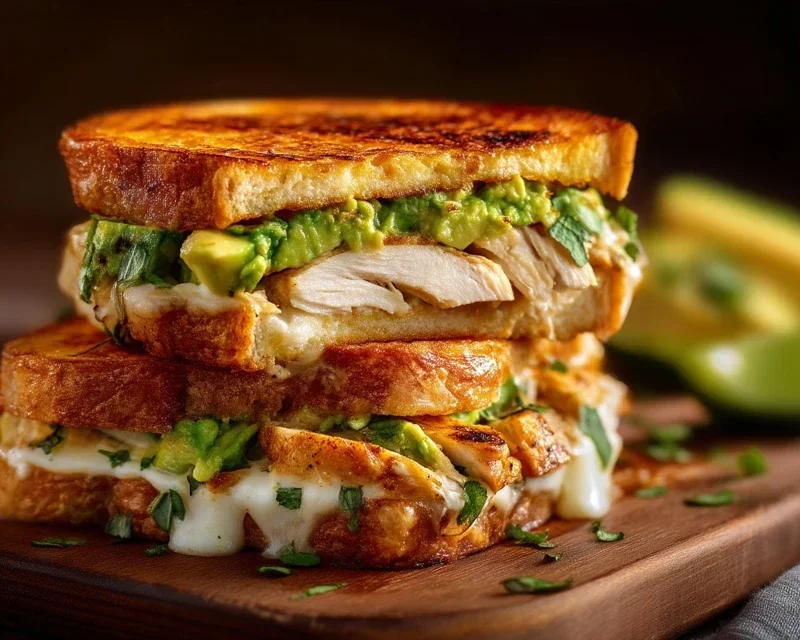
Serve your Chicken Avocado Melt Sandwiches immediately while they are warm and the cheese is at its melty best. Enjoy this delightful creation!
Conclusion:
There you have it – a delicious and incredibly satisfying Chicken Avocado Melt Sandwich recipe that’s sure to become a fast favorite in your kitchen! This sandwich truly shines because it perfectly balances creamy avocado with savory chicken, gooey melted cheese, and a delightful crunch from toasted bread. It’s a remarkably simple yet elevated meal, ideal for busy weeknights or a leisurely weekend lunch. Don’t be afraid to experiment and make it your own!
To elevate your Chicken Avocado Melt Sandwich experience, consider serving it alongside a crisp side salad with a light vinaigrette, a bowl of hearty tomato soup, or even some sweet potato fries. For variations, try swapping out the cheese for pepper jack for a little heat, adding a layer of crispy beef bacon for extra indulgence, or incorporating a drizzle of sriracha mayo for a spicy kick. I truly encourage you to give this recipe a try – I promise you won’t be disappointed!
Frequently Asked Questions:
Can I make the chicken ahead of time for this sandwich?
Absolutely! You can cook the chicken breasts a day or two in advance and store them in an airtight container in the refrigerator. Simply shred or dice them when you’re ready to assemble your sandwich. This makes the assembly process even quicker!
What kind of bread is best for this melt?
While sourdough or a sturdy whole wheat bread works wonderfully, I’ve found that a slightly thicker cut white or Italian bread holds up exceptionally well to the melting cheese and creamy avocado. The key is a bread that can get nicely toasted without becoming soggy.
Can I use pre-cooked rotisserie chicken?
Yes, definitely! Using a good quality rotisserie chicken is a fantastic shortcut. It’s already cooked and seasoned, saving you even more time while still delivering delicious results for your Chicken Avocado Melt Sandwich.
Chicken Avocado Melt Sandwich
A delicious and satisfying sandwich featuring tender chicken, creamy avocado, melted cheese, and fresh vegetables grilled to perfection.
Ingredients
-
2 boneless skinless chicken breasts
-
Salt and pepper to taste
-
1 tablespoon olive oil
-
1 avocado, sliced
-
4 slices of Swiss cheese
-
4 slices of sourdough bread
-
2 tablespoons mayonnaise
-
1 tablespoon Dijon mustard
-
1 small red onion, thinly sliced
-
1 tomato, sliced
-
Butter for grilling the sandwiches
Instructions
-
Step 1
Season the chicken breasts with salt and pepper. Heat olive oil in a skillet over medium-high heat and cook chicken until thoroughly done. Let cool slightly, then shred or dice. -
Step 2
In a small bowl, mix together the mayonnaise and Dijon mustard. -
Step 3
Spread the mayonnaise mixture evenly on one side of each slice of bread. -
Step 4
On two slices of bread (mayonnaise side up), layer the cooked chicken, Swiss cheese slices, sliced avocado, red onion, and tomato slices. -
Step 5
Top with the remaining two slices of bread, mayonnaise side down. -
Step 6
Melt butter in a clean skillet or on a griddle over medium heat. Grill the sandwiches for 4-5 minutes per side, or until the bread is golden brown and the cheese is melted.
Important Information
Nutrition Facts (Per Serving)
It is important to consider this information as approximate and not to use it as definitive health advice.
Allergy Information
Please check ingredients for potential allergens and consult a health professional if in doubt.