Dark Chocolate Sea Salt Nut Bars-Easy Recipe
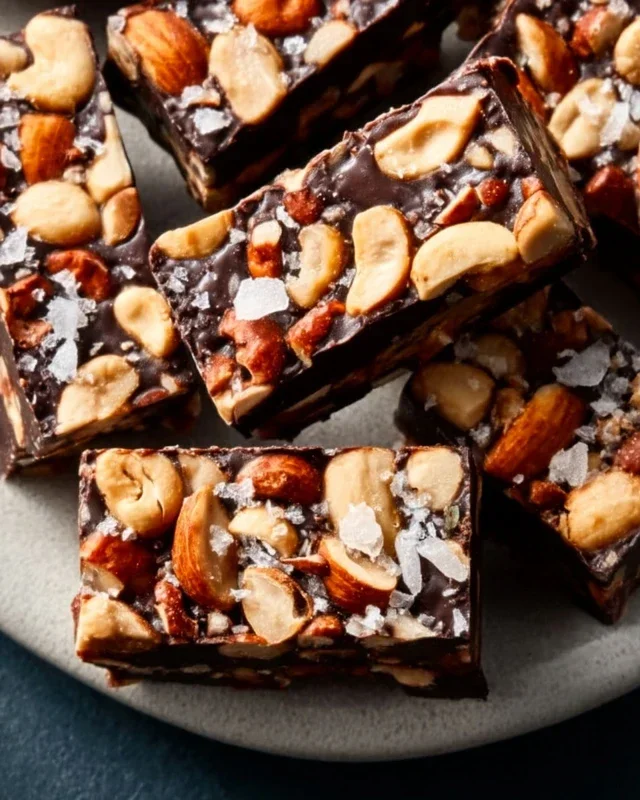
Dark Chocolate and Sea Salt Nut Bars are more than just a snack; they are a symphony of textures and flavors designed to utterly delight your palate. If you, like me, crave that perfect balance between rich, decadent sweetness and a hint of savory intrigue, then these bars are destined to become your new obsession. The satisfying crunch of toasted nuts, the deep, bittersweet embrace of dark chocolate, and the surprising pop of sea salt create a truly addictive combination that I simply can’t get enough of. What makes these Dark Chocolate and Sea Salt Nut Bars so special is their effortless elegance and adaptability. They’re wonderfully wholesome yet feel like a luxurious treat, making them perfect for an afternoon pick-me-up, a post-workout refuel, or even a simple, sophisticated dessert. Prepare to fall in love with the irresistible allure of these incredible Dark Chocolate and Sea Salt Nut Bars!
Why You’ll Adore Them:
Indulgent yet Wholesome
Perfectly Balanced Flavors
Quick and Easy to Make
Dark Chocolate and Sea Salt Nut Bars
These Dark Chocolate and Sea Salt Nut Bars are my go-to for a quick, satisfying, and surprisingly healthy treat. They’re incredibly versatile, allowing you to tailor the nuts to your preference, and the combination of rich dark chocolate and a hint of sea salt is simply divine. They’re perfect for a mid-afternoon energy boost, a post-workout snack, or even a sophisticated addition to a dessert spread. Plus, they’re incredibly easy to make, requiring minimal fuss and no fancy equipment. Let’s get started on creating these delicious bars!
Ingredients:
Preparing Your Ingredients
Before we dive into the fun part, let’s get everything prepped. This will ensure a smooth and efficient cooking process.
Roasting the Nuts (Optional but Recommended)
While you can use raw nuts, a quick roast can really elevate the flavor and texture of your nut bars. To do this, preheat your oven to 350°F (175°C). Spread your chosen nuts in a single layer on a baking sheet. Roast for 8-10 minutes, or until fragrant and lightly golden. Keep a close eye on them, as nuts can go from perfectly toasted to burnt very quickly. Once roasted, let them cool completely. This step adds a wonderful depth of flavor to the finished bars.
Chopping the Nuts
Once your nuts are cooled, roughly chop them. You don’t want them to be a fine powder, but rather have some satisfying chunks for texture. You can use a sharp knife and cutting board for this, or if you prefer, pulse them a few times in a food processor. The key is to have a mix of smaller pieces and some slightly larger ones. This variation in size contributes to the delightful mouthfeel of the bars.
Assembling the Bars
Now for the magic to happen. We’ll combine all our dry ingredients and then bind them together.
Mixing the Dry Ingredients
In a large mixing bowl, combine your chopped nuts and the puffed rice. The puffed rice adds a lovely lightness and crunch to the bars, preventing them from being too dense. Next, add the 1/2 teaspoon of sea salt to this mixture. This salt will be distributed throughout the bars, providing subtle savory notes that beautifully complement the sweetness of the chocolate and syrup. Stir everything together to ensure the ingredients are evenly distributed.
Creating the Binding Syrup
In a small saucepan, combine the brown rice syrup and the vanilla extract. Place the saucepan over low heat. Stir gently until the brown rice syrup is warmed through and more fluid. It shouldn’t boil, just become easier to incorporate. The brown rice syrup is a fantastic natural sweetener and binder, giving the bars their cohesive structure without being overly sticky. The vanilla extract adds a warm, aromatic depth that enhances all the other flavors.
Combining Wet and Dry Ingredients
Pour the warmed brown rice syrup mixture over the dry ingredients in the large mixing bowl. Using a sturdy spatula or a wooden spoon, mix everything together thoroughly. You want to ensure that every piece of nut and puffed rice is coated with the syrupy mixture. It can be a bit sticky, so don’t be afraid to get your hands in there to really press and mix if needed. The goal is a cohesive mixture that holds together when squeezed.
Forming and Baking
This is where our bars start to take shape and get that delightful final texture.
Pressing into the Pan
Line an 8×8 inch baking pan with parchment paper, leaving some overhang on the sides to make it easier to lift the bars out later. This is a crucial step to prevent sticking. Pour the nut and syrup mixture into the prepared pan. Using the back of your spatula, or even another piece of parchment paper on top, press the mixture down firmly and evenly into the pan. You want to compact it well to ensure the bars hold their shape. The firmer you press, the less likely they are to crum extractble.
Chilling and Cutting
Once the mixture is firmly pressed into the pan, place the pan in the refrigerator for at least 1 hour. This chilling time is essential for the bars to set and become firm enough to cut. If you’re short on time, you can pop it in the freezer for about 30 minutes. After chilling, lift the entire block out of the pan using the parchment paper overhang. Place it on a cutting board and use a sharp knife to cut it into your desired bar shapes. I usually aim for about 12-16 bars, depending on how large I want them.
Adding the Chocolatey Finish
The final touch that truly elevates these bars!
Melting the Chocolate
While the bars are chilling or after you’ve cut them, prepare your dark chocolate topping. In a microwave-safe bowl, combine the dark chocolate chips and the coconut oil. Microwave in 30-second intervals, stirring well after each interval, until the chocolate is completely melted and smooth. The coconut oil helps the chocolate melt more smoothly and gives it a slightly glossier finish. Alternatively, you can melt the chocolate and coconut oil in a double boiler over simmering water, stirring constantly until smooth.
Drizzling or Dipping
Once the chocolate is melted, you have a couple of options. You can drizzle the melted chocolate over the top of your cut bars using a spoon or a piping bag. For a more decadent treat, you can dip the bottom of each bar into the melted chocolate, letting any excess drip off. If you’re using the optional flaky salt, sprinkle it generously over the melted chocolate immediately after drizzling or dipping, while the chocolate is still wet. The contrast of the salty flakes against the rich dark chocolate is heavenly.
Final Setting and Enjoyment
Place the chocolate-coated bars back onto the parchment paper-lined baking sheet and refrigerate for another 30 minutes, or until the chocolate has set completely. Once set, your Dark Chocolate and Sea Salt Nut Bars are ready to be enjoyed! Store them in an airtight container in the refrigerator to keep them fresh. These are truly a delightful treat that I hope you’ll love as much as I do!
Conclusion:
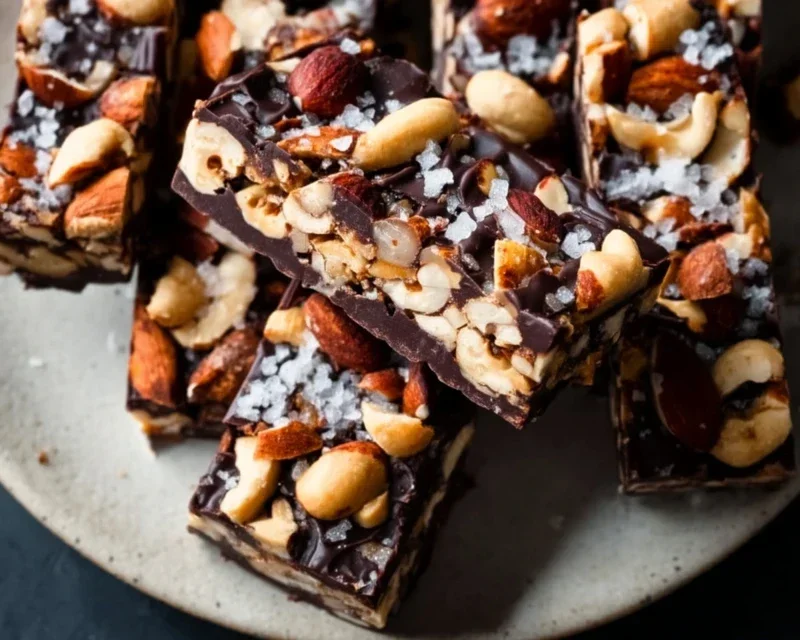
These Dark Chocolate and Sea Salt Nut Bars are an absolute triumph! The interplay of rich, bitter dark chocolate with the satisfying crunch of nuts, all elevated by those little pops of sea salt, makes for an irresistible treat. They’re incredibly versatile, perfect for a quick breakfast on the go, an energizing afternoon snack, or even a sophisticated dessert. I love how easily they come together, requiring no baking and minimal fuss. Give them a try – you won’t regret adding this delightful recipe to your repertoire!
For serving, I find these bars are fantastic enjoyed on their own, perhaps with a steaming cup of coffee or tea. They also make a wonderful addition to a cheese board, offering a sweet and salty counterpoint. If you’re feeling adventurous with variations, consider adding a sprinkle of chili flakes for a hint of heat, or incorporating dried cranberries for a chewy, tart element. You could also swap out some of the nuts for pumpkin seeds or sunflower seeds for added texture and flavor.
Frequently Asked Questions:
Can I make these Dark Chocolate and Sea Salt Nut Bars vegan?
Absolutely! To make these bars vegan, simply ensure you use a dairy-free dark chocolate. Most dark chocolates with a high cocoa content are naturally vegan, but it’s always worth checking the ingredients list. You can also use maple syrup or agave nectar as your liquid sweetener if you prefer over honey (though honey is not vegan).
How long will these bars keep?
Stored in an airtight container in the refrigerator, these Dark Chocolate and Sea Salt Nut Bars will stay fresh for up to two weeks. For longer storage, you can freeze them, wrapped individually, for up to three months. They thaw beautifully at room temperature or in the fridge.
What if I don’t have all the nuts listed? Can I substitute?
Yes, you can definitely substitute! Feel free to use any combination of nuts you have on hand. Almonds, walnuts, pecans, cashews, or even pistachios would work wonderfully. The key is to have a good mix of textures and flavors to create a satisfying bar.
Dark Chocolate and Sea Salt Nut Bars
A delightful no-bake bar featuring a crunchy nut and puffed rice base, bound with brown rice syrup and vanilla, finished with a dark chocolate drizzle and a hint of sea salt.
Ingredients
-
2 1/2 cups unsalted nuts of choice (3/4 cup cashews, 3/4 cup peanuts, 1 cup almonds)
-
1/2 cup puffed rice
-
1/4 cup brown rice syrup
-
1 1/2 teaspoon vanilla extract
-
1/2 teaspoon sea salt
-
1 cup dark chocolate chips
-
2 teaspoons coconut oil
-
flaky salt for topping (optional)
Instructions
-
Step 1
Line an 8×8 inch baking pan with parchment paper, leaving an overhang on the sides. -
Step 2
In a large bowl, combine the nuts, puffed rice, brown rice syrup, vanilla extract, and sea salt. Mix well until everything is evenly coated. -
Step 3
Press the nut mixture firmly and evenly into the prepared baking pan. -
Step 4
In a microwave-safe bowl, melt the dark chocolate chips and coconut oil in 30-second intervals, stirring between each, until smooth. -
Step 5
Pour the melted chocolate over the nut mixture in the pan. Spread evenly with a spatula. -
Step 6
If using, sprinkle flaky salt over the chocolate topping while it is still wet. -
Step 7
Refrigerate for at least 2 hours, or until the chocolate is firm. Use the parchment paper overhang to lift the bars out of the pan. Cut into desired bar shapes.
Important Information
Nutrition Facts (Per Serving)
It is important to consider this information as approximate and not to use it as definitive health advice.
Allergy Information
Please check ingredients for potential allergens and consult a health professional if in doubt.